Rasmalai | Rossomalai | Rosh molai, the popular dessert from Bengal, India, is a heavenly treat that is sure to tantalize your taste buds! Here’s an easy rasmalai recipe with all the tips and tricks to make soft rasmalai at home!

Bengali sweets are one of the most loved Indian sweets. Some of my favorites are rasgulla, sandesh, mishti doi, bhapa doi, patishapta (similar to Goan alle belle, coconut pancakes) and much more. I have a big sweet-tooth and milk-based desserts are my weakness!
So let’s get into all the details to make soft rasmalai at home.
- What is rasmalai?
- Ingredients needed to make this classic Bengali sweet
- How to prepare rasmalai?
- Easy, alternative ways to make rasmalai
- Tips to make the best rasmalai at home
- Enjoyed this rasmalai recipe? Then you may also like these Indian sweet recipes
- How to make soft rasmalai at home – Step by step instructions
- Rasmalai Recipe | How To Make Rasmalai
What is rasmalai?
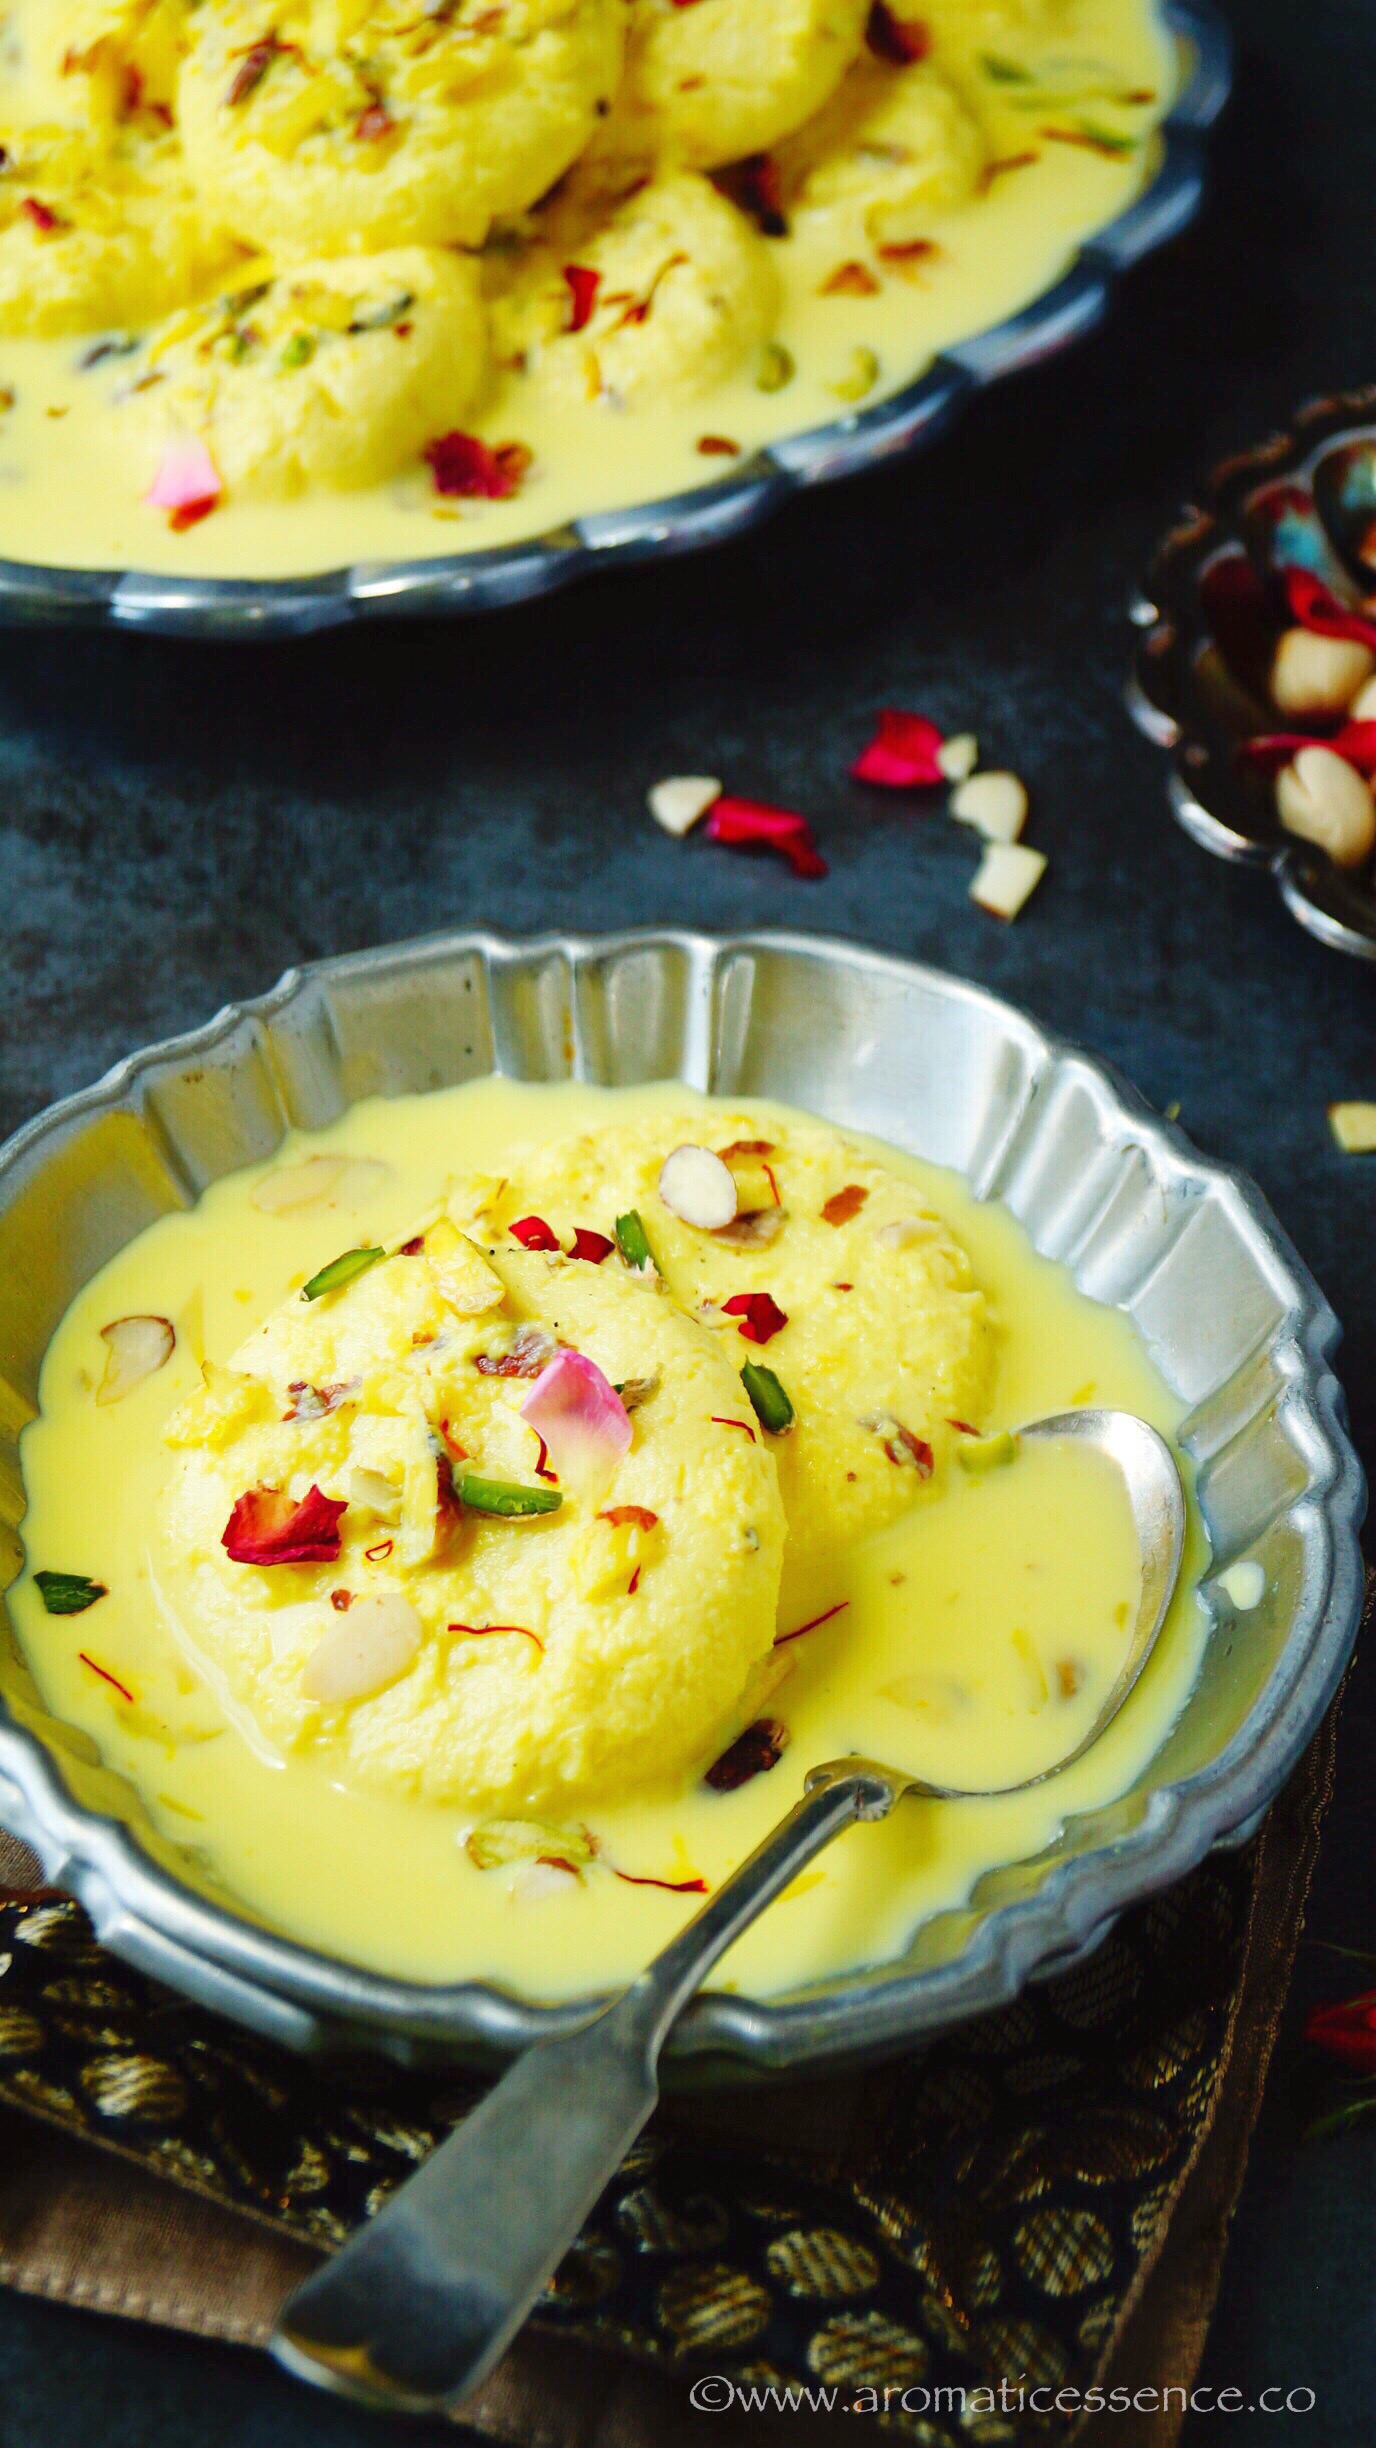
Rasmalai is basically soft, spongy cottage cheese cakes doused in sweetened, thickened milk infused with exotic flavors of cardamom and saffron!
Ingredients needed to make this classic Bengali sweet
Indian sweet rasmalai calls for few ingredients i.e. milk, lemon juice/white vinegar/yogurt (to curdle the milk), sugar and flavorings like saffron, cardamom, rose water along with some nuts for texture and garnish.
Then there is also a Pakistani version of rasmalai with eggs and milk powder. However, the Bengali rasmalai recipe sticks to the ingredients I have mentioned above and does not use eggs traditionally.
I’ve also come across recipes of rasmalai with ricotta cheese, however, I’ve yet to try that. I’m sure that tastes great as well!
How to prepare rasmalai?
I’ve made rasgullas successfully a couple of times earlier, so I wasn’t really apprehensive about making rasmalai.
To make rasmalai you just need to take it a step further and prepare the sweetened milk which is basically a no-brainer! All you have to do is simmer the milk until it reduces by 75 % of its volume, then sweeten and flavor it. That’s about it!
You can also make angoori rasmalai with this same recipe. Simply make smaller sized chenna balls, a little smaller than the size of a grape, as they will expand on cooking. Angoor means grapes in Hindi, and that’s the size angoori rasmalai should be. A nice bite-sized dessert 🙂
Now let’s get to the point, I’ll be talking in the context of rasgulla because that is basically what the malai of rasmalai is! It made me realize I should have shared a post on rasgulla first, that would have made things easier, but nevertheless, I’ll add all the important tips here.
To sum it all up, this is a gist of the entire procedure of making rasgulla
- Boiling the milk
- Curdling the milk
- Straining the whey
- Hanging the chenna (paneer)
- Kneading the chenna (paneer)
- Forming paneer balls
- Making the sugar syrup
- And finally, cooking the paneer balls in boiling sugar syrup.
Sounds easy right? But trust me a lot of people fail at the last part i.e boiling or the cooking of the rasgulla. And they do not know why! So sit back with your favorite beverage, and enjoy the rest of the post as I try to cover up as much as possible.

Easy, alternative ways to make rasmalai
Now, if you don’t like sticking to the traditional recipe, or have tried making rasmalai earlier only to have disastrous results and don’t feel like venturing to make rasmalai from scratch again, here are some easy alternatives for you.
- How to make rasmalai from rasgulla – Make your work easier by using store-bought rasgullas or the ones that come in cans. Squeeze out all the sugar syrup and dunk them in the ‘ras’ to absorb all that sweet, flavored milk, thereby transforming the plain rasgullas to rasmalai. You can also use condensed milk along with regular milk to make the ras, this will make the ras richer. So adjust the sugar, and keep in mind, condensed milk is thick, so do not cook the milk for a long time, as we do not want the ‘ras’ to thicken too much.
- Bread Rasmalai – If you thought making rasmalai from canned rasgulla was relatively easier, then this bread rasmalai is a breeze too! Simply cut out rounds of white sandwich bread using a cookie cutter, and pour the ras over the bread just before serving. Easy, right? The spongy bread mimics the texture of the traditional ‘malai’ of rasmalai. So it is a great alternative to make rasmalai.
- Rasmalai ready mix – Honestly, I still haven’t tried ready mix packets to make rasmalai. Most of these come with instructions on the back of the pack, so it should be pretty easy to follow.
There are ways to make quick rasmalai, but if you ask me, I will still suggest making rasmalai from scratch if you really want to enjoy it in the best form. I do not recommend making rasmalai with readymade paneer.
To make any of these Bengali sweet recipes with milk like rasgulla or rasmalai, you need fresh, soft chenna aka paneer. So don’t even waste your time and energy making this sweet from readymade paneer, make some delicious curry with that paneer instead.
Make the chenna at home, it hardly needs much effort and the results are highly rewarding 🙂
I know rasgullas are difficult to tame, but I guess the rasgulla Gods may have been super kind to me! Jokes apart I did my study well before attempting these!
I did badger my Bengali friend, Ujjaini too with my queries, and she was kind enough to oblige 🙂

Tips to make the best rasmalai at home
Choosing the correct type of milk
Good quality cow’s milk is what my friend, Ujjaini suggests. Preferably full cream, because indirectly it will make good quality paneer. Buffalos milk should be avoided, you can use that for the preparation of the ras aka masala doodh instead.
The right time to add lemon juice or vinegar
Bring the milk to a boil, then switch off the heat and let it cool for about 5 minutes. Now is the time to add vinegar or lemon juice. Though here’s another tip, Ujjaini suggests using lemon juice for a better end result. Some people also dilute the lemon juice or vinegar, I’ve never done that and it has not affected the rasgulla in any way.
Adding vinegar or lemon juice to boiling milk will result in hard, chewier rasgullas , so avoid it.
Once you see the greenish whey separate completely, drain it as soon as possible. You do not want to let the curdled milk sit that way, which can also result in hard and chewy rasgullas.
Make sure you give the chenna a good wash under running water to get rid of the lemon juice/vinegar taste.
Straining the prepared chenna (paneer)
I usually keep the paneer for around 30 mins to drain. You should not see any more water droplets falling. Once you open the assembly, the paneer should have formed a ball and it should be slightly dry, crumbly plus you should feel some moisture. It shouldn’t be pasty. If it is too pasty, it needs to be drained for a longer time. Please refer to pics in the step by step instructions.
Kneading the chenna
- This is one of the most critical steps which can result in either perfect rasgullas or it can go haywire and you will end up with disastrous results.
- You have to knead until you get a smooth, non-sticky dough, neither too hard nor too soft, that just about begins to ooze out the fat. Do not overwork the dough. This easily takes around 8-10 mins.
- Use the heel of your palm and fingertips to knead the dough by dragging the chenna in a forward motion, then gather the chenna and keep doing this until you reach the smooth dough stage.
- Alternatively, you can transfer the chenna in the blender and pulse it for 10-15 seconds, for 5 to 6 times or until it forms a dough ball. Then transfer to a plate and knead for another minute or two.
Making crack free balls
Squeeze and press a portion of the dough in your palm to make it compact. Then start rolling it using both your palms to form a smooth, round ball. Little cracks are allowable, but if it is too much, knead the chenna for few more minutes. If you find the dough too dry, sprinkle few drops of water and knead.
The apparatus to cook the rasgullas
- The pot has to be big enough to accommodate the rasgullas. I like to use a wide pot with a see-through lid to keep a watch on the rasgullas.
- If the pot is overcrowded, the rasgullas will lose their round shape and they won’t have room to expand and thus become flat. This doesn’t matter much in terms of shape for rasmalai, but it is a good practice to judge the number of rasgullas that would go in a pot and cook in batches if required.
The consistency of sugar syrup
- You may need to double or triple the sugar syrup depending upon the size of your pot or pan, always remember that the syrup must be filled to at least 3/4th of the vessel.
- For rasgulla, I usually follow a 1: 2:: sugar: water ratio, but for rasmalai, I’ve followed a 1:4 :: sugar: water ratio to cook the paneer balls, as later they are going to be dunked in the sweetened milk i.e ras which is sweet enough.
Cooking rasgullas
This is a critical step to make sure you have perfect rasgullas.
It has to do with the temperature of the sugar syrup. You want the syrup to be boiling in full swing when you put the rasgullas in. Rasgullas cook in foam.
Another important tip shared by Ujjaini is to avoid opening the lid or stirring or meddling with the rasgullas once you put them in the pan to cook. Cover and let them cook undisturbed for around 15 minutes. Then let them cool down for about 30 minutes.
Opening the lid can cause the rasgullas to shrink, as they come in contact with air.
You can also use a pressure cooker to cook rasgullas, though I’ve never tried cooking them that way. I love watching them fluff up and expand through the see-through lid. I never cease to do a little happy dance when that happens 😀
Cook rasgullas in two batches if you have to, as they need space to expand. The quantity of sugar syrup will reduce, so simply add some more water and bring it to a boil again before putting the other batch in.
The consistency of milk for ‘ras’
I recommend reducing the milk to 75 % of its original quantity. You do not want to make it thick like rabri , because that will inhibit the paneer balls from absorbing any ‘ras’.
Important: A simple test for beginners attempting rasgullas/rasmalai
Do a small test! Drop one paneer ball in the boiling sugar syrup, if it cooks and doubles up without breaking or scattering in the syrup, you are good to go with the rest of the batch!
Do remember to keep the other paneer balls covered with a clean and damp kitchen napkin.
Why did my rasgulla still scatter in the syrup?
If you did not test for a single rasgulla and put the whole batch in, or it failed in the single test; The answer to that is in k neading the chenna mentioned above, if there was a lot of moisture in the paneer, chances are you may have ended up with a super soft moist dough, with not much to bind it, it scattered in the syrup. Pay very close attention to the final dough. Too moist and it will scatter, too dry and that will result in a dry rasgulla.
If you are attempting these for the first time, you can add about 2 teaspoons of cornstarch to the chenna and knead the dough. This will absorb excess moisture plus help in binding the dough. I, however, do not use cornstarch.
This is pretty much it about rasgullas, once they have cooked and doubled in the sugar syrup, you can let them chill before serving. But for rasmalai, you need to squeeze out all the sugar syrup before putting them in the sweetened milk, which is why it is good to cook them in light sugar syrup.

As I had promised in my eggless rasmalai cake post, I would be sharing an easy rasmalai recipe, so here it is!
I hope you guys found all the tips and tricks to make perfectly, soft and spongy rasgulla or rasmalai handy. I’d love to know if there are other specific things you follow if you have been making them successfully for a long time.

Below is a detailed step by step rasmalai recipe. Do give this wonderful Indian cheese dessert a go!

- Instant shahi rabri
- Kalakand
- Instant Mango Shrikhand
- No-cook Kulfi
- Faluda
- Kesar peda
- Chocolate peda
- Badam pista burfi
How to make soft rasmalai at home – Step by step instructions
For the ‘Ras’
Step 1: Reduce the milk
Heat 4 cups of full-fat milk in a heavy-bottomed pan over medium heat, stirring occasionally, bring the milk to a boil, then reduce the heat and cook until it reduces to at least 75 % i.e. 3 cups approx.

Step 2: Prepare saffron-infused milk
While the milk is reducing, take a tablespoon of the hot milk from the pan and add it to a bowl containing the saffron. Mix it well, to extract its flavor and color into the milk. Set the bowl aside while the milk continues to cook.

Step 3: Add sugar to reduced milk
Once the milk has reduced to 75%, add 1/2 cup sugar, mix to dissolve the sugar.

Step 4: Add saffron-infused milk, nuts, food color, and cardamom
Add the saffron milk, 2 tablespoons each of sliced almonds and pistachios, 3-4 drops of food color, and 1/4 to 1/2 teaspoon of ground cardamom, cook another minute. Then switch off the heat and set the pan aside to cool down.

For the light sugar syrup
Step 1: Add water and sugar in a pan
Add 6 cups of water and 1.5 cups of sugar in a wide mouth pan, mix well to dissolve the sugar completely. Bring to a rolling boil.

For the paneer/chenna balls
Step 1: Boil milk
Bring 1.5 liters of full-fat milk to boil in heavy-bottomed pot/pan. Stir in between to avoid the milk from burning or sticking at the bottom of the vessel.

Step 2: Lemon juice or vinegar
Once the milk boils, switch off the heat and let it stand for about 5 minutes. Now add vinegar/ lemon juice, 1 tablespoon at a time, stirring with each addition, until the milk splits and you see the greenish whey. I needed about 2 tablespoons of lemon juice.


Step 3: Strain the split milk
Line a strainer with muslin cloth over a big bowl, drain the split milk, collect the whey. You can use this whey for kneading dough for bread’s/ chapatis or even make soup. Gather the edges of the muslin cloth, squeeze out the water ( exercise precaution as it will be very hot ). Wash the chenna well under running water to get rid of the vinegar or lemon juice smell.

Step 4: Drain the liquid
4.Make a knot/ or secure with a thread /rubber band and hang it for about 30 minutes. Do not let it dry completely, let it retain little moisture.

Step 5: Transfer fresh paneer to a bowl or plate
After 30 minutes, open the assembly, transfer it to a bowl, since it is fresh you can easily crumble the paneer with your hands. Set aside. (This yielded me 230 grams of paneer).

Step 6: Knead the chenna
Knead the chenna with the heel of your palm and fingertips by dragging in a forward motion until it is smooth. Scoop the chenna again and keep kneading with the heel of your palm until you feel the chenna starting to give out some grease/fat and it turns into a smooth and soft dough. You should be able to make a smooth ball with minimal cracks if it has been kneaded well. This will take around 10 minutes for the dough to come together. Alternatively, you can pulse the chenna 5-6 times in the mixer or food processor, until it forms a soft dough when you press the chenna with your hands. You do not want to do overdo the pulsing part.

Step 7: Make the chenna balls
Divide the dough into 12 equal parts. Roll out each in a smooth ball between your palms then flatten them gently. Set aside on a plate.

Prepare the rest in the same way.

Cooking the rasmalai balls
Step 1: Drop the balls in the boiling sugar syrup
Drop the prepared flattened balls, one at a time. Cover with the lid and let it cook on medium-high heat for 15 minutes until it absorbs the sugar syrup and doubles up in size. Remember the sugar syrup must be boiling when you put them in.


Step 2: Set the pan aside to cool down
Remove the pan from heat, leave it aside to cool down completely, at least 30 – 45 minutes. Do not touch the rasgullas, as they will be very soft at this stage. Let them stabilize.

Step 3: Test
I usually don’t check, because I can tell if they are done. I let them sit undisturbed for 30 – 45 minutes without opening the lid. To check if they are done, drop one rasgulla in a glass filled with clean water. If it sinks, it is done. If it floats, it needs to be cooked further.

They will come back to their original shape even after squeezing out the water.

Assembling Rasmalai
Step 1: Squeeze out the excess sugar syrup
Squeeze out the excess syrup from the rasgulla, with the help of a slotted spoon, or simply squeeze it out pressing it between your clean palms.

Step 2: Transfer it to the sweetened milk
Immediately transfer it to the ras, prepared earlier, which should have cooled down by now. Refrigerate the rasmalai for 3-4 hours or until you are ready to serve. The balls will soak up all the sweetness and aroma of the milk, best served chilled! Enjoy

Note
You can skip the saffron to make a regular rasmalai flavored with cardamom. You can add some rose essence instead.

You can also follow me on Facebook , Pinterest, Instagram & Twitter
Rasmalai Recipe | How To Make Rasmalai
Ingredients1x2x3x
For the ‘ras’- sweetened milk
- 4 cups whole milk
- 1/2 cup sugar, adjust as per desired sweetness
- 2 tablespoons sliced almonds
- 2 tablespoons sliced pistachios
- A fat pinch of saffron strands
- 1/4 to 1/2 teaspoon ground cardamom
- yellow food color optional
For the light sugar syrup
- 1.5 cups sugar
- 6 cups water
For the paneer
- 1.5 liters whole milk, preferably cow’s milk
- 2 tablespoons white distilled vinegar/lemon juice, or as required
For garnishing
- Dried rose petals, as required
- Few saffron strands
- 1 tablespoon sliced nuts
Instructions
For the ‘Ras’
- Heat milk in a heavy-bottomed pan over medium heat, stirring occasionally, bring the milk to a boil, then reduce the heat and cook until it reduces to at least 75 % i.e. 3 cups approx.
- While the milk is reducing, take a tablespoon of the hot milk from the pan and add it to a bowl containing the saffron. Mix it well, to extract its flavor and color into the milk. Set the bowl aside while the milk continues to cook.
- Once the milk has reduced to 75%, add the sugar, mix to dissolve the sugar.
- Add the saffron milk, the nuts,food color, and the cardamom powder, cook another minute. Then switch off the heat and set the pan aside to cool down.
For the light sugar syrup
- Add water and sugar in a wide mouth pan, mix well to dissolve the sugar completely. Bring to a rolling boil.
For the paneer/chenna balls
- Bring milk to boil in heavy bottomed pot/pan. Stir in between to avoid the milk from burning or sticking at the bottom of the vessel.
- Once the milk boils, switch off the heat and let it stand for about 5 minutes. Now add vinegar/ lemon juice, 1 tablespoon at a time, stirring with each addition, until the milk splits and you see the greenish whey.
- Line a strainer with muslin cloth over a big bowl, drain the split milk, collect the whey. You can use this whey for kneading dough for bread’s/ chapatis or even make a soup. Gather the edges of the muslin cloth, squeeze out the water (exercise precaution as it will be very hot). Wash the chenna well under running water to get rid of the vinegar or lemon juice smell.
- Make a knot/ or secure with a thread /rubber band and hang it for about 30 minutes. Do not let it dry completely, let it retain little moisture.
- After 30 minutes, open the assembly, transfer it to a bowl, since it is fresh you can easily crumble the paneer with your hands. Set aside. (This yielded me 230 grams of paneer).
- Knead the chenna with the heel of your palm and fingertips by dragging in a forward motion until it is smooth. Scoop the chenna again and keep kneading with the heel of your palm until you feel the chenna starting to give out some grease/fat and it turns into a smooth and soft dough. You should be able to make a smooth ball with minimal cracks if it has been kneaded well. This will take around 10 minutes for the dough to come together. Alternatively, you can pulse the chenna 5-6 times in the mixer or food processor, until it forms a soft dough when you press the chenna with your hands. You do not want to do overdo the pulsing part.
- In the meanwhile, start making the balls. Divide the dough into 12 equal parts. Roll out each in a smooth ball between your palms then flatten them gently. Set aside on a plate.
- Prepare the rest in the same way.
Cook the rasmalai balls
- Drop the prepared flattened balls, one at a time. Cover with the lid and let it cook on medium-high heat for 15 minutes until it absorbs the sugar syrup and doubles up in size. Remember the sugar syrup must be boiling when you put them in.
- Remove the pan from heat, leave it aside to cool down completely, at least 30 - 45 minutes. Do not touch the rasgullas, as they will be very soft at this stage. Let them stabilize.
- I usually don’t check, because I can tell if they are done. I let them sit undisturbed for 30 - 45 minutes without opening the lid. To check if they are done, drop one rasgulla in a glass filled with clean water. If it sinks, it is done. If it floats, it needs to be cooked further.
- They will come back to their original shape even after squeezing out the water.
Assembling Rasmalai
- Squeeze out the excess syrup from the rasgulla, with the help of a slotted spoon, or simply squeeze it out pressing it between your clean palms.
- Immediately transfer it to the ras, prepared earlier, which should have cooled down by now. Refrigerate the rasmalai for 3-4 hours or until you are ready to serve. The balls will soak up all the sweetness and aroma of the milk, best served chilled! Enjoy
Notes
Nutrition


Rasmalai Recipe | How To Make Rasmalai
Ingredients
For the ‘ras’- sweetened milk
- 4 cups whole milk
- 1/2 cup sugar, adjust as per desired sweetness
- 2 tablespoons sliced almonds
- 2 tablespoons sliced pistachios
- A fat pinch of saffron strands
- 1/4 to 1/2 teaspoon ground cardamom
- yellow food color optional
For the light sugar syrup
- 1.5 cups sugar
- 6 cups water
For the paneer
- 1.5 liters whole milk, preferably cow’s milk
- 2 tablespoons white distilled vinegar/lemon juice, or as required
For garnishing
- Dried rose petals, as required
- Few saffron strands
- 1 tablespoon sliced nuts
Instructions
For the ‘Ras’
- Heat milk in a heavy-bottomed pan over medium heat, stirring occasionally, bring the milk to a boil, then reduce the heat and cook until it reduces to at least 75 % i.e. 3 cups approx.
- While the milk is reducing, take a tablespoon of the hot milk from the pan and add it to a bowl containing the saffron. Mix it well, to extract its flavor and color into the milk. Set the bowl aside while the milk continues to cook.
- Once the milk has reduced to 75%, add the sugar, mix to dissolve the sugar.
- Add the saffron milk, the nuts,food color, and the cardamom powder, cook another minute. Then switch off the heat and set the pan aside to cool down.
For the light sugar syrup
- Add water and sugar in a wide mouth pan, mix well to dissolve the sugar completely. Bring to a rolling boil.
For the paneer/chenna balls
- Bring milk to boil in heavy bottomed pot/pan. Stir in between to avoid the milk from burning or sticking at the bottom of the vessel.
- Once the milk boils, switch off the heat and let it stand for about 5 minutes. Now add vinegar/ lemon juice, 1 tablespoon at a time, stirring with each addition, until the milk splits and you see the greenish whey.
- Line a strainer with muslin cloth over a big bowl, drain the split milk, collect the whey. You can use this whey for kneading dough for bread’s/ chapatis or even make a soup. Gather the edges of the muslin cloth, squeeze out the water (exercise precaution as it will be very hot). Wash the chenna well under running water to get rid of the vinegar or lemon juice smell.
- Make a knot/ or secure with a thread /rubber band and hang it for about 30 minutes. Do not let it dry completely, let it retain little moisture.
- After 30 minutes, open the assembly, transfer it to a bowl, since it is fresh you can easily crumble the paneer with your hands. Set aside. (This yielded me 230 grams of paneer).
- Knead the chenna with the heel of your palm and fingertips by dragging in a forward motion until it is smooth. Scoop the chenna again and keep kneading with the heel of your palm until you feel the chenna starting to give out some grease/fat and it turns into a smooth and soft dough. You should be able to make a smooth ball with minimal cracks if it has been kneaded well. This will take around 10 minutes for the dough to come together. Alternatively, you can pulse the chenna 5-6 times in the mixer or food processor, until it forms a soft dough when you press the chenna with your hands. You do not want to do overdo the pulsing part.
- In the meanwhile, start making the balls. Divide the dough into 12 equal parts. Roll out each in a smooth ball between your palms then flatten them gently. Set aside on a plate.
- Prepare the rest in the same way.
Cook the rasmalai balls
- Drop the prepared flattened balls, one at a time. Cover with the lid and let it cook on medium-high heat for 15 minutes until it absorbs the sugar syrup and doubles up in size. Remember the sugar syrup must be boiling when you put them in.
- Remove the pan from heat, leave it aside to cool down completely, at least 30 - 45 minutes. Do not touch the rasgullas, as they will be very soft at this stage. Let them stabilize.
- I usually don’t check, because I can tell if they are done. I let them sit undisturbed for 30 - 45 minutes without opening the lid. To check if they are done, drop one rasgulla in a glass filled with clean water. If it sinks, it is done. If it floats, it needs to be cooked further.
- They will come back to their original shape even after squeezing out the water.
Assembling Rasmalai
- Squeeze out the excess syrup from the rasgulla, with the help of a slotted spoon, or simply squeeze it out pressing it between your clean palms.
- Immediately transfer it to the ras, prepared earlier, which should have cooled down by now. Refrigerate the rasmalai for 3-4 hours or until you are ready to serve. The balls will soak up all the sweetness and aroma of the milk, best served chilled! Enjoy
Notes
Nutrition
These two ingredient eggless coconut macaroons, bursting with coconut flavor are chewy, delicious, gluten-free and oh so yum! These are so good, you may just want to double a batch every time you make them. Beware! They will disappear no sooner than they are baked 😀

WHAT IS A COCONUT MACAROON?
A macaroon is a small dense cookie made traditionally made with almonds or coconut, egg whites, sugar, and flavorings. It may be decorated with glazed cherries or chocolate.
These two ingredients eggless coconut macaroon , on the other hand, are basically coconut sweetened condensed milk cookies. It is egg-free and perfect to still enjoy macaroons if you have any egg allergies.
These eggless coconut macaroons are a beautiful, toasty, golden brown on the outside and chewy on the inside. Moreover, they are so easy and taste equally delicious.

DIFFERENCE BETWEEN MACARON AND MACAROONS
Many people confuse macaroons with macarons and vice versa, both are completely different cookies.
The first difference is very obvious in their appearance, macarons are sandwiched between different flavored fillings and macaroons are usually piped or shaped as mounds and baked.
French macarons are light, airy and meringue-based cookies and macaroons are chewy coconut based cookies.
Macarons need some expertise, are slightly tricky to nail! Macaroons, on the other hand, are really easy to pull off!

HOW TO MAKE 2-INGREDIENT SIMPLE MACAROONS?
You only need some shredded desiccated coconut flakes and sweetened condensed milk to make these little treats. Mix these two up, shape into little mounds and bake. That’s all!
I’ve used regular desiccated coconut, which does not make these eggless coconut macaroons cloyingly sweet. If you like it sweeter, use the sweetened shredded coconut.
You don’t need any special expertise to make this, in fact, it’s awesome to get your kids involved in making this. Let them do the mixing or the scooping part. I bet they will enjoy it!
WHAT DO MACAROONS TASTE LIKE?
Macaroons have a slightly crisp exterior, and the texture inside is soft and chewy with a nutty, sweet, coconut flavor.
They are perfect for parties or as a hostess gift. These are also good to satiate your sweet cravings or if you wish to make something quick, these coconut macaroons would be a nice choice. They all come together under 30 minutes from start to finish.

I actually had half of the tin of condensed milk and was wondering what to do with leftover condensed milk. That’s where I came across this recipe for easy coconut macaroon cookies. I already had some shredded coconut in the pantry, so I didn’t waste any time in making these.
These egg-free macaroons turned out to be quite a delight, we savored some for tea time. I have the classic version with egg whites in my Mom’s recipe book, I hope to try that soon and share it with you guys!
There are countless things to make from coconut like curries, chutney’s, crepes, desserts. It is such a common ingredient in Goan cuisine and one that I enjoy cooking with! If you love coconut anything, I’m sure you will enjoy these macaroons too 🙂

IF YOU LOVE THESE EGGLESS COCONUT MACAROONS, YOU MAY ALSO ENJOY THESE COCONUT BASED TREATS
- Bolinhos de coco (Goan coconut and semolina cookies)
- Baath cake (Goan coconut and semolina cake)
- Coconut Toffee
- Crispy coconut cookies
STEP BY STEP INSTRUCTIONS TO MAKE EGGLESS COCONUT MACAROONS | 2-INGREDIENT COCONUT MACAROONS
1.Preheat the oven to 350 degrees F / 180 C. Line a baking tray with Silpat or parchment paper. Set aside. In a bowl, add desiccated coconut and sweetened condensed milk. Mix well with a spatula until the coconut is evenly coated with the condensed milk.

2.Use a cookie scoop or tablespoon to scoop out the mixture. Press lightly with the help of your fingers so that they slide out in a defined shape. Transfer to a baking tray. You may use some oil spray on the cookie scoop or tablespoon so that the mixture slides out easily.

3.Place half a glazed cherry on top of each macaroon. Bake for about 15-18 minutes or until lightly golden brown. Keep checking after 12 minutes. It took me around 18 minutes. Transfer onto a wire rack and let it cool. You may drizzle some melted chocolate over the macaroons if desired.

NOTE
1.These were the right sweetness for us. They are not very sweet. If you prefer a sweeter macaroon, you may use sweetened desiccated coconut flakes.
HOW TO MAKE EGGLESS COCONUT MACAROONS | 2-INGREDIENT COCONUT MACAROONS?

Eggless Coconut Macaroons | Two Ingredient Coconut Macaroons
Ingredients1x2x3x
Measuring cup used, 1 cup = 250 ml, 1 tsp = 5 ml
- 250 grams / 8.8 oz desiccated coconut
- 1/2 can / 7 oz sweetened condensed milk
- 10 glazed cherries, cut into half (optional)
Instructions
- Preheat the oven to 350 degrees F / 180 C. Line a baking tray with Silpat or parchment paper. Set aside. In a bowl, add desiccated coconut and sweetened condensed milk. Mix well with a spatula until the coconut is evenly coated with the condensed milk.
- Use a cookie scoop or tablespoon to scoop out the mixture. Press lightly with the help of your fingers so that they slide out in a defined shape. Transfer to a baking tray. You may use some oil spray on the cookie scoop or tablespoon so that the mixture slides out easily.
- Place half a glazed cherry on top of each macaroon. Bake for about 15-18 minutes or until lightly golden brown. Keep checking after 12 minutes. It took me around 18 minutes. Transfer onto a wire rack and let it cool. You may drizzle some melted chocolate over the macaroons if desired.
Notes
- These were the right sweetness for us. They are not very sweet. If you prefer a sweeter macaroon, you may use sweetened desiccated coconut flakes.

I would love to hear from you! Please feel free to share your feedback with photos and suggestions to me at aromaticessence77@gmail.com
You can also follow me on :
Facebook @ Aromaticessence
Pinterest @ Aromatic Essence
Instagram @ aromatic_essence77
Twitter @ freda_dias
Regards,
Freda
