Pudina rice (mint rice) is an easy rice dish to put together. It is aromatic, packed with refreshing flavors, and perfect to be whipped up during busy weekdays. Serve it along with some raita, papad, and pickle for a quick and delicious meal!

This pudina rice or pudina pulao/mint pulao is so easy to make and packed with zesty flavors. The rice is cooked with a simple mint paste made with lots and lots of fresh mint leaves, coriander leaves, ginger, garlic, green chilies, and freshly grated coconut.
When I’m pressed for time, I prefer to cook up a simple yet delicious rice dish, that doesn’t need a lot of sides to be served with. This coconut mint rice is easy, really tasty and I’m sure you will add this rice recipe to your repertoire.
Mint is known as pudina in Hindi. As you know, this culinary herb is known for its aroma, refreshing flavors, and numerous health benefits. I love this herb so much, that I have a small mint plant in my kitchen garden. I’m sure going to be using it up in a lot of my summer coolers this season.
Pudina rice is quite popular in the Southern states of India. It is known as pudina sadam or pudina bath and is made slightly differently.Sadam translates to rice in Tamil and bath translates to rice in Kannada language respectively. Be sure to check out the South Indian version in variations below.
It’s great to whip up pudina sadam if you have some leftover rice. Well, you can make this recipe with leftover rice too, but I prefer making it with uncooked rice so that every grain of rice is infused with the flavorful mint paste.

- Why you will love this recipe
- Ingredients
- Instructions
- Serving suggestions
- Variations
- Storage
- Top tips
- FAQ
- Related
- Pudina Rice | Mint Rice
Why you will love this recipe
- A quick and easy rice dish, which is equally flavorful and needs simple ingredients
- Does not have an overpowering mint flavor, even if you don’t like mint as much, you will still enjoy this rice
- It has a beautiful green color, that is all-natural and makes it look appetizing
- The addition of vegetables makes it wholesome
- Does not need a lot of sides, it is substantial enough to be served with plain yogurt or raita of your choice
- Great to be packed in a lunch box
- Perfect for busy weekday meals
- Naturally gluten-free and can be made vegan by swapping the ghee with oil
Ingredients

To make this recipe, first, you will need to prepare the mint paste. For that, you will need the following;
- Mint leaves: Use only the leaves and not the stems.
- Coriander leaves: Optional, but I love the flavor it adds.
- Ginger and garlic: Enhances the overall flavor of the dish.
- Green chillies: To add some heat, skip or use the mild variety of chillies, if making for kids.
- Freshly grated coconut: You can also use desiccated coconut or small pieces of coconut.
To make the pulao, you will need;
- Rice: I’ve used basmati, but feel free to use any kind of rice. Even leftover rice is great.
- Cooking fat: Ghee is my choice of cooking fat when it comes to making pulao.
- Whole spices: I’ve used green cardamom, cloves, cinnamon, peppercorns, star anise, and cumin seeds. When sauteed in ghee, these spices release a wonderful aroma.
- Vegetables: I’ve used frozen diced veggies as it is super convenient. You can use finely diced fresh vegetables too.
- Ground spices: You don’t need a ton of spices for this recipe. I’ve used ground turmeric, and garam masala along with salt.
- Onions: Thinly sliced!
- Tomatoes: Adds some tang to the pulao.
- Cashew nuts: This is optional. I’ve used it mainly for garnishing, though I love the additional texture it adds. If you don’t have any nut allergies, definitely include this ingredient.
- Lemon juice: Again, an optional ingredient. But, I love the pop of freshness that it adds.
Instructions
Stovetop method
Rinse 1.5 cups of basmati rice until the water runs clear, soak it in 2-3 cups of water for 30 minutes. ( Photos 1 and 2 )
In the meanwhile, prep your ingredients.

Add 1 cup tightly packed mint leaves, 1/3 cup coriander leaves, 4 tablespoons grated coconut, 1/2- inch ginger, 4 garlic cloves, and 1-2 green chillies in a blender. Add 2-3 tablespoons of water and blend to a smooth paste. Set aside. ( Photos 3 to 8 )

Heat 2 tablespoons of ghee in a heavy-bottomed pot over medium heat. ( Photo 9 )

Add 8 to 10 cashew nuts, broken into halves, roast until golden brown, set aside. ( Photos 10 and 11 )

Add whole spices (3 each of green cardamom, cloves, 1 bay leaf, 3-4 peppercorns, 1-star anise, 1-inch cinnamon) 1/2 teaspoon cumin seeds), saute for a few seconds until the spices are fragrant. ( Photos 12 and 13 )

Add 1 cup of sliced onions, saute until the onions turn golden brown. ( Photos 14 and 15 )

Add 1/2 cup diced tomatoes, and cook until they soften. ( Photos 16 and 17 )

Next, add 1 to 1.5 cups of mixed vegetables, mix well, and cook for another 2-3 minutes. ( Photos 18 and 19 )

Add the mint paste and 1/4 teaspoon turmeric, and saute for a few more minutes until most of the moisture is lost. ( Photos 20 and 21 )

Next, add salt (to taste) and 1/2 teaspoon garam masala and mix well. ( Photos 22 to 24 )

Add the drained rice, and saute gently until the rice is coated with the paste. ( Photos 25 and 26 )
Rinse the blender with 1 cup of water to extract any remaining mint paste and add it to the pot. Add the remaining 1.75 cups of water, mix well, and bring to a boil.
Check for seasoning, the water should taste salty. Add more salt if needed.
Reduce the heat, cover the pot, and simmer for 10 minutes or until all the water is absorbed and the rice is done. ( Photos 27 to 29 )

Switch off the heat and let the rice stand undisturbed, with the lid on, for 10 minutes.
Open the lid, sprinkle 1/2 tablespoon of lemon juice (optional), and roasted cashew nuts (reserve a few for garnishing), and fluff the rice with a fork. ( Photos 30 to 33 )

Instant Pot method
Press the ‘SAUTE’ button, and set it to ‘NORMAL’. Once it displays, ‘HOT’, then add 2 tablespoons of oil or ghee, and let it heat up a bit, Add 8 to 10 cashew nuts, broken into halves, roast until golden brown, and set aside. ( Photos 34 and 35 )

Add whole spices (3 each of green cardamom, cloves, 1 bay leaf, 3-4 peppercorns, 1-star anise, 1-inch cinnamon) 1/2 teaspoon cumin seeds), and saute for a few seconds until the spices are fragrant. ( Photo 36 )

Add 1 cup of sliced onions, and saute until the onions turn golden brown. ( Photos 37 and 38 )

Add 1/2 cup diced tomatoes, and cook until they soften. ( Photos 39 and 40 )

Next, add 1 to 1.5 cups of mixed vegetables, mix well, and cook for another 2-3 minutes. ( Photo 41 )

Add the mint paste and 1/4 teaspoon turmeric, and saute for a few more minutes until most of the moisture is lost. ( Photos 42 to 44 )

Next, add salt (to taste) and 1/2 teaspoon garam masala and mix well. ( Photos 45 and 46 )

If you have browned bits stuck at the bottom of the pot, deglaze it with about 2 tablespoons of water to avoid a potential ‘BURN’ error.
Add the drained rice, and saute gently until the rice is coated with the paste.
Rinse the blender with 1/2 cup of water to extract any remaining mint paste and add it to the pot. Add the remaining 1 cup of water, and mix well. Make sure the rice is submerged in the liquid. ( Photos 47 to 49 )

Check for seasoning, the water should taste salty. Add more salt if needed.
Press ‘CANCEL’ to switch off the “SAUTE’ mode. Close the lid of the Instant Pot. Set the valve to ‘SEALING’. Pressure cook on high for 4 minutes. It will take some time for the pressure to build up (about 9 minutes), after which the timer will begin. ( Photo 50 )

Once the cooking cycle is complete, let the pot depressurize for 10 minutes. Then do a quick release of the leftover pressure as per the manufacturer’s instructions. Press ‘CANCEL’ and switch off the IP. Once the silver pin drops, turn the knob to ‘VENTING’ and open the lid away from you.
Sprinkle 1/2 tablespoon of lemon juice (optional), and roasted cashew nuts (reserve a few for garnishing), Fluff mint coriander rice with a fork. (Photos 51 to 55)

Serving suggestions
This mint pulao is packed with a lot of flavors and hence does not need a curry or gravy as an accompaniment. However, you can serve it with any vegetarian or meat-based curries of your choice.
I prefer to keep it simple and serve it with raita or plain yogurt, pickle, and some papad.
Roasted vegetables or grilled meats such as kebabs, etc. would make for a great side dish for this pudina rice.

Variations
South Indian style: Follow these steps;
- Heat 2 tablespoons oil, add 1 teaspoon each of mustard seeds.
- Once it starts crackling, add 1 teaspoon each of chana dal and urad dal.
- Add about 2 tablespoons of raw peanuts. Cook until the dals and peanuts turn a golden brown color.
- Add a sprig of curry leaves and 1 cup of sliced onions, and saute until golden brown.
- Next, add the mint paste, and 1/4 teaspoon of turmeric powder, and cook until the moisture is lost.
- Add 2 to 3 cups of cooked rice, sprinkle 1 tablespoon or so of lemon juice, and mix well. Dish out and serve!
Add proteins: You can also add cooked chickpeas, rajma, sprouts, paneer, or tofu to this tomato pudina rice.
Palak (spinach): You can add some blanched spinach leaves and blend them along with the other ingredients to make a palak pudina paste.
Use chicken or veg stock: Flavor up this pudina coriander rice even more by swapping the water with stock or broth. Remember to adjust the salt accordingly if the stock has added salt.
No onion/garlic: For a Jain version, feel free to make this rice without onion or garlic.
Chicken or prawns: Follow these steps;
- Dice up about 1 boneless chicken breast or 2 chicken thighs into 1-inch chunks or use prawns.
- Marinate with ginger garlic paste, yogurt, lemon juice salt, and pepper.
- Add it to the pot after sauteing the onions and tomatoes.
- Saute on medium-high heat until the chicken/prawn turns opaque.
- Then follow the rest of the recipe as stated above.
- You can also add fried/grilled chicken or prawns to this mint coriander rice after it’s done cooking, and mix it gently.
Storage
Refrigerator: Refrigerate leftovers (within 2 hours of cooking) in an airtight container for up to 1-2 days.
Reheat: Transfer the rice to a pan, sprinkle some water, cover, and reheat on low heat, stirring occasionally until heated through. You may also reheat it in the microwave.
Top tips
Mint leaves: Use fresh mint leaves for this recipe, as it is the key ingredient used for flavoring the rice. Never use the stems, as they can add a bitter taste to the dish.
Spice: I do not add a lot of green chilies because of my kids. Feel free to add more chilies as per your desired heat. You can also add 1/2 teaspoon of black peppercorns to the chutney to amp up the spice levels.
Vegetables: You can add any vegetables of your choice. I added a cup of mixed frozen vegetables (peas, corn, carrots, cauliflower, and green beans) to make my life easier. If adding vegetables like aloo (potatoes), then dice them small so that they cook through, especially if you make this recipe on the stovetop. If you dice bigger chunks, then be sure to let them cook at least until they are cooked halfway through.
Check for salt: Always check for salt, after the water comes to a boil. If the water does not taste salty, adjust with more salt at this stage, or else the rice will taste bland.
Quantity of water: I prefer to soak my rice, and hence reduce the water required to cook the pulao, or else it becomes too soft for our liking. If you choose to skip soaking the rice, then follow the 1:2 ratio (stovetop) and 1: 1.25 ratio (for Instant Pot) of rice to water for cooking the pulao. I do recommend rinsing your rice though, so don’t skip that step.
Let the rice rest: Leave the rice undisturbed for at least 10-15 minutes after it’s done cooking. Avoid fluffing the rice, as it continues to absorb moisture even after cooking.
If you skip tomatoes: Squeeze extra lemon juice, in the end, to add some tang and peppy flavor to the dish.

How to make this mint rice in a stovetop pressure cooker?
Follow the same steps as above. Reduce the water to 2 & 1/4 to 2 & 1/2 cups, depending on the quality of the rice. Cook on high for 2 whistles, then let the pressure release naturally. Open the lid and fluff the rice with a fork.
Can I make this pudina rice with cooked rice or leftover rice?
You can make fried rice-style pudina rice if you have cooked or leftover rice. Add about 2 to 3 cups of cooked and cooled rice instead of the drained rice in this recipe. Mix gently to avoid breaking the rice grains. Cover the pan, and cook on low heat for 2 minutes. Then fluff the rice and serve hot.
Can I skip coconut in the mint paste?
Yes, you can skip the coconut. The paste will not be as thick, but it will still be good. You can use cashew nuts instead of coconut for the paste. You can substitute some of the water used for cooking the rice with coconut milk instead, i.e. about 2 cups water and 3/4 cup light coconut milk.
Do I have to make this recipe with basmati rice?
Not really! Feel free to use any rice of your choice. The main ingredient here is the mint paste which will flavor up any variety of rice equally well. Adjust the water quantities as per the rice you choose to use.
Related
- Vegetable pulao
- Moong sprouts and paneer pulao
- Palak rice
- Cauliflower dum biryani
- Mushroom pulao
- Bagara rice

Pudina Rice | Mint Rice
Equipment
- Instant Pot DUO60 6 Qt 7-in-1
Ingredients1x2x3x
For the mint coconut chutney
- 1 cup tightly packed mint leaves, 25 grams
- 1/3 cup coriander leaves along with tender stems, tightly packed, 10 grams
- 4 tablespoons grated coconut, 25 grams
- 1/2 inch ginger root, peeled
- 4 to 5 garlic cloves
- 1-2 green chillies, I used the less spicy Indian variety that’s light green in color
For the pudina rice
- 1.5 cups of basmati rice 285 grams
- 2 tablespoons ghee or oil,
- 8-10 cashew nuts broken in halves
- Whole spices 3 each of green cardamom, cloves, 1 bay leaf, 3-4 peppercorns, 1-star anise, 1-inch cinnamon 1/2 teaspoon cumin seeds
- 1 cup sliced onions
- 1/2 cup diced tomatoes,
- 1 to 1.5 cups mixed vegetables
- table salt, to taste (I added about 1.25 teaspoons)
- 1/4 teaspoon turmeric
- 1/2 teaspoon garam masala
- 2.75 cups water, 1.5 cups water for the Instant Pot
- 1/2 tablespoon lemon juice, optional
Instructions
- Rinse basmati rice until the water runs clear, soak it in 2-3 cups of water for 30 minutes. In the meanwhile, prep your ingredients.
Mint coconut chutney
- Add mint leaves, coriander leaves, grated coconut, ginger, garlic, and green chillies in a blender. Add water and blend to a smooth paste. Set aside.
Stovetop Method
- Heat ghee in a heavy-bottomed pot over medium heat.
- Add cashew nuts, roast until golden brown, set aside.
- Add whole spices, saute for a few seconds until the spices are fragrant.
- Add sliced onions, saute until the onions turn golden brown.
- Add diced tomatoes, cook until they soften.
- Next, add the vegetables, mix well and cook for another 2-3 minutes.
- Add the mint paste and ground turmeric, saute for few more minutes until most of the moisture is lost.
- Next, add salt and garam masala, mix well.
- Add the drained rice, saute gently until the rice is coated with the paste.
- Rinse the blender with 1 cup of water to extract any remaining mint paste and add it to the pot. Add the remaining 1.75 cups of water, mix well, and bring to a boil.
- Check for seasoning, the water should taste salty. Add more salt if needed.
- Reduce the heat, cover the pot and simmer for 10 minutes or until all the water is absorbed and the rice is done.
- Switch off the heat and let the rice stand undisturbed, with the lid on, for 10 minutes.
- Open the lid, sprinkle lemon juice, and roasted cashew nuts (reserve a few for garnishing), fluff the rice with a fork.
Instant Pot Method
- Press the ‘SAUTE’ button, and set it to ‘NORMAL’. Once it displays, ‘HOT’, then add 2 tablespoons of oil or ghee, let it heat up a bit, Add cashew nuts, roast until golden brown, set aside.
- Add whole spices, saute for a few seconds until the spices are fragrant.
- Add sliced onions, saute until the onions turn golden brown.
- Add diced tomatoes, cook until they soften.
- Next, add the vegetables, mix well and cook for another 2-3 minutes.
- Add the mint paste and turmeric, saute for few more minutes until most of the moisture is lost.
- Next, add salt and garam masala and mix well
- If you have browned bits stuck at the bottom of the pot, deglaze it with about 2 tablespoons of water to avoid a potential ‘BURN’ error.
- Add the drained rice, saute gently until the rice is coated with the paste.
- Rinse the blender with 1/2 cup of water to extract any remaining mint paste and add it to the pot. Add the remaining 1 cup of water, mix well. Make sure the rice is submerged under the liquid.
- Check for seasoning, the water should taste salty. Add more salt if needed.
- Press ‘CANCEL’ to switch off the “SAUTE’ mode. Close the lid of the Instant Pot. Set the valve to ‘SEALING’. Pressure cook on high for 4 minutes. It will take some time for the pressure to build up (about 9 minutes), after which the timer will begin.
- Once the cooking cycle is complete, let the pot depressurize for 10 minutes. Then do a quick release of the leftover pressure as per the manufacturer’s instructions. Press ‘CANCEL’ and switch off the IP. Once the silver pin drops, turn the knob to ‘VENTING’ and open the lid away from you.
- Sprinkle lemon juice, and roasted cashew nuts (reserve a few for garnishing), Fluff mint coriander rice with a fork.
Video
Notes
Nutrition

Pudina Rice | Mint Rice
Equipment
- Instant Pot DUO60 6 Qt 7-in-1
Ingredients
For the mint coconut chutney
- 1 cup tightly packed mint leaves, 25 grams
- 1/3 cup coriander leaves along with tender stems, tightly packed, 10 grams
- 4 tablespoons grated coconut, 25 grams
- 1/2 inch ginger root, peeled
- 4 to 5 garlic cloves
- 1-2 green chillies, I used the less spicy Indian variety that’s light green in color
For the pudina rice
- 1.5 cups of basmati rice 285 grams
- 2 tablespoons ghee or oil,
- 8-10 cashew nuts broken in halves
- Whole spices 3 each of green cardamom, cloves, 1 bay leaf, 3-4 peppercorns, 1-star anise, 1-inch cinnamon 1/2 teaspoon cumin seeds
- 1 cup sliced onions
- 1/2 cup diced tomatoes,
- 1 to 1.5 cups mixed vegetables
- table salt, to taste (I added about 1.25 teaspoons)
- 1/4 teaspoon turmeric
- 1/2 teaspoon garam masala
- 2.75 cups water, 1.5 cups water for the Instant Pot
- 1/2 tablespoon lemon juice, optional
Instructions
- Rinse basmati rice until the water runs clear, soak it in 2-3 cups of water for 30 minutes. In the meanwhile, prep your ingredients.
Mint coconut chutney
- Add mint leaves, coriander leaves, grated coconut, ginger, garlic, and green chillies in a blender. Add water and blend to a smooth paste. Set aside.
Stovetop Method
- Heat ghee in a heavy-bottomed pot over medium heat.
- Add cashew nuts, roast until golden brown, set aside.
- Add whole spices, saute for a few seconds until the spices are fragrant.
- Add sliced onions, saute until the onions turn golden brown.
- Add diced tomatoes, cook until they soften.
- Next, add the vegetables, mix well and cook for another 2-3 minutes.
- Add the mint paste and ground turmeric, saute for few more minutes until most of the moisture is lost.
- Next, add salt and garam masala, mix well.
- Add the drained rice, saute gently until the rice is coated with the paste.
- Rinse the blender with 1 cup of water to extract any remaining mint paste and add it to the pot. Add the remaining 1.75 cups of water, mix well, and bring to a boil.
- Check for seasoning, the water should taste salty. Add more salt if needed.
- Reduce the heat, cover the pot and simmer for 10 minutes or until all the water is absorbed and the rice is done.
- Switch off the heat and let the rice stand undisturbed, with the lid on, for 10 minutes.
- Open the lid, sprinkle lemon juice, and roasted cashew nuts (reserve a few for garnishing), fluff the rice with a fork.
Instant Pot Method
- Press the ‘SAUTE’ button, and set it to ‘NORMAL’. Once it displays, ‘HOT’, then add 2 tablespoons of oil or ghee, let it heat up a bit, Add cashew nuts, roast until golden brown, set aside.
- Add whole spices, saute for a few seconds until the spices are fragrant.
- Add sliced onions, saute until the onions turn golden brown.
- Add diced tomatoes, cook until they soften.
- Next, add the vegetables, mix well and cook for another 2-3 minutes.
- Add the mint paste and turmeric, saute for few more minutes until most of the moisture is lost.
- Next, add salt and garam masala and mix well
- If you have browned bits stuck at the bottom of the pot, deglaze it with about 2 tablespoons of water to avoid a potential ‘BURN’ error.
- Add the drained rice, saute gently until the rice is coated with the paste.
- Rinse the blender with 1/2 cup of water to extract any remaining mint paste and add it to the pot. Add the remaining 1 cup of water, mix well. Make sure the rice is submerged under the liquid.
- Check for seasoning, the water should taste salty. Add more salt if needed.
- Press ‘CANCEL’ to switch off the “SAUTE’ mode. Close the lid of the Instant Pot. Set the valve to ‘SEALING’. Pressure cook on high for 4 minutes. It will take some time for the pressure to build up (about 9 minutes), after which the timer will begin.
- Once the cooking cycle is complete, let the pot depressurize for 10 minutes. Then do a quick release of the leftover pressure as per the manufacturer’s instructions. Press ‘CANCEL’ and switch off the IP. Once the silver pin drops, turn the knob to ‘VENTING’ and open the lid away from you.
- Sprinkle lemon juice, and roasted cashew nuts (reserve a few for garnishing), Fluff mint coriander rice with a fork.
Video
Notes
Nutrition
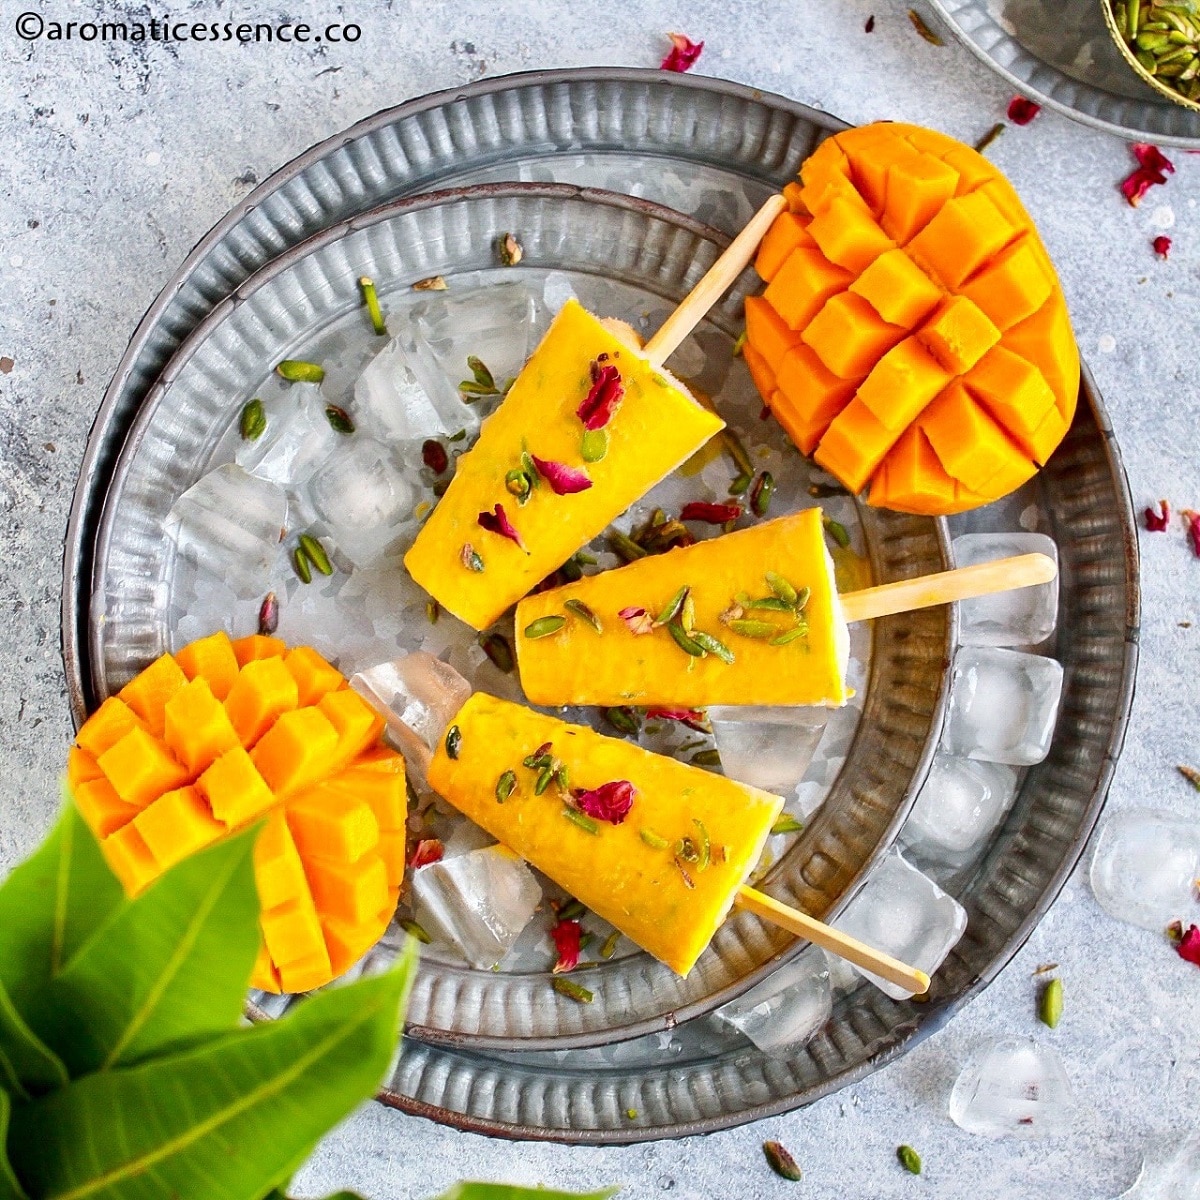
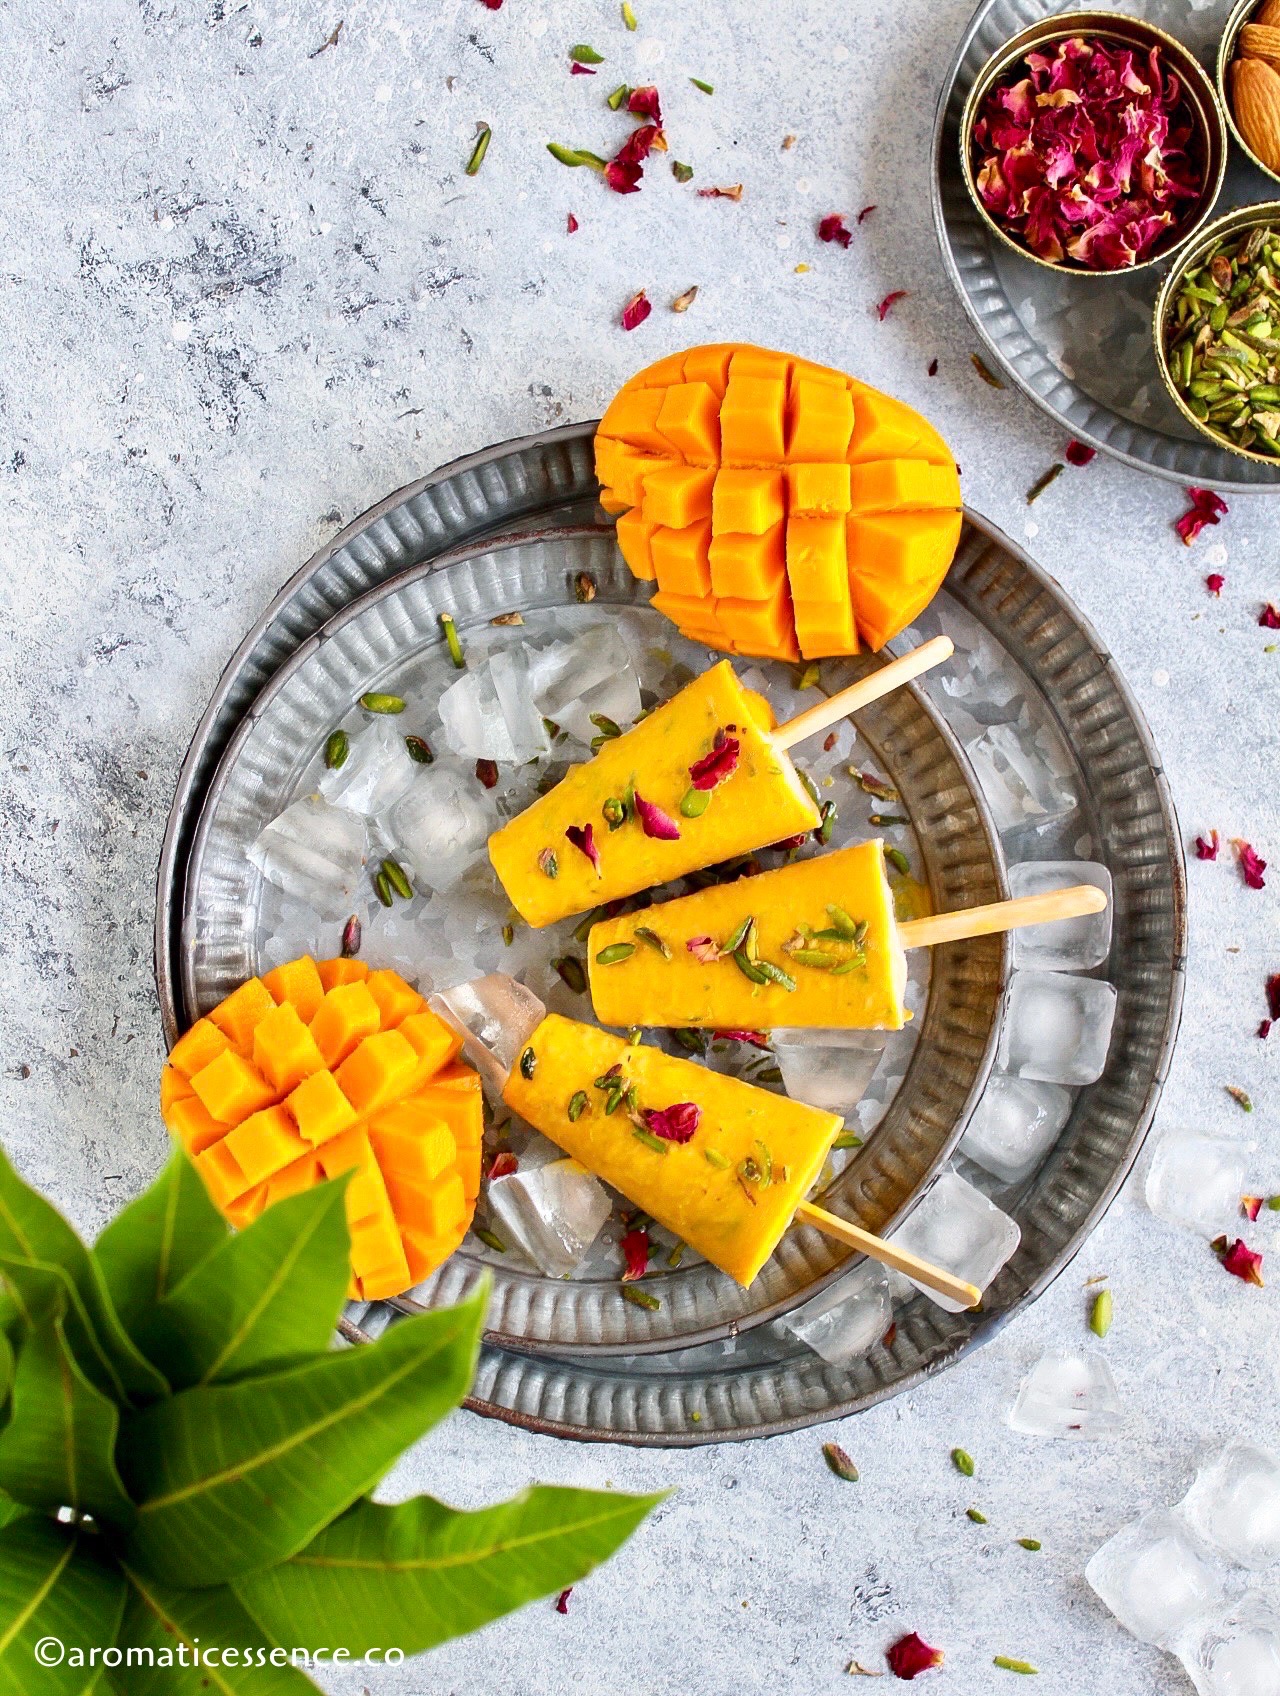
This homemade mango kulfi is rich, creamy, and luscious. It is made with simple ingredients like milk, sugar, powdered milk, fresh seasonal mangoes, saffron, and cardamom. Also be sure to check out a quick, no-cook version in variations below to make this mango kulfi!
It is super hot these days and all we want to do is indulge in frozen treats and cool beverages. Since it’s mango season, I’m making the most of it by incorporating them in every possible way, from savory to sweet recipes.
This delicious and easy mango kulfi recipe is made from scratch with the most basic ingredients. Since this recipe makes about 8 kulfis, it was over within 2 days 🙁
I understand that the weather is hot and the last thing you need is to be standing near your stovetop, stirring something for as long as 45 to 50 minutes. But trust me, all that effort is worth your while.
You don’t need to use a lot of elbow grease to prepare this mango kulfi. Just remember not to walk away from the stovetop. Stir the mixture every couple of minutes, while you prep lunch or dinner.

- What is kulfi?
- You will love this mango kesar kulfi recipe because
- Ingredients needed to make this kulfi
- How to make mango kulfi – Step by step process
- Serving suggestions
- Storage
- Tips to make the best mango kulfi at home
- Variations
- Frequently asked questions
- You may also enjoy these mango recipes
- Mango Kulfi {Without Condensed Milk/Khoya}
What is kulfi?
Kulfi is a frozen, dairy-based Indian dessert. It is primarily made by reducing full-fat milk to half its original quantity. It is then sweetened with sugar.
This thickened and sweetened milk mixture is then poured into aluminum cones and frozen in an earthen pot containing a mix of ice and rock salt.
The long cooking period of milk gives it its characteristic caramelized flavor, which is what makes kulfi so unique. Kulfi can be referred to as the Indian version of ice cream. But if you consider technicalities, they are totally different.
Here are the major differences between kulfi and ice cream;
- The base: Ice cream is made with a milk-custard base. Kulfi just needs milk, milk solids, and sugar.
- Texture: Ice cream has air incorporated in it, due to which it is light, fluffy, and airy. Kulfi, on the other hand, is dense and that is how it is supposed to be.
- Equipment: You need an ice cream maker to make ice cream the old-fashioned way. Of course, these days the no-churn method is popular. You just need a heavy-bottomed Kadai (wok) to make kulfi
Given the Indian weather, one can actually enjoy kulfi all year round, but slurping on some during summers is a real treat!
Whether it is a simple malai kulfi or other flavors like saffron, pistachio, paan, chocolate, custard apple, rose, etc, they all taste so good! And this homemade mango kulfi is no exception!
You will love this mango kesar kulfi recipe because
✓ It is made with very basic ingredients, does not need condensed milk or any type of cream.
✓ A no-frills recipe that does not need any fancy gadget such as an ice cream maker.
✓ It is a creamy and yummy frozen treat.
✓ It is packed with a delicious mango flavor that screams summer.
✓ Has a gorgeous golden color that looks so very appetizing.
✓ It is hit with people of all age groups.

Ingredients needed to make this kulfi
To make this super yummy Aam kulfi, you will need;
Milk: This recipe requires very few ingredients and milk being the base of kulfi is an important one. Full-fat or whole milk is preferred for this recipe. So, please don’t compromise by using skimmed milk, 1%, or any other type of low-fat milk. If you do that, you will need to compensate by adding cream and more milk powder to get similar results.
Mangoes: I’ve used Alphonso mangoes since they are in season now. You can also use canned mango pulp and enjoy this kulfi all year round.
Sugar: To sweeten the kulfi! I prefer using castor sugar. It dissolves easily due to the small crystal size.
Coarsely chopped nuts: I’ve used unsalted pistachios and almonds. You can also include some cashew nuts. I’ve chopped them quite fine, you can also powder them. This will give a nice grainy texture to the mango kulfi.
Saffron and cardamom: These exotic ingredients add an amazing flavor that not only complements the mangoes but also elevates the overall flavor of the kulfi. I highly recommend using these ingredients.

How to make mango kulfi – Step by step process
Step 1: Reduce the milk to half
Add 4 cups full-fat milk into a heavy-bottomed pan. ( Photo 1 )
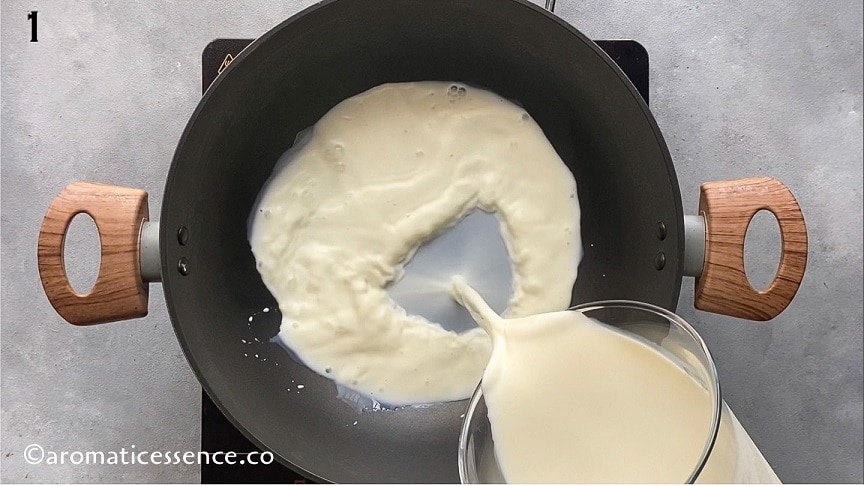
Add 1/4 cup of milk powder to a bowl, transfer about 3 to 4 tablespoons of milk from the pan, and mix with the milk powder to make a slurry. Set this aside. ( Photos 2 and 3 )

Switch on the heat to medium, and bring the milk to a boil, stirring occasionally in between. ( Photos 4 and 5 )

Once the milk comes to a boil (after 9 minutes approx), reduce the heat to medium-low, cook, stirring frequently, until the milk reduces to half of its original quantity, i.e from 4 cups to 2 cups. ( Photos 6 to 8 )

After 10 minutes….

After 20 minutes…

After a total of 30 minutes, the milk has reduced to 2 cups
Step 2: Add sugar, milk powder slurry, nuts, saffron, and cook further
Add 1/3 cup sugar, crushed saffron strands, milk powder slurry, 1 tablespoon each of coarsely chopped almonds and pistachios. ( Photos 9 to 12 )

Mix well and cook for another 10 minutes over medium-low heat, or until the mixture is thick and creamy. You should end up with about 1 and 3/4 cups of thickened and sweetened milk. ( Photos 13 and 14 )

Step 3: Add cardamom and cool down the milk mixture
Add 1/4 teaspoon cardamom powder, mix well, and switch off the heat. ( Photos 15 and 16 )

Transfer the reduced milk to a heat-safe bowl or a glass measuring jug. (Using a jug makes it easier to pour the mango kulfi mixture into kulfi cones). Let the milk cool completely to room temperature. ( Photo17 )

Step 4: Add mango pulp, mix, and freeze
Add 1 cup fresh mango pulp to the reduced milk mixture, and mix well. ( Photos 18 and 19 )

Pour in kulfi molds or popsicle molds. ( Photos 20 and 21 )

Cover with aluminum foil. Insert a stick through the foil, and freeze the molds for 8 to 10 hours. ( Photos 22 to 25 )

To serve, dip the mold in warm water for a few seconds, pull it out gently to release it from the mold.

Serving suggestions
Kulfi is best enjoyed as a dessert after meals. Of course, there is no right or wrong time, so I’ll leave that to you.
You can enjoy this delicious mango kulfi as it is! Another delicious variation is to jazz it up by making kulfi falooda.
To do that, slice the kulfi and place it in a serving bowl, top it with some falooda sev, sabja, sliced nuts, and some rose syrup. To make it even more decadent, add a little rabdi! Yum yum!!

Storage
This mango kulfi can be frozen for up to a month. Since this is a small batch, I doubt it will last past 2 days 😀
Tips to make the best mango kulfi at home
Use the right mangoes: Choose a fleshy variety of mango that is not fibrous as fibers in the kulfi are very unpleasant and not at all appealing. Mangoes such as Alphonso, Kesari, and Badami are good. Avoid totapuri, bottle mangoes, etc that are fibrous and not meant to be used in recipes like these. Also, make sure you use only ripe and sweet mangoes for this kulfi recipe. Avoid sour or semi-ripe mangoes as mixing these kinds of mangoes with dairy can cause digestive issues and an upset stomach.
Sweetness: Feel free to increase the sugar to 1/2 cup if your mangoes are not very sweet. You can also reduce the sugar to 1/4 cup if your mangoes are really sweet or skip it altogether if the mangoes are super sweet.
Avoid overcooking the milk mixture: You start with 4 cups of milk and you will want to end up with approx 1.75 cups of thickened and sweetened milk. Do not reduce it more than that, since the milk thickens as it cools. Also, fresh mango pulp is already thick. So mixing both results in an overly thick mixture, that makes the kulfi denser than it should be. Please stick to the recipe as I’ve tested this recipe multiple times, and we prefer this version over the other.
Add khoya: You can add about 1/4 cup of grated or crumbled mawa instead of the milk powder slurry. It will add more richness to the kulfi.
Scaling the recipe: You can scale up or down to make as many kulfi’s as you’d like. The cooking time will change depending on the quantity of milk you begin with. So remember to factor that in.
Alternatives to kulfi molds: You can freeze this mango kulfi mixture in any popsicle mold, or disposable plastic or paper cups. Follow the same process as I’ve done with the aluminum kulfi molds.

Variations
Basic kulfi: Omit the mango pulp from this recipe and you have a very basic malai kulfi. Add more nuts, if you wish to.
Instant, no-cook mango kulfi: I’ve already shared the base recipe for an instant no-cook kulfi that involves blending 1-(14 oz) can of sweetened condensed milk, 1 cup heavy cream, 1-(12 oz) can of evaporated milk. To this base, add 1 cup of fresh mango pulp and blend everything together. You can add a tablespoon of saffron-infused milk, and a pinch of cardamom as well.
Stuffed mango kulfi: Instead of adding mango pulp to the milk mixture, you can stuff ripe mangoes with the kulfi mixture. To do that, cut off the top of the mango, insert a knife to loosen the seed, then remove the seed. Scrape off all the mango flesh from the seed and add it back inside the mango. Pour in the kulfi mixture, cover it with the top. Place it in a bowl so that it sits undisturbed. Freeze for 6-8 hours. When you are ready to serve, peel the mango skin, cut it into slices and serve. enjoy mango-filled kulfi!
Mango chunks: You can add small, diced mango pieces to the milk-mango mixture
Mango extract: Add a few drops of mango extract/essence if you prefer a more pronounced mango flavor.
Sweetened condensed milk: Instead of sugar, you can also use about 200 grams of sweetened condensed milk. You can increase or decrease the condensed milk as per your desired sweetness. I’ve tried making this recipe with and without condensed milk, and frankly, both taste great.
Cream: If you use skimmed milk, add some cream to give the kulfi a creamy texture. Add 1/2 cup malai (fresh cream) along with the milk in the first step. This will also prevent the kulfi from having too many ice crystals. You can use any kind of cream from fresh malai, low-fat, double cream, to whipping cream.
Mango matka kulfi: Pour the kulfi mixture into small matka’s, cover with an aluminum foil, and freeze.

Can I skip the milk powder in this recipe?
You can skip the milk powder, but since we are using only milk and nothing else to make this kulfi, a little bit of milk powder helps thicken it up. You can also add some cornstarch or custard powder to thicken the milk.
Use about 1 tablespoon of cornstarch/cornflour or custard powder. Mix it with 2 tablespoons of cold milk to make a slurry. Add this slurry about 2-3 minutes after the sugar dissolves and cook until the milk turns creamy and thick enough to coat the back of a spoon.
Can I use canned mango pulp or frozen mangoes to make this kulfi?
Yes, absolutely! That way you can enjoy this kulfi all year round 🙂 If using canned, you may skip adding sugar, as canned mango pulp is usually sweetened with sugar.
Do I need to blend the milk-mango mixture before transferring it to popsicle molds?
If you prefer a really creamy texture in your kulfi, then yes, feel free to blend it.
Is there a difference in taste between the cooked and no-cook kulfi version?
Yes, there is a difference in texture to some extent. The cooked version has a more grainy texture due to the reduction of milk, while the no-cook version is really smooth and creamy. You can add some breadcrumbs to mimic that grainy texture.
How to take out the kulfi from the mold?
Traditionally, kulfiwalas would remove the kulfi cones from their matka (earthen pot) and unmold the kulfi by rubbing the cone between their palms. Doing so generates heat, which helps in releasing the kulfi. A stick was inserted in the cone, and with a little twist, the kulfi would pop out of the cone.
The kulfi cones that I’ve used have a lid, but I chose to cover them with aluminum foil and insert the stick and freeze them. I just prefer this method as it is simpler and one doesn’t have to struggle to insert the stick in the frozen kulfi. You can also insert the stick once the kulfi is semi-frozen.
To unmold, dip the cones in warm water for a few seconds, twist the stick a little, and unmold it.
You can also avoid using the candy stick altogether. Simply run a butter knife around the edges, unmold the kulfi, cut it into slices and enjoy it that way!
Can I use cool whip to make kulfi?
No, cool whip will not work in this recipe. It will not work for the no-cook version either.
You just need cream that’s not been whipped to soft peaks for the no-cook version. Since cool whip is already whipped, it will add a very light and airy texture. Kulfi is meant to be a dense frozen treat. Cool whip will work great to make no-churn mango ice cream .
You may also enjoy these mango recipes
Mango shake
Mango semolina cupcakes
Eggless mango loaf cake
You can also follow me on Facebook , Pinterest, Instagram & Twitter

Mango Kulfi {Without Condensed Milk/Khoya}
Ingredients1x2x3x
- 4 cups full-fat (whole) milk, 1000 ml
- 1/3 cup milk powder or milk-mava powder, approx 42 grams
- 1/3 sugar, depending on the sweetness of the mangoes, 80 grams
- 1 tablespoon coarsely chopped almonds, 7 grams
- 1 tablespoon coarsely chopped pistachios, 7 grams
- A small pinch of saffron
- 1/4 teaspoon cardamom powder
- 1 cup fresh mango pulp
Instructions
- Add milk into a heavy-bottomed pan.
- Add milk powder to a bowl, transfer about 3 to 4 tablespoons of milk from the pan, and mix with the milk powder to make a slurry. Set this aside.
- Switch on the heat to medium, and bring the milk to a boil, stirring occasionally in between.
- Once the milk comes to a boil, reduce the heat to medium-low, cook, stirring frequently, until the milk reduces to half of its original quantity, i.e from 4 cups to 2 cups.
- Add the sugar, crushed saffron strands, milk powder slurry, chopped nuts, and mix well and cook for another 10 minutes over medium-low heat, or until the mixture is thick and creamy. You should end up with about 1 and 3/4 cups of thickened and sweetened milk.
- Add the cardamom powder, mix well, and switch off the heat.
- Let the milk cool completely to room temperature.
- Add the mango pulp to the reduced milk mixture, and mix well.
- Pour in kulfi molds or popsicle molds.
- Cover with aluminum foil. Insert a stick through the foil, and freeze the molds for 8 to 10 hours.
- To serve, dip the mold in warm water for a few seconds, pull it out gently to release it from the mold.
