These Mexican wedding cookies are buttery, nutty, bursting with rich flavor, and have a crumbly and melt-in-the-mouth texture!
They only need 7 ingredients and are so easy to make! These powdered sugar-dusted cookies are sure to make a festive addition to your Christmas cookie tray!

Mexican wedding cookies are always a hit in my family and one that I love to include in my Christmas sweet platter!
Though Mexican wedding cookies are a classic Holiday treat, I do not have any memories associated with them. It is not something that I grew up eating around the Holidays!
But thanks to the time I’ve spent in the US, I’ve come to learn of other cultures and a variety of treats that are associated with Christmas. I’m creating new memories for my children and I hope they will remember them in the years to come!
Different variations of one cookie!
Mexican wedding cookies are also known by other names like Mexican wedding cakes, polvorones, sugar butterballs, pecan butterballs, or Russian tea cakes. Polvorones are derived from the Spanish word ‘polvo’ which means dust or powder.
There are quite a few variations of these cookies, like snowballs, Italian wedding cookies, pecan sandies, Greek kourabiedes, and almond crescents depending on the type of nuts used in the recipe.
Contrary to its name, I see no reason why they should only be reserved for serving as favors for weddings. These are great all year round or just to satisfy those sweet cravings!
These sweet butter balls speckled with pecans have a soft, flaky, and crumbly interior and they simply fall apart and melt in the mouth. These are absolutely moreish and I bet you won’t be able to stop at one.
Why you will love this recipe?
☑ These are easy to put together
☑ So addictive
☑ One-bowl recipe
☑ Egg-free
☑ Looks so dreamy and festive making it a lovely addition to your Christmas cookie platter
☑ They make great edible gifts
☑ Great with a hot cup of tea, coffee, hot chocolate, or a beverage of your choice

Ingredients needed to make Polvorones
To make these scrumptious cookies, you will need the following 7 ingredients;
- All-purpose flour
- Butter: I’ve used unsalted butter. You may use salted butter too, simply skip the salt.
- Confectioners’ sugar: Also known as powdered sugar. Sugar is used in the dough as well as to coat the cookies.
- Pecans: This adds a nuttiness and elevates the overall flavor of the cookies. I toasted whole pecans and ground them coarsely in a blender.
- Flavoring: I’ve used vanilla and almond extract in this recipe. Almond extract enhances the nuttiness of the pecans, and a little goes a long way!
- Salt: Enhances the flavor and balances the sweetness in these cookies.

How To Make Mexican Wedding Cookies – Step-By-Step Process
Step 1: Cookie dough
Add 1/2 cup unsalted butter (room temperature) to a large mixing bowl. Place a fine mesh sieve and sift 1/4 cup of confectioners’ (powdered) sugar. Beat on medium-high speed until light and fluffy, scraping down the sides and the bottom of the bowl in between. ( Photos 1 to 5 )

Add 1 teaspoon of vanilla and 1/4 teaspoon of almond extract and beat on medium speed until well combined. ( Photos 6 to 9 )

Place a fine mesh sieve over the bowl, and sift 1 cup all-purpose flour and 1/8 teaspoon kosher salt. Add 1/2 cup coarsely ground toasted pecans. ( Photos 10 to 12 )
Beat on low speed or mix using a spatula, just until combined. Do not overmix! ( Photos 13 and 14 )
Cover with cling wrap and chill the dough for 30 minutes. ( Photo 15 )
Note: You can either refrigerate the dough at this stage or shape it into balls and refrigerate the baking tray with dough balls (whatever works for you!)

Step 2: Shape dough and bake
Preheat the oven to 350° F (180° C), and position a rack in the middle of the oven. Line a baking sheet with Silpat or parchment paper.
Form dough into 1-inch balls (I used a tablespoon to form uniform-sized cookies) and place them about 2 inches apart on the prepared baking sheet. ( Photos 16 and 17 )
Bake for 15 to 18 minutes or until they turn golden brown around the edges. Every oven is different, so please keep an eye out! ( Photo 18 )
Allow the cookies to cool down for 5 minutes on the baking sheet. ( Photos 19)
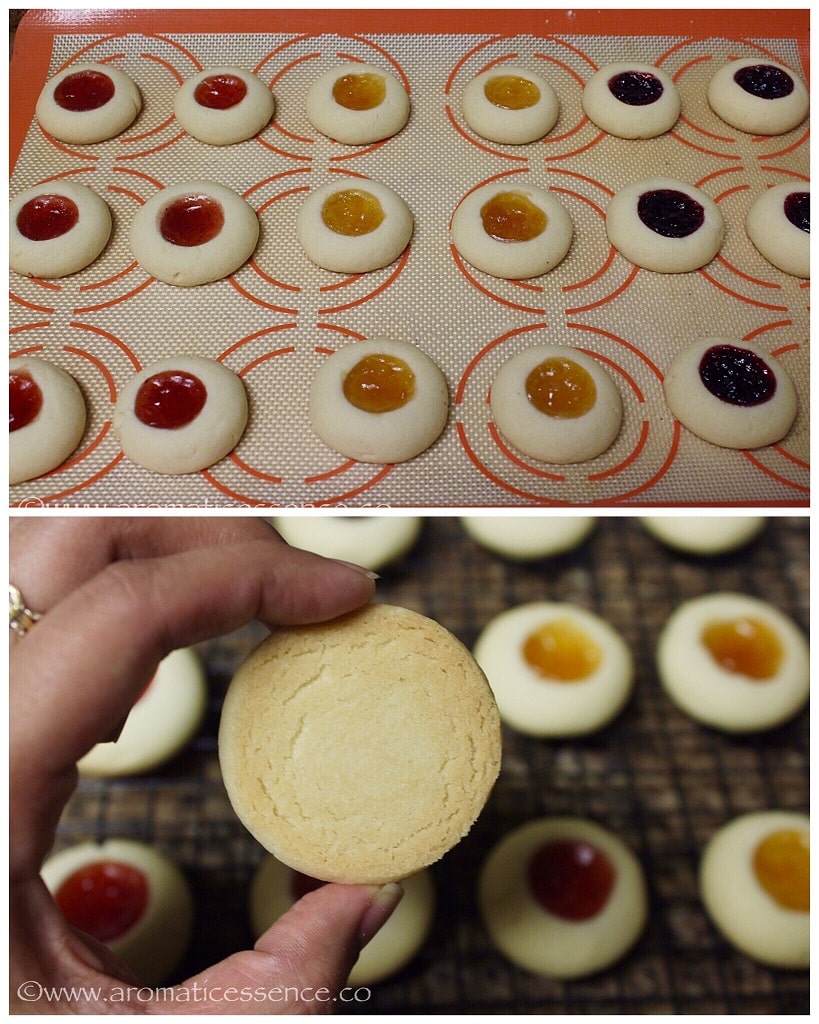
The bottom of the cookies are a beautiful golden brown color! ( Photo 20 )

Step 3: Roll in powdered sugar
Place sifted powdered sugar in a small bowl. Roll warm cookies in powdered sugar and place them on a cooling rack to cool down completely. ( Photos 21 to 23 )
Once cooled to room temperature, roll the cookies a second time in powdered sugar. ( Photos 24 to 26 )

Storage instructions
Place the cookies in a single layer in an airtight container. For a big batch, be sure to stack them between parchment paper in single layers so that they don’t stick to each other.
Store cookies at room temperature for up to 1 week, though I really doubt if it’ll last that long. 😀
Freezing Mexican cookie dough: There are two ways you can go about freezing the dough;
- Freeze the dough as such: Wrap the dough in plastic wrap and place it in a freezer-safe zip-top bag, freeze for up to 3 months. Let thaw overnight in the refrigerator, form 1-inch balls, and bake as instructed above.
- Freeze cookie dough balls: Place the dough balls on a baking sheet, and freeze for 2-3 hours or until solid. Then transfer in a freezer-safe container or zip-top bag and freeze for up to 3 months. Thaw overnight in the refrigerator and bake as directed.
Freezing baked cookies: Freeze them in a freezer-safe container or zip-top bag for up to 3 months. Avoid rolling them in powdered sugar as it will melt on thawing.

Recipe Tips
Even though this recipe is fairly simple, here are a few tips to ensure that you make a batch of the best melt-in-the-mouth Mexican wedding cookies.
Pecans: Please make sure the pecans are not rancid. They tend to turn rancid if not stored in proper conditions. Taste one before proceeding with the recipe.
Toasting pecans: I toasted the pecans on low heat in a skillet for 5 to 7 minutes. Do not burn them or they will make the cookies taste bitter. You can also toast them in a 350° F oven for 7 to 8 minutes, shaking the pan occasionally. Once cool, transfer to a food processor and pulse until coarsely ground.
Butter: Do not let the butter soften completely. The best way to test it is by pressing down the butter with your finger, it should leave a dent and not slide down into the butter. This helps if you want to bake the cookies right away without refrigerating the dough if you are in a hurry. The cookies will not spread on baking.
Chilling the dough is optional: If you follow the above tip on softened butter, you will not need to chill the dough. But I do suggest chilling if you have time to spare so that the cookies maintain their ball shape.
Let cool for 5 minutes on the baking sheet: The cookies are very fragile when they are out of the oven. Leave undisturbed for a minimum of 5 to 6 minutes to set before rolling in powdered sugar or they will crumble and fall apart.
Sugar coating for the cookies: I prefer to use a small bowl filled with powdered sugar to coat the warm cookies. Some people prefer using a zip-top bag to coat the cookies with sugar. This can be a hit-or-miss situation since the cookies are delicate when freshly baked, they can crumble and fall apart when you shake the bag.
Coat with powdered sugar twice: For a nice and even coating, roll the cookies twice in powdered sugar. Coating it the first time when the cookies are warm will help the sugar to adhere better and melt ever so slightly creating a sticky coating for the final coat. If you can’t get a nice coating, brush the cookies with a little melted butter and then try rolling them or dusting them with powdered sugar.
Vegan: Swap the butter with vegan butter.

Variations
- Chocolate: Add about 2 tablespoons of unsweetened natural cocoa powder along with the dry ingredients. You can also fold in about 1/4 cup of mini chocolate chips along with the pecans.
- Chocolate dipped: Dip the cookies in melted chocolate and set aside on a tray lined with parchment paper. Chill until the chocolate sets and hardens.
- Spiced cookies: You can flavor the cookie dough with 1/4 teaspoon of warm spices like cinnamon, nutmeg, cardamom, or a teaspoon of pumpkin pie spice blend, etc. For a subtle hint of heat, add about 1/4 teaspoon of chili powder!
- Other nuts: Traditional Mexican wedding cookies are made with pecans and I love to use them in this recipe. But you could also use other nuts like walnuts (the closest substitute), almonds, cashew nuts, hazelnuts, pistachios, Brazil nuts, macadamia nuts, etc.
- Citrus: You can add the zest of a lemon or orange for a burst of citrus flavor!

Can I omit the pecans?
If you are allergic to nuts or simply don’t like them, feel free to omit them. You don’t need to alter anything in the recipe.
Why did my cookies turn flat?
One possibility is that the dough may have been too soft and hence the butter melted quickly causing it to spread out on baking. You can refrigerate the dough balls for about 30 minutes to an hour until they firm up a bit before baking.
Another reason could be that the amount of flour in the cookie dough may have been less. For accurate results, I strongly suggest using a weighing scale. The quantity of flour can alter the outcome of these cookies. Too much flour will cause them to turn dense and dry and little flour will lead to flat cookies. If you don’t have a scale, be sure to use the spoon & level method of measuring flour.
Why are my cookies dry?
There are two possibilities here;
- You added too much flour
- Or you most likely overbaked them and hence they turned out dry. Once they start to turn golden brown around the edges, they are done!
Why is my dough crumbly?
This is more of a shortbread-style cookie recipe as opposed to the soft and chewy chocolate chip cookie recipe and the like.
To test, pinch a portion of the dough and squeeze it tightly in your fists, if it holds shape, it is good. If it is too dry and falling apart, add 1 teaspoon of milk or water at a time, and mix until it holds shape.
Can I make these cookies gluten-free?
A 1:1 substitute of gluten-free flour blend should work easily in this recipe. Though, I haven’t tried it. If you do, please let us know how it turned out.
Are Mexican wedding cookies and Russian tea cakes the same?
One look at the ingredients and you can tell that they are quite indistinguishable. I’m not sure about the origin of these cookies. But here’s what is mentioned on Wikipedia if you are interested.
A reason for the common name “Russian Tea Cake” or any connection to Russian cuisine is unknown. Some have speculated the recipes either derived from other Eastern European shortbread cookies, may have migrated to Mexico with European nuns, or may have been associated with cookies served beside Russian samovars (tea urns). By the 20th century, they were a part of wedding and Christmas, and Easter traditions in the U.S., known by their popular “Russian tea cake” or “Mexican wedding cookie” name.
You may also enjoy these Holiday cookies
Eggless thumbprint cookies
Shortbread cookies
Eggless Linzer cookies

Mexican Wedding Cookies (Polvorones)
Ingredients1x2x3x
- 1/2 cup unsalted butter, room temperature, 113 grams
- 1/4 cup confectioners’/powdered sugar, 35 grams, (plus 3/4 cup more sugar for rolling)
- 1 teaspoon vanilla extract
- 1/4 teaspoon almond extract
- 1 cup all-purpose flour, 143 grams
- 1/8 teaspoon kosher salt
- 1/2 cup toasted pecans, coarsely ground, 55 grams
Instructions
Cookie dough
- Add unsalted butter to a large mixing bowl. Place a fine mesh sieve and sift 1/4 cup of confectioners’ sugar. Beat at medium-high speed until light and fluffy, scraping down the sides and the bottom of the bowl in between.
- Add vanilla and almond extract and beat on medium speed until well combined.
- Place a fine mesh sieve over the bowl, and sift all-purpose flour and salt. Add coarsely ground toasted pecans.
- Beat on low speed or mix using a spatula, just until combined. Do not overmix!
- Cover with cling wrap and chill the dough for 30 minutes.
- Note: You can either refrigerate the dough at this stage or shape it into balls and refrigerate the baking tray with dough balls (whatever works for you!)
Shape dough and bake
- Preheat the oven to 350° F (180° C), and position a rack in the middle of the oven. Line a baking sheet with Silpat or parchment paper.
- Form dough into 1-inch balls (I used a tablespoon to form uniform-sized cookies) and place them about 2 inches apart on the prepared baking sheet.
- Bake for 15 to 18 minutes or until they turn golden brown around the edges. Every oven is different, so please keep an eye out!
- Allow the cookies to cool down for 5 minutes on the baking sheet.
Roll in powdered sugar
- Place sifted powdered sugar in a small bowl. Roll warm cookies in powdered sugar and place on a cooling rack to cool down completely.
- Once cooled to room temperature, roll the cookies a second time in powdered sugar.
Video
Notes
Nutrition

Mexican Wedding Cookies (Polvorones)
Ingredients
- 1/2 cup unsalted butter, room temperature, 113 grams
- 1/4 cup confectioners’/powdered sugar, 35 grams, (plus 3/4 cup more sugar for rolling)
- 1 teaspoon vanilla extract
- 1/4 teaspoon almond extract
- 1 cup all-purpose flour, 143 grams
- 1/8 teaspoon kosher salt
- 1/2 cup toasted pecans, coarsely ground, 55 grams
Instructions
Cookie dough
- Add unsalted butter to a large mixing bowl. Place a fine mesh sieve and sift 1/4 cup of confectioners’ sugar. Beat at medium-high speed until light and fluffy, scraping down the sides and the bottom of the bowl in between.
- Add vanilla and almond extract and beat on medium speed until well combined.
- Place a fine mesh sieve over the bowl, and sift all-purpose flour and salt. Add coarsely ground toasted pecans.
- Beat on low speed or mix using a spatula, just until combined. Do not overmix!
- Cover with cling wrap and chill the dough for 30 minutes.
- Note: You can either refrigerate the dough at this stage or shape it into balls and refrigerate the baking tray with dough balls (whatever works for you!)
Shape dough and bake
- Preheat the oven to 350° F (180° C), and position a rack in the middle of the oven. Line a baking sheet with Silpat or parchment paper.
- Form dough into 1-inch balls (I used a tablespoon to form uniform-sized cookies) and place them about 2 inches apart on the prepared baking sheet.
- Bake for 15 to 18 minutes or until they turn golden brown around the edges. Every oven is different, so please keep an eye out!
- Allow the cookies to cool down for 5 minutes on the baking sheet.
Roll in powdered sugar
- Place sifted powdered sugar in a small bowl. Roll warm cookies in powdered sugar and place on a cooling rack to cool down completely.
- Once cooled to room temperature, roll the cookies a second time in powdered sugar.
Video
Notes
Nutrition
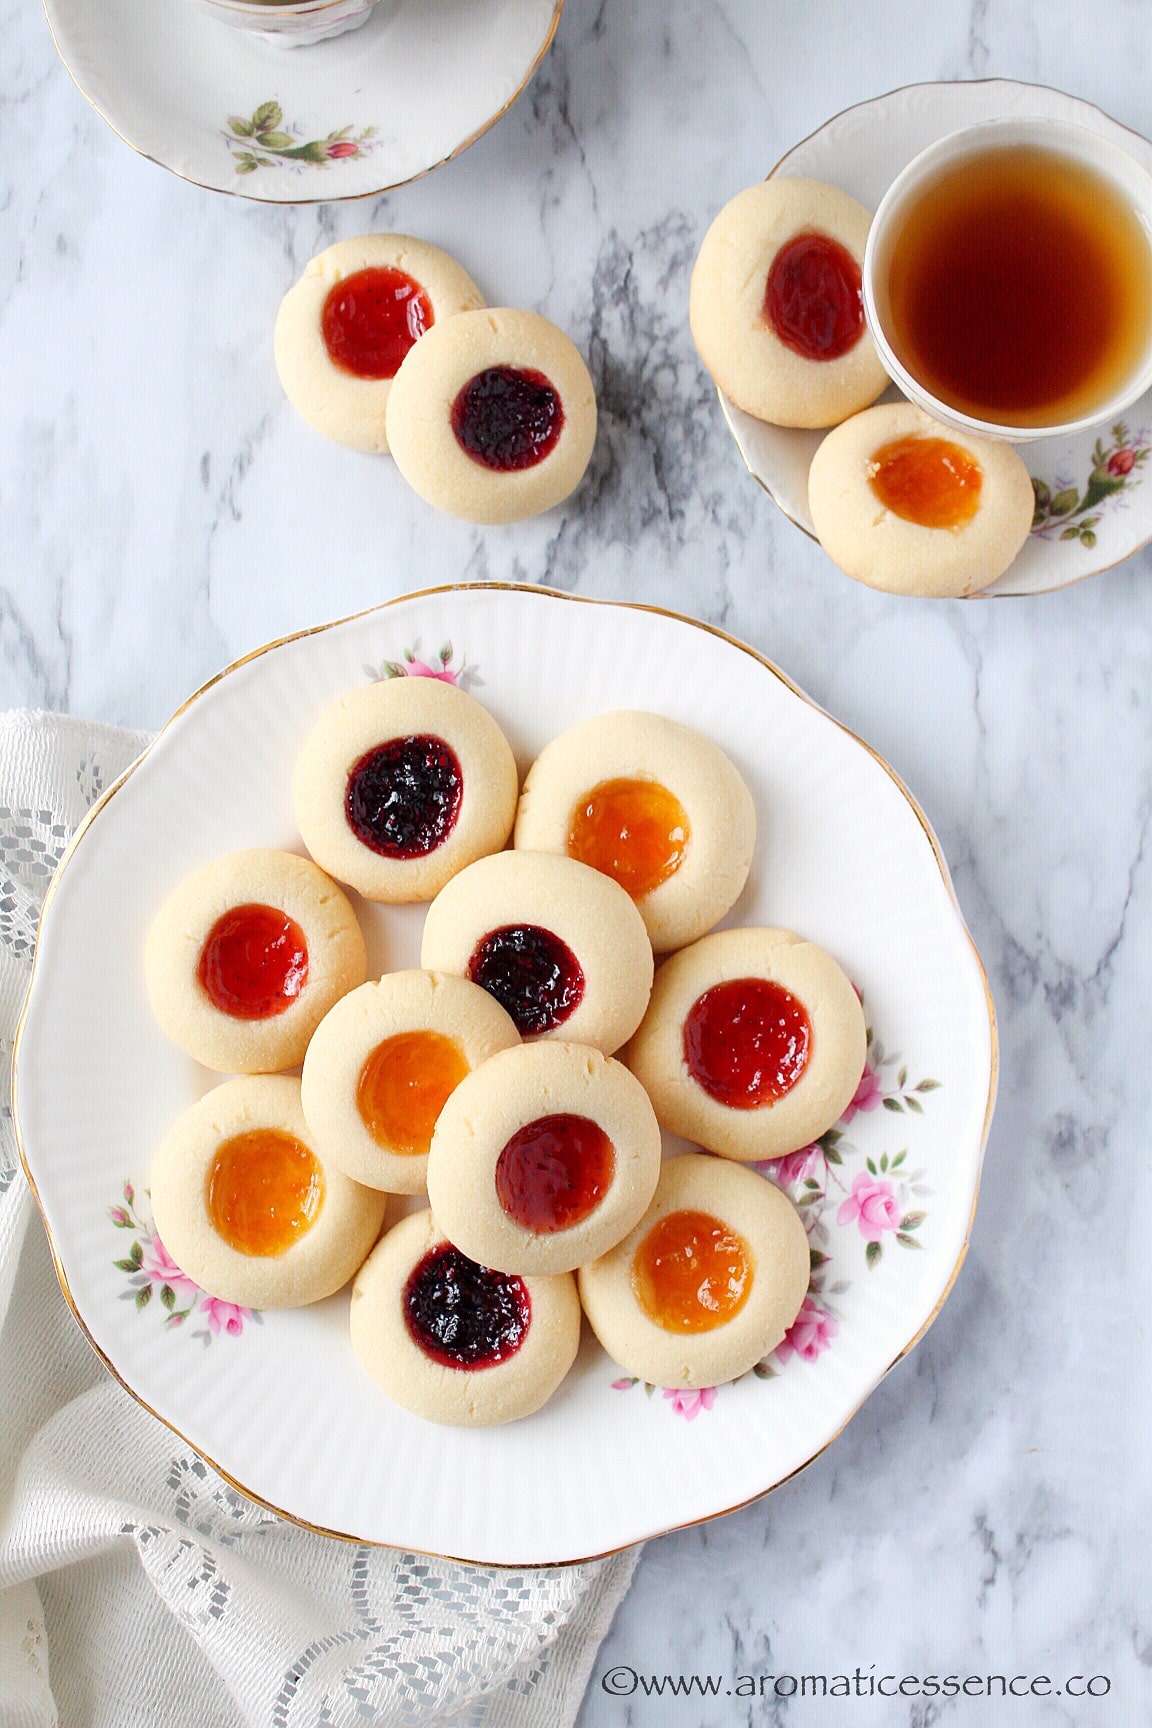
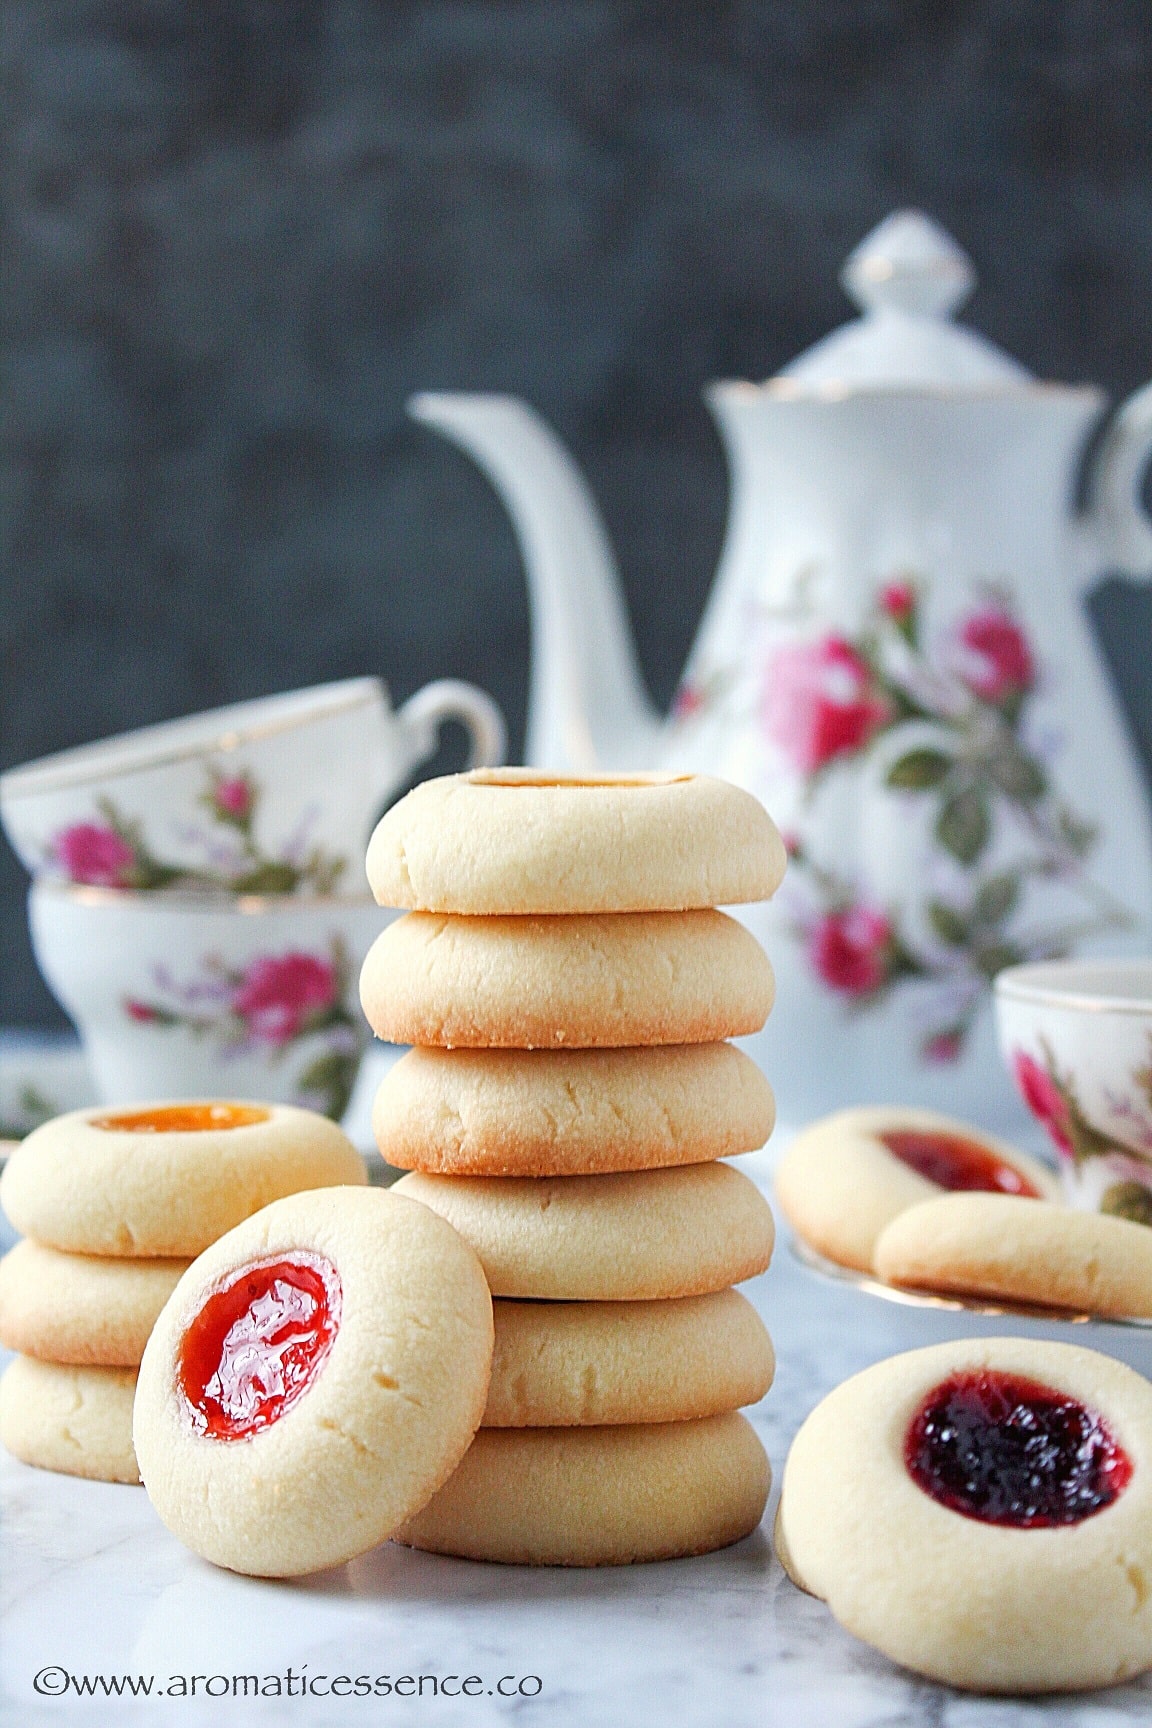
These Eggless thumbprint cookies | shortbread thumbprint cookies | shortbread jelly cookies are rich, buttery, tender, crumbly and melt in the mouth. Made with just five basic ingredients, these are easily adaptable to endless variations. Bake up a batch, or two or more this Holiday season coz they will be gone sooner than you think!

The Holidays are going to be upon us pretty soon. And I’ve made a list of goodies to share with you guys, starting with this classic Holiday favorite- Thumbprint Cookies, traditionally known as rosenmunnar , which are basically, buttery Swedish cookies with jam in the middle .
If you are looking for some easy Holiday cookies | Christmas cookie recipes , you have to add these awesome homemade thumbprint cookies to your cookie platter because –
- They are really easy , I promise. You just need about 15-20 mins of prep time for the cookie dough, shaping, and filling it with jam.
- There is no chilling or rolling involved . So no worries about the dough cracking and sticking and loads of other issues.
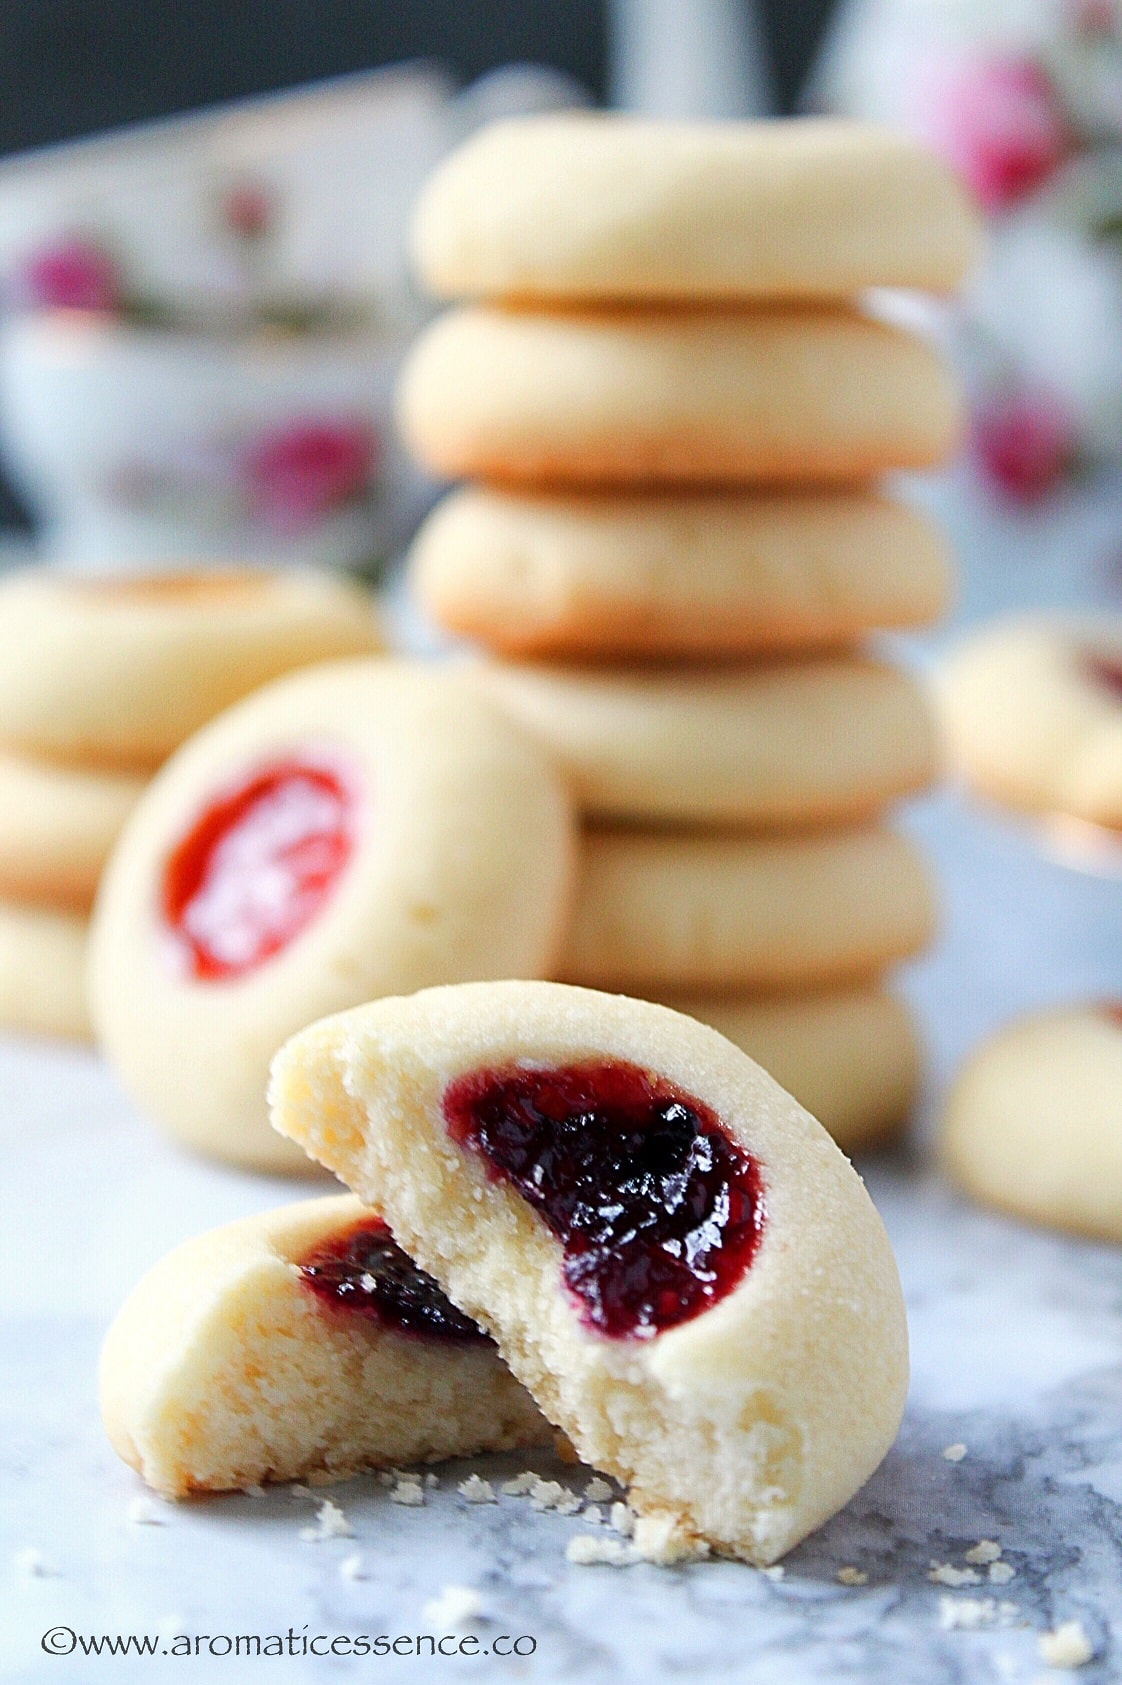
- Plus guys, look how pretty they look especially when you fill them with an assortment of jams or jellies.
- The taste – what it all comes down to after all. These jelly-filled cookies taste amazing, imagine taking a bite of these cookies, they are crisp yet so tender they literally crumble in your mouth with a little bit of the chewy texture from the sweet jam/jelly. These are little bites of heaven!
EGGLESS THUMBPRINT COOKIES INGREDIENTS | WHAT ARE THE INGREDIENTS FOR THUMBPRINT COOKIES?
These easy thumbprint cookies require just 5 basic ingredients , not counting salt and your flavoring agents.
- Butter, salted or unsalted both work in this recipe.
- Flour
- Cornstarch, an ingredient that makes these cookies really light and gives it an amazing crisp-tender texture. You can skip the cornstarch if you don’t have it and substitute it with flour instead. But if you do have some in your pantry, I highly recommend using it in this recipe.
- Confectioners sugar or powdered/icing sugar, another ingredient which also gives a nice, light texture to these eggless thumbprint cookies.
- Jams, jellies or preserves of choice. I’ve used an assortment of mixed berry, strawberry and mango jam. It did make for a stunning and gorgeous cookie platter!

These thumbprint cookies are adapted from my Karachi Fruit Biscuits, which is basically similar to a shortbread cookie. It is one of the most tried and tested recipes on my blog, and it has been loved by all those who have tried it. It is that one cookie dough that I always have at the back of my hand. I don’t even need to look at the recipe, because I have made it so many times that I’ve literally lost track of the number of cookies I’ve dished out using that failproof cookie dough recipe.
The best part is how versatile it is, either slice-and-bake, or roll it out and make cut-outs, or roll the dough into balls, flatten and make individual cookies. It always yields such amazing treats to enjoy sans the eggs. This is the best thumbprint cookie recipe ever, without the eggs, and after trying these out I’m sure you will agree with me on this one. You could also use this dough to make reindeer cookies and many other theme related shapes for any occasion.
You could also make vegan thumbprint cookies by using vegan butter instead.
I’ve flavored these jam thumbprints | jelly thumbprint cookies with pure vanilla extract to make a vanilla thumbprint cookie recipe . You can get creative here and create your own variations. Don’t know from where to start? I’ve given a list of variations further down and how to go about it. I bet you will enjoy those flavors too:)

VARIATIONS OF THUMBPRINT COOKIES USING THIS BASIC COOKIE DOUGH
These eggless thumbprint cookies are a gorgeous and lovely treat all year round. I don’t think they should be reserved only for the Holidays, they would be apt for any occasion. Here’s a very basic thumbprint cookie recipe along with numerous variations. So pick a few, and make some of these goodies to treat your family and friends this Holiday season.
Thumbprint cookies with kisses | Hershey thumbprint cookies: Press a Hershey’s kisses candy into each indentation as soon as you remove it from the oven.
Candy thumbprint cookies: Roll the cookie dough into 1-inch balls and press a candy melt in the center of each cookie. Bake for about 15 mins until edges are golden brown.
Red and green thumbprint cookies | Holiday thumbprint cookies: Press red or green candy melts or a halved candied cherry in the center of the cookies and bake as directed below. You can also roll the cookie dough in red or green sugar or use red and green sprinkles after filling the indentations with melted chocolate, Nutella etc
Caramel thumbprint cookies: Use about 10 caramels, such as Kraft’s. Melt the caramels with 1 tbsp heavy cream in the microwave or in a pot over medium-low heat until smooth. Take it off the heat and set aside. Once the caramel is warm, fill each indentation of the baked cookies up to the brim. You may sprinkle sea salt or nuts. Let it cool completely before serving.
Raspberry almond shortbread thumbprint cookies: Use 1/2 teaspoon almond extract instead of vanilla extract and use raspberry preserves or jelly to fill the indentations. Bake as directed in the recipe below.
Walnut or pecan thumbprint cookies: Use about 1/2 to 3/4 cup of crushed walnuts or pecans for this recipe. Roll the cookie dough ball in flax egg or egg white and then coat it by rolling the ball in crushed nuts. Place them on a baking sheet, make the indentation and proceed with the recipe.
Lemon raspberry thumbprint cookies: Add about 1/2 tbsp of lemon zest along with vanilla extract to the dough. Fill the indentations with raspberry preserves or jelly. Bake as directed in the recipe below.
Nutella thumbprint cookies: Fill the indentation with Nutella after the cookies have cooled down. Transfer the Nutella into a piping bag or ziplock bag (ends snipped off) and fill the cookies. Top with shredded coconut, sprinkles etc
Raspberry thumbprint cookies: Use raspberry jam/jelly to fill the indentation.
Blueberry thumbprint cookies: Use blueberry jam/jelly to fill the indentation.
Apricot thumbprint cookies: Use apricot preserves/jelly to fill the indentation.
Cinnamon thumbprint cookies: Swap 1/2 teaspoon of vanilla extract with the same amount of ground cinnamon.
Cardamom thumbprint cookies: Swap 1/2 teaspoon of vanilla extract with the same amount of green cardamom powder.
Thumbprint cookies with icing: For the icing, take 1/2 cup of powdered sugar and 1-2 teaspoons of milk, some lemon zest. Adjust the consistency of the icing with more milk if required. Combine everything and drizzle over the cookies once they cool down.
Chocolate thumbprint cookies: Use this recipe of chocolate cookies, and make thumbprint cookies instead.
HOW TO STORE THUMBPRINT COOKIES?
CAN YOU FREEZE THUMBPRINT COOKIES? IF YES, THEN HOW TO FREEZE THUMBPRINT COOKIES?
YOU MAY ALSO LIKE THESE EASY EGGLESS COOKIE RECIPES
STEP BY STEP INSTRUCTIONS TO MAKE EGGLESS THUMBPRINT COOKIES | BUTTER AND JAM THUMBPRINTS | SHORTBREAD BUTTER THUMBPRINT COOKIES
HOW TO MAKE EGGLESS THUMBPRINT COOKIES | JAM COOKIES? | THUMBPRINT BISCUITS RECIPE?
Eggless Thumbprint Cookies | Shortbread Thumbprint Cookies | Rosenmunnar
HOW TO STORE THUMBPRINT COOKIES?
Once you fill the thumbprints they are good for around 2 days at room temperature, as the moisture in the jams tends to soften them. If you plan on making these thumbprint cookies in advance, bake them without adding the jam. Store the baked thumbprints in an airtight container and fill in the jam only before serving. This way they will keep for longer.
CAN YOU FREEZE THUMBPRINT COOKIES? IF YES, THEN HOW TO FREEZE THUMBPRINT COOKIES?
Yes, you can definitely freeze the cookies. Simply follow these steps-
- Place all the thumbprints in a good airtight container such as Tupperware.
- Place parchment paper or wax paper between each layer of cookies so that they don’t stick together.
- Make sure the container is sealed tightly as you don’t want other odors passing on to the cookies.
- Place the container in a foil and then into a plastic bag to avoid as much air from getting into the container.
- If you have the time and patience you may also wrap each cookie individually in waxed paper and place them all in a container or zip lock bag.
- Thaw it overnight in the refrigerator or at room temperature for about 30 mins before serving. You can freeze them with or without the jam.
- Eggless Bourbon biscuits
- Eggless badam pista biscuits, Karachi bakery style
- Coconut cookies
- Nankhatai (Indian shortbread cookies)
- Linzer cookies
STEP BY STEP INSTRUCTIONS TO MAKE EGGLESS THUMBPRINT COOKIES | BUTTER AND JAM THUMBPRINTS | SHORTBREAD BUTTER THUMBPRINT COOKIES
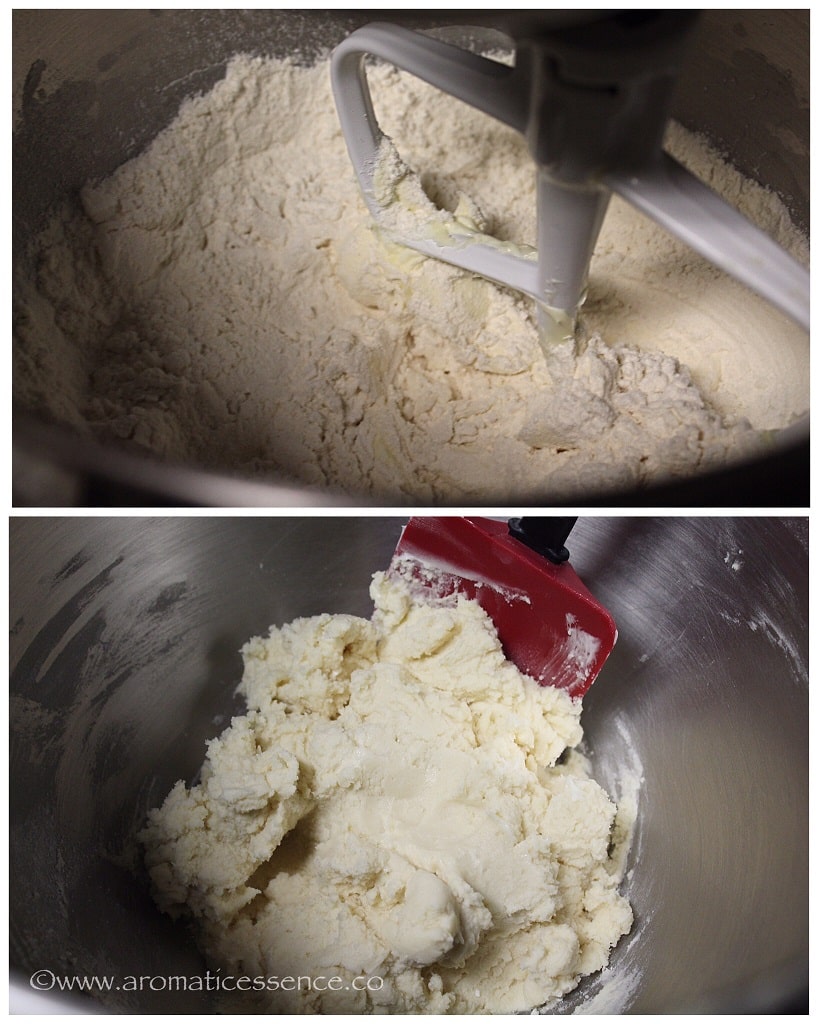
1.Line a baking sheet with Silpat or parchment paper. Sift the flour, cornstarch, and salt in a large mixing bowl.

2.Place butter in the bowl of your stand mixer (you can use your hand mixer or a whisk too), sift in powdered sugar, beat on low heat initially, until the powdered sugar is mixed with the butter, then increase the speed to medium and beat until pale, light and creamy, scraping down the bowl in between.

3.Add vanilla extract and mix well.
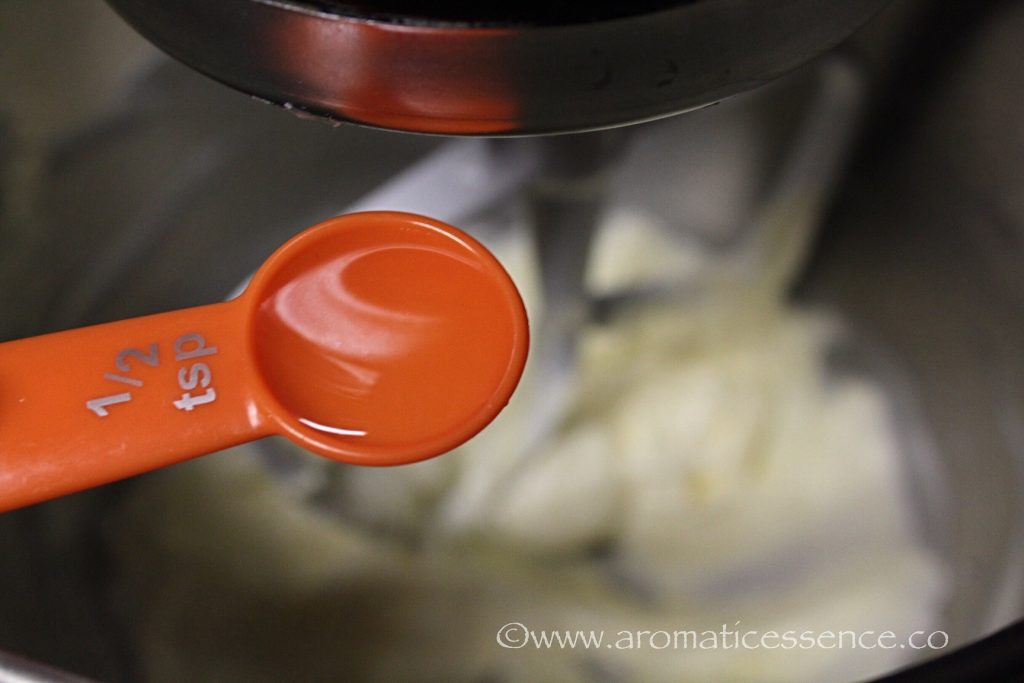
4.Now, switch to the lowest speed and add the dry ingredients in two parts, scraping down the bowl in between until well mixed. Gently bring the dough together. Do not knead. If at all the dough is dry, sprinkle few teaspoons of milk at a time, do not add too much. I didn’t require any milk. The dough should be soft.
5.Preheat the oven to 350 degrees F/180 degrees C. Shape the dough into 1 inch balls. I used a tablespoon and half to measure out the dough and form the balls, just so they are all uniform. Place the balls on the baking tray, about 2-inches apart.

6.Make an indentation in the center of each cookie gently, using your thumb or the back of a rounded 1/4 teaspoon. If the edges crack, simply fix it with your fingers. Or just leave it as it is, it doesn’t really matter.

7.Fill the centers of the cookies with jam right up to the brim, about 1/4 teaspoon.

8.Bake for 13-15 minutes or just until the edges are golden brown. Let it stand on the cookie sheet for about a minute, then transfer to a cooling rack and cool completely.
NOTE
- The butter should be soft but not so soft that it is mushy. If you push the butter with your finger, it should slide with some resistance, leaving a dent behind. That is the correct consistency of the butter to be used in this recipe. Leave it for no more than 1 hour on the countertop to reach this stage. When the butter is too soft, you may end up using more flour as the dough might be sticky. Simply avoid this situation by ensuring the butter is not too soft.
- If the jam is too firm, transfer it to a microwave safe bowl and microwave for about 10 seconds or transfer to a heavy bottomed pot over medium-low heat, stir it well to loosen it and fill the cookies. Make sure it is not very hot.
- If it is too hot and humid where you live, you may want to refrigerate the cookies after making the indentation. Doing so will prevent the cookies from spreading while baking. Add the jam after the refrigerating the cookies and bake as directed.
HOW TO MAKE EGGLESS THUMBPRINT COOKIES | JAM COOKIES? | THUMBPRINT BISCUITS RECIPE?

Eggless Thumbprint Cookies | Shortbread Thumbprint Cookies | Rosenmunnar
Ingredients1x2x3x
Measuring cup used, 1 cup = 250 ml, 1 tsp = 5 ml
- 1 cup all-purpose flour, spooned and leveled
- 2 tbsp cornstarch
- 1/2 cup unsalted butter softened (leave the butter on the counter top, until soft)
- 1/2 cup Confectioner’s sugar/powdered sugar, you may even reduce it to 1/3 cup if you prefer less sweeter cookies
- 1/2 tsp vanilla extract
- 1/4 tsp salt, skip if using salted butter
- 1/4 to 1/3 cup jam/jelly/preserves, of choice
Instructions
- Line a baking sheet with Silpat or parchment paper. Sift the flour, cornstarch, and salt in a large mixing bowl.
- Place butter in the bowl of your stand mixer (you can use your hand mixer or a whisk too), sift in powdered sugar, beat on low heat initially, until the powdered sugar is mixed with the butter, then increase the speed to medium and beat until pale, light and creamy, scraping down the bowl in between.
- Add vanilla extract and mix well.
- Now, switch to the lowest speed and add the dry ingredients in two parts, scraping down the bowl in between until well mixed. Gently bring the dough together. Do not knead. If at all the dough is dry, sprinkle few teaspoons of milk at a time, do not add too much. I didn’t require any milk. The dough should be soft.
- Preheat the oven to 350 degrees F/180 degrees C. Shape the dough into 1 inch balls. I used a tablespoon and half to measure out the dough and form the balls, just so they are all uniform. Place the balls on the baking tray, about 2-inches apart.
- Make an indentation in the center of each cookie gently, using your thumb or the back of a rounded 1/4 teaspoon. If the edges crack, simply fix it with your fingers. Or just leave it as it is, it doesn’t really matter.
- Fill the centers of the cookies with jam right up to the brim, about 1/4 teaspoon.
- Bake for 13-15 minutes or just until the edges are golden brown. Let it stand on the cookie sheet for about a minute, then transfer to a cooling rack and cool completely.
Notes
- The butter should be soft but not so soft that it is mushy. If you push the butter with your finger, it should slide with some resistance, leaving a dent behind. That is the correct consistency of the butter to be used in this recipe. Leave it for no more than 1 hour on the countertop to reach this stage. When the butter is too soft, you may end up using more flour as the dough might be sticky. Simply avoid this situation by ensuring the butter is not too soft.
- If the jam is too firm, transfer it to a microwave safe bowl and microwave for about 10 seconds or transfer to a heavy bottomed pot over medium-low heat, stir it well to loosen it and fill the cookies. Make sure it is not very hot.
- If it is too hot and humid where you live, you may want to refrigerate the cookies after making the indentation. Doing so will prevent the cookies from spreading while baking. Add the jam after the refrigerating the cookies and bake as directed.

I hope you guys enjoyed this easy thumbprint cookie recipe. I would love to hear from you if you try them out.
Please feel free to share your feedback with photos and suggestions to me at aromaticessence77@gmail.com
You can also follow me on :
Facebook @ Aromaticessence
Pinterest @ Aromatic Essence
Instagram @ aromatic_essence77
Twitter @ freda_dias
Regards,
Freda
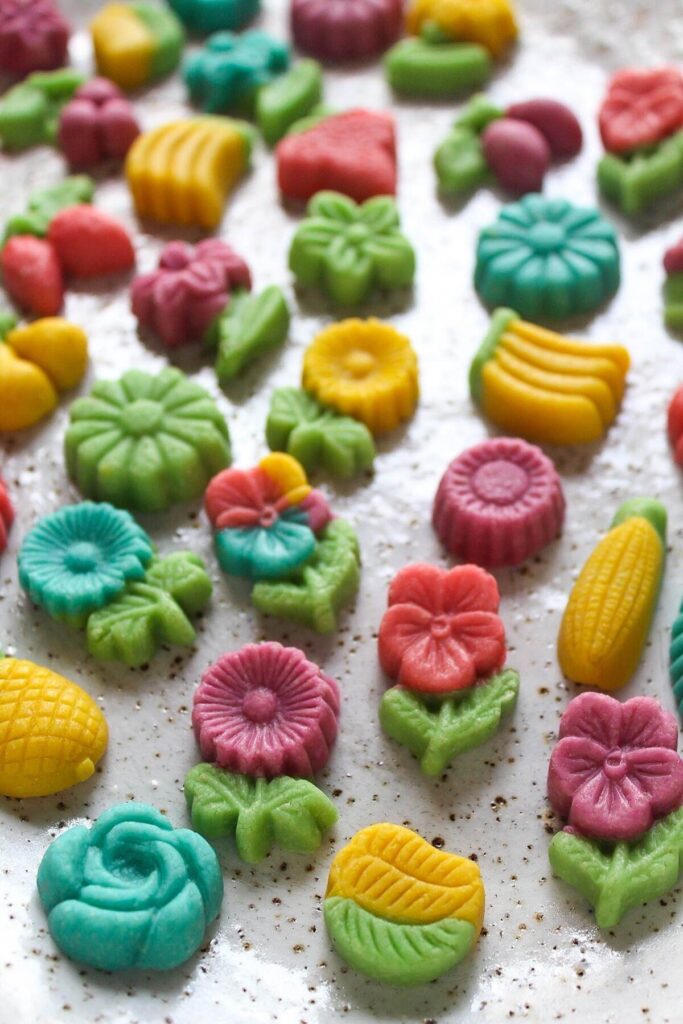
Marzipan is a popular sweet prepared during Christmas in most Goan and East Indian homes! Learn how to make this delicious, no-cook, and eggless marzipan, a much easier alternative to the traditional recipe!

Marzipan and milk cream were the two sweets that were always prepared in our home for Christmas for as long as I can remember. Most of the other sweets were store-bought. Mom had a busy working schedule, so we skipped making most of the sweets, except for these two.
These beautiful and dainty, colorful bite-sized treats were quite a temptation! At least a quarter of a batch would vanish while preparing them, and my Mom had to somehow tuck away those jars of marzipan somewhere safe until Christmas!
That’s my marzipan story and guess what? It is my children’s story now as well. Circle of life! I totally empathize with my Mom now.
- What’s marzipan anyway?
- Ingredients needed
- How To Make Goan Marzipan (eggless) – Step-By-Step-Process
- Storage instructions
- Recipe Tips
- Frequently Asked Questions
- You may also enjoy these Goan Christmas sweets
- Marzipan Recipe (Eggless & No-Cook)
What’s marzipan anyway?
Marzipan (pronounced as mah-zuh-pan) is a sweet paste made from ground almonds, sugar, and egg whites. It is also known as almond candy dough.
It is often colored and molded into different shapes, or used to cover traditional Christmas fruit cakes, wedding cakes, Battenberg cakes, etc. The cake is covered with a layer of marzipan and then with a layer of fondant.
It is also made into a sweet/confection/candy and sometimes coated with chocolate to make marzipan chocolate.

Ingredients needed
Marzipan is popular in most European countries. It was introduced to Goa through the Portuguese since it was a former Portuguese colony! But unlike the European version that uses almond meal, the Goan version is made with cashew nuts.
Goa is known for its premium quality cashew nuts, also they are slightly inexpensive as compared to almonds. Hence the recipe has been adapted over time by people to use what was available locally!
The traditional Goan version of making this confection is a laborious process and then shaping the hot dough into these pretty shapes is another task altogether.
The ingredients that go into the traditional Goan recipe are,
- Cashew nuts
- Egg whites
- Sugar
- Rose water or almond extract
Mum learned a simpler way of making this from her friend Flavia. This is a no-cook and egg-free marzipan recipe. You will need the following ingredients;
Cashew nuts: Make sure you use unsalted cashew nuts. I prefer using broken ones rather than whole cashew nuts as it’s easier to grind.
Icing sugar: Also known as confectioners’ sugar or powdered sugar. Traditionally, the quantity of sugar used is twice that of cashews. But I find a 1:1 ratio just perfect.
Almond extract: To flavor the marzipan.
Warm water: To bring everything together!
Edible food colors: This is optional, but it makes them look really vibrant and festive! You may choose natural food colors too.

Since this recipe contains no eggs, it is absolutely suitable for vegetarians or anyone who is allergic to eggs.
This is a great activity to get your kids involved in. So without further ado, let’s make some Christmas marzipan 🙂
How To Make Goan Marzipan (eggless) – Step-By-Step-Process
Step 1: Marzipan dough
Grind 200 grams (1.5 cups) of cashews to a fine powder, in batches. I ground 1.5 cups of cashew nuts in 3 batches, by pulsing them 8-10 times. ( Photos 1 and 2 )
Sift it through a fine mesh sieve by pressing the powder with the back of a spoon. ( Photos 3 and 4 )
Add 200 grams of icing sugar (1 & 1/3 cups + 2 tablespoons) to the ground cashew nut powder and mix until well incorporated. ( Photos 5 and 6 )
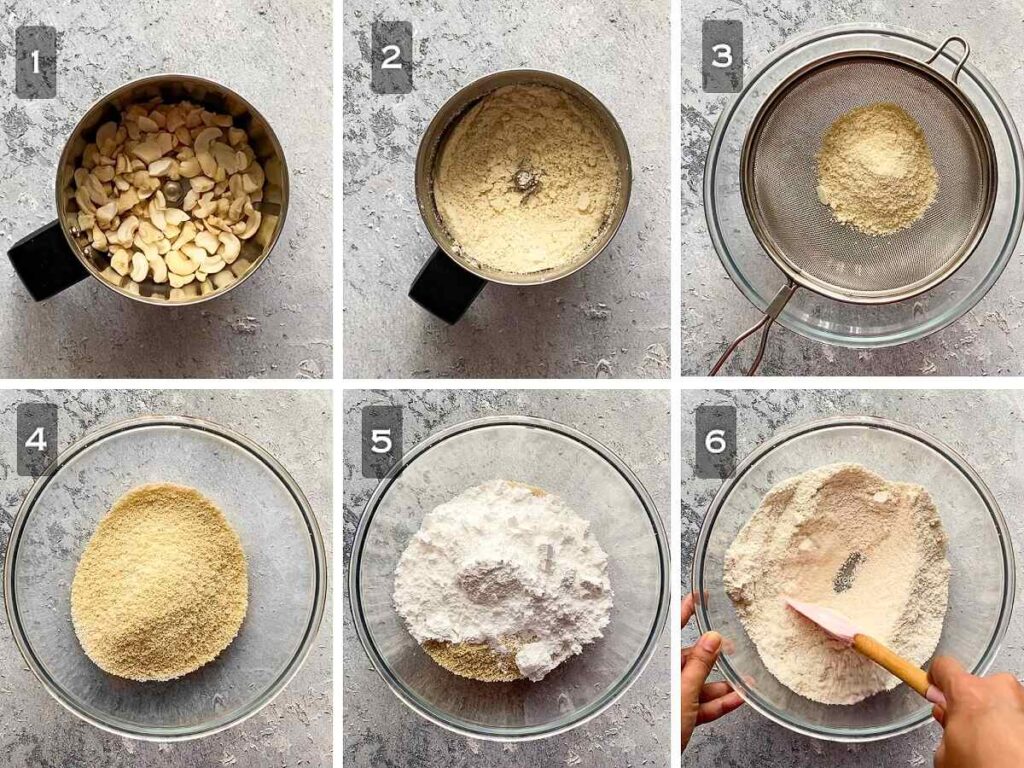
Add 1/2 teaspoon of almond extract and 2-3 teaspoons of warm water. Mix well using a spatula. ( Photos 7 to 9 )
Add more warm water, a teaspoon at a time, and bring the dough together using your hands. You will need about 2 to 3 tablespoons (30 to 45 ml) of warm water approximately. ( Photos 10 to 12 )
Pro tip: Avoid kneading the dough with too much pressure as that can cause the cashews to release excess oil.

Step 2: Divide the dough into equal parts and add color to each
Divide the dough according to the food colors you need. ( Photo 13 )
Flatten a portion of the dough using your fingers, and add about 1 drop of food color. (I’ve used gel colors and one drop was enough. Add as needed depending on the type of food color you use) ( Photo 14 )
Bring the edges of the dough towards the center and then knead to mix the color evenly. ( Photos 15 to 17 )
Repeat the same process to color the rest of the dough. ( Photo 18 )
Pro tip: You may leave one portion of the dough uncolored if you need to adjust the color of any dough, just in case it gets too dark for your liking!

Step 3: Shape and unmold
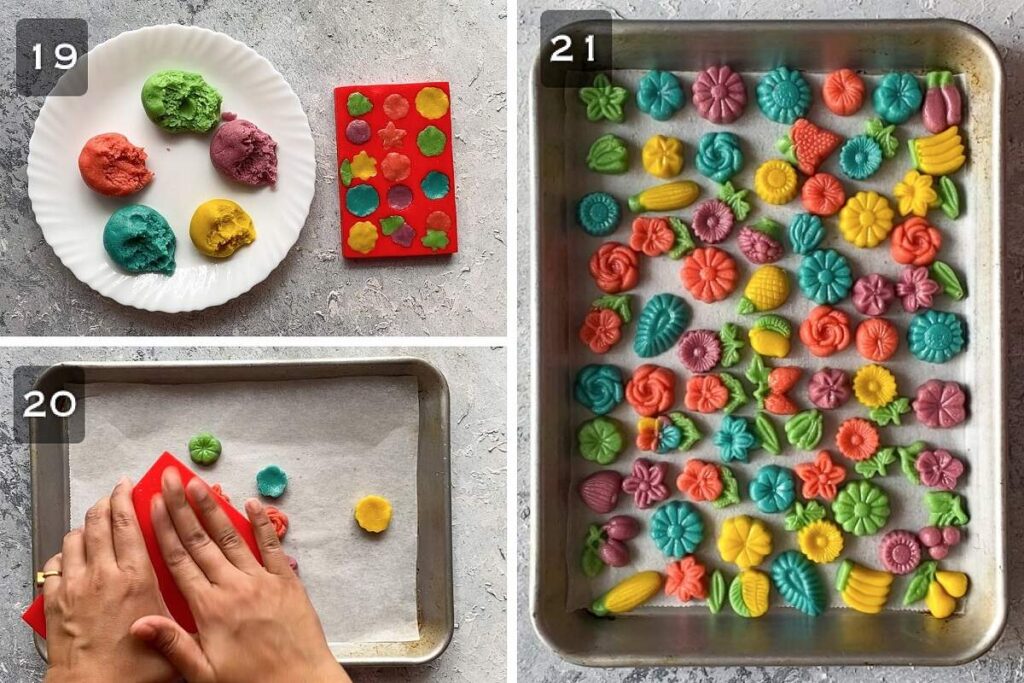
Once your dough is ready, pinch a portion of the dough and shape them by filling the molds and pressing gently. Remove any excess dough. ( Photo 19 )
Repeat with the rest of the dough.
Gently pat the back of the mold to release the marzipan. If using the hard silicon molds, you may need to twist it a bit to unmold it. ( Photo 20 )
Transfer to a tray lined with parchment paper or kitchen paper towel (if cashews have released oil while kneading, the paper towel will absorb excess oil better), and let it air dry for 6-8 hours/overnight to a day. ( Photo 21 )
Do not over-dry the marzipan or it will become hard.
Storage instructions
Allow the marzipan to dry up completely, and transfer it to an airtight container.
They keep well for 1 to 2 weeks at room temperature and then they will begin to dry out. For a longer shelf life, you may refrigerate them in an airtight container for up to a month or freeze them for up to 3 months. Bring to room temperature before serving.
Recipe Tips
If making a large batch: I suggest kneading the dough in batches as it is easier to work with. Also, the cashews won’t release as much oil while kneading.
Cashew nuts: If the cashews have lost their crunch, you can revive them by dry roasting them in a skillet on low heat, stirring frequently. Do not brown them! Set aside on a plate and let them cool completely. This will also help in grinding them to a fine powder and not a paste.
Grind the cashews in batches: It’s best to grind the cashews in batches using the pulse setting of the mixer grinder to get a fine powder. If you grind the cashews in one go, they will release oil and you will end up with cashew butter!
Sweetness: The sweetness of the marzipan is just right for us with these proportions. If you prefer sweeter marzipan, you may increase the quantity of icing sugar.
Sift the icing sugar first: I suggest sifting the icing sugar and setting it aside first because the sieve tends to get slightly sticky sometimes while sifting the cashew, especially towards the end of the last batch of ground cashews.
Do not skip sifting the cashew powder: This step is absolutely essential for that smooth and creamy finish. If you skip this step you will see white flecks of cashew nut pieces and it doesn’t look appealing nor does it give your that smooth, creamy, and melt-in-the-mouth texture!
Store-bought cashew flour: If you have access to readymade finely ground cashew flour, feel free to use that instead. Taste test to ensure that it’s good. I still suggest sifting the cashew flour.
If using whole almonds: You can use almonds in place of cashew nuts, but you have the blanch the almonds, skin them, and let them dry completely. Then powder them, and finally, sift and use in the recipe.
If using readymade almond powder: Make sure you remember to sift it, or else the dough will appear grainy.
If using rose water: You can add 1/2 teaspoon of rose essence to the mixture instead of almond essence. Alternatively, you can replace 1 tablespoon of warm water used for the dough with 1 tablespoon of rose water instead
Add water gradually to form the dough: You need very little water to make this dough. Adding too much in one go will make it super sticky! To troubleshoot you will need to add more of both cashew powder and icing sugar in equal proportions.

What is the difference between marzipan and almond paste?
- Although Marzipan and almond paste have the same ingredients, the ratio of almonds to sugar differs in both, almond paste has lesser sugar as compared to marzipan.
- Marzipan is smooth and firm whereas almond paste is softer.
- Marzipan is mainly used to make candy/confections or sweets or in lieu of fondant for cakes and other baked goods, basically, you can eat it as such! Almond paste on the other hand is less sweet and slightly coarse and is used as an ingredient for baked goods.
What does marzipan taste like?
It has a firm exterior, but it is really soft and creamy, and just melts in your mouth. It is sweet and has a strong, nutty almond flavor.
Can I make it without mold?
Yes, of course, you can still make some! When molds were not available, people made marzipan fruits shaped by hand.
You can use the uncolored dough, make fruit shapes, and paint with edible food color or make shapes using already colored dough.
You can also make small balls of colored dough and stick a plastic leaf to make quick marzipan fruits. These plastic leaves are commonly available in most stores around Christmas in Mumbai and I’m sure you’d find them in other places as well.
You can also roll out the dough between two parchment papers, and make fun shapes using cookie cutters. FYI, I’ve used this same recipe to make kaju katli . Do have a look at the post if you need stepwise pictorials.
How healthy is it?
Even though it is made with cashew nuts which are a good source of fiber, minerals, protein, and good fats, marzipan cannot be considered a healthy food. Since it is also packed with sugar, this is best eaten in moderation!
You may also enjoy these Goan Christmas sweets
- Bebinca
- Guava cheese
- Milk Cream
- Coconut Toffee
- Baath cake
- Doce de grao (chana dal fudge)
- Karanji/Neureos
- Kormolas
- Shankapali
- Kalkal
- Walnut fudge
- Coconut ice
- Christmas fruit cake
- Date rolls
I would love to hear from you! Please be sure to share your feedback and/or give this recipe a rating in the comment below. Your reviews help others know the recipe better too.
You can also FOLLOW me on Facebook , Pinterest, Instagram & Twitter
Editor’s note: This recipe was originally published on Dec 7, 2016. It has been republished and updated with new images, video, and content on Dec 19, 2022. The recipe is the same, I’ve just scaled back on the quantities. You can easily scale up this recipe according to your desired yield.

Marzipan Recipe (Eggless & No-Cook)
Ingredients1x2x3x
- 200 grams cashew nuts, unsalted, about 1.5 cups
- 200 grams icing sugar, sifted, about 1 & 1/3 cups + 2 tablespoons
- 1/2 teaspoon almond extract
- 2 to 3 tablespoons warm water, or as needed
- Edible food colors, as needed
Instructions
Marzipan dough
- Grind the cashews to a fine powder, in batches. I ground 1.5 cups of cashew nuts in 3 batches, by pulsing them 8-10 times.
- Sift it through a fine mesh sieve by pressing the powder with the back of a spoon.
- Add icing sugar to the ground cashew nut powder and mix until well incorporated.
- Add almond extract and 2-3 teaspoons of warm water. Mix well using a spatula.
- Add more warm water, a teaspoon at a time, and bring the dough together using your hands. You will need about 2 to 3 tablespoons (30 to 45 ml) of warm water approximately.
- Pro tip: Avoid kneading the dough with too much pressure as that can cause the cashews to release excess oil.
Divide the dough into equal parts and add color to each
- Divide the dough according to the food colors you need. Flatten a portion of the dough using your fingers, and add about 1 drop of food color. (I’ve used gel colors and one drop was enough. Add as needed depending on the type of food color you use)
- Bring the edges of the dough towards the center and then knead to mix the color evenly.
- Repeat the same process to color the rest of the dough.
- Pro tip: You may leave one portion of the dough uncolored if you need to adjust the color of any dough, just in case it gets too dark for your liking!
Shape and unmold
- Once your dough is ready, pinch a portion of the dough and shape them by filling the molds and pressing gently. Remove any excess dough.
- Repeat with the rest of the dough.
- Gently pat the back of the mold to release the marzipan. If using the hard silicon molds, you may need to twist it a bit to unmold the marzipan.
- Transfer to a tray lined with parchment paper or kitchen paper towel (if cashews have released oil while kneading, the paper towel will absorb excess oil better), and let it air dry for 6-8 hours/overnight to a day.
- Do not over-dry the marzipan or it will become hard.
