This mango kheer is a delicious, Indian-style rice pudding flavored with sweet and aromatic mango pulp. You need a few ingredients to make this creamy and yummy mango rice pudding.
I love adding a seasonal twist to traditional Indian desserts. Since mangoes are in season, I decided to add some tropical twist to one of my favorite Indian desserts, kheer!
Kheer is made with the most basic ingredients, yet the end result is nothing short of phenomenal. And this mango rice kheer turned out to be so good that it had to be shared on the blog.
This recipe for mango kheer is simple, although the stovetop version is time-consuming. It is not laborious per se, nor do you need elbow grease, it’s just the slow cooking process that takes time.
You can even make mango payasam or mango vermicelli kheer, but I’ll leave that post for another time.
With this mango rice kheer, I am winding up my share of mango posts. I’m just going to enjoy them as such in the next few weeks or in the form of a milkshake for the kiddos before they disappear from the market.
I’m definitely going to make a big batch of mango jam so that I can still continue enjoying mangoes in the coming months 😀
If you are not up to making jam, then simply freeze fresh mango pulp or mango chunks to enjoy in your favorite mango recipes 🙂
If you love mangoes as much as we do, do make the most of the seasonal mangoes by giving this delicious kheer recipe a go!
- You will love this recipe because it is
- Ingredients needed for mango rice pudding
- How to make mango kheer – Step by step process
- Serving suggestions
- My top tips for this recipe
- Frequently asked questions
- You may also enjoy these mango recipes
- Mango Kheer | Indian Mango Rice Pudding
You will love this recipe because it is
✔ So creamy and delicious!
✔ No eggs in the Indian version of rice pudding.
✔ Made with simple ingredients.
✔ You don’t need extra ingredients like condensed milk.
✔ One of the best desserts to be served for parties since it can be made ahead.
✔ Has a beautiful mango flavor that is not very overpowering.
✔ Looks gorgeous with its lovely golden hue
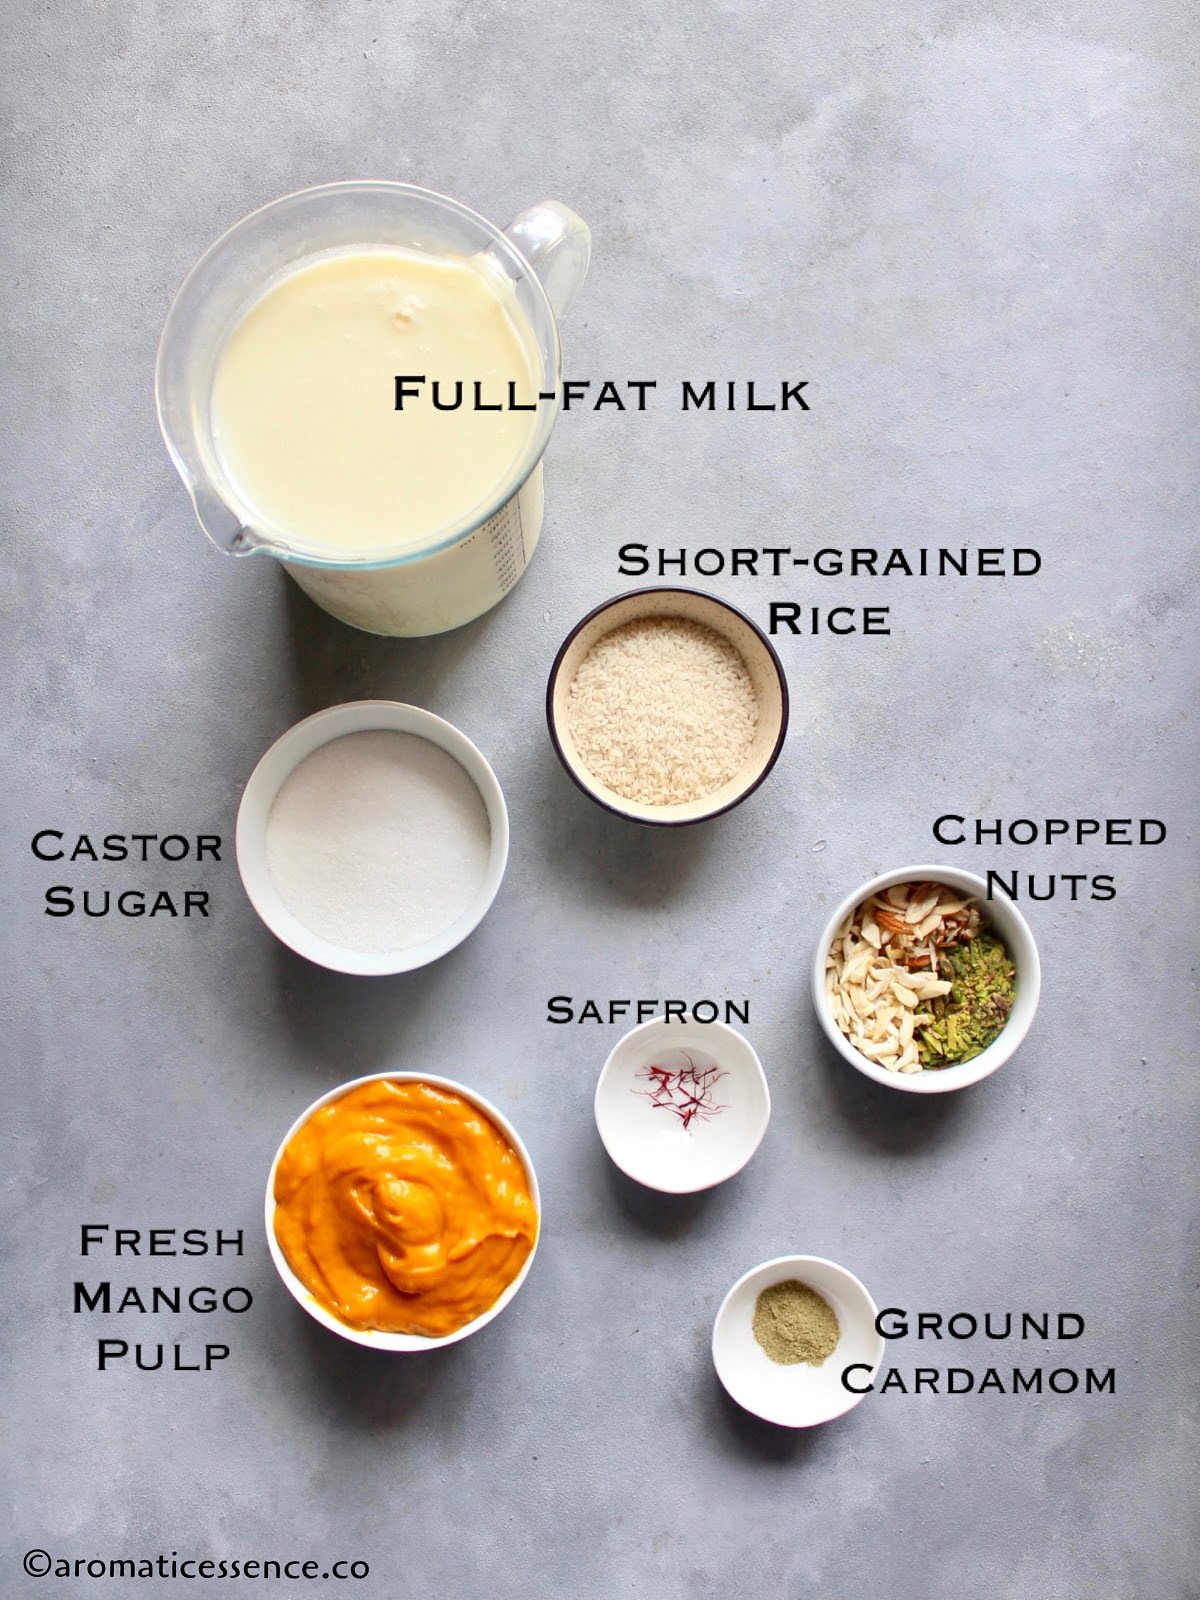
Ingredients needed for mango rice pudding
Milk: Use full-fat/whole milk always when it comes to preparing kheer!
Rice: I’ve used gobindobhog rice, which is a fragrant, short-grained variety of rice.
Sugar: I’ve used castor sugar, I prefer using it for my dessert recipes. You can use regular sugar as well. Honey, agave nectar, maple syrup are some other alternatives to sweeten the kheer.
Mangoes: Fresh alphonso mango pulp!
Nuts: A mix of almond, cashew nuts, and pistachios. They add a nice texture contrast to the creamy and rich kheer.
Saffron and cardamom: The classic spices to flavor Indian desserts. It just makes sense to include them here as well. They add a touch of exotic flavors that pair well with mangoes!
How to make mango kheer – Step by step process
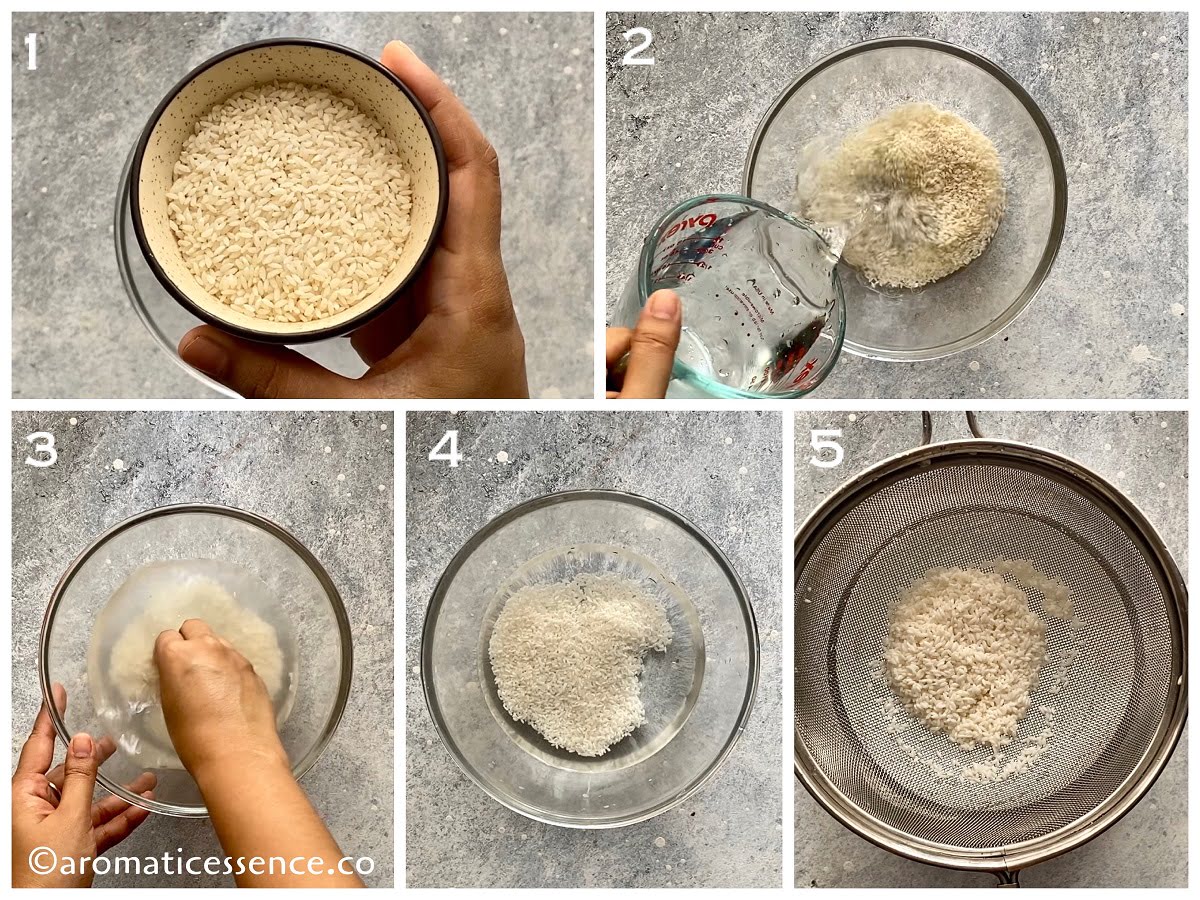
Step 1: Soak the rice
Rinse 50 grams of short-grained rice until the water runs clear. Soak the rice for 30 minutes and set it aside. ( Photos 1 to 5 )
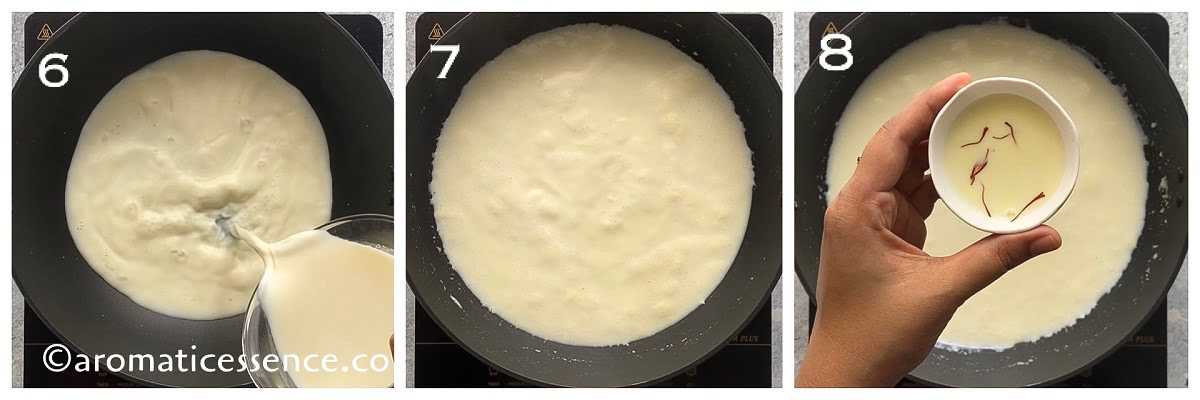
Step 2: Bring milk to a boil
Add 1-liter milk in a heavy-bottomed pot, bring to boil over medium heat. Add 2 tablespoons of hot milk to saffron in a small bowl and set it aside. ( Photos 6 to 8 )
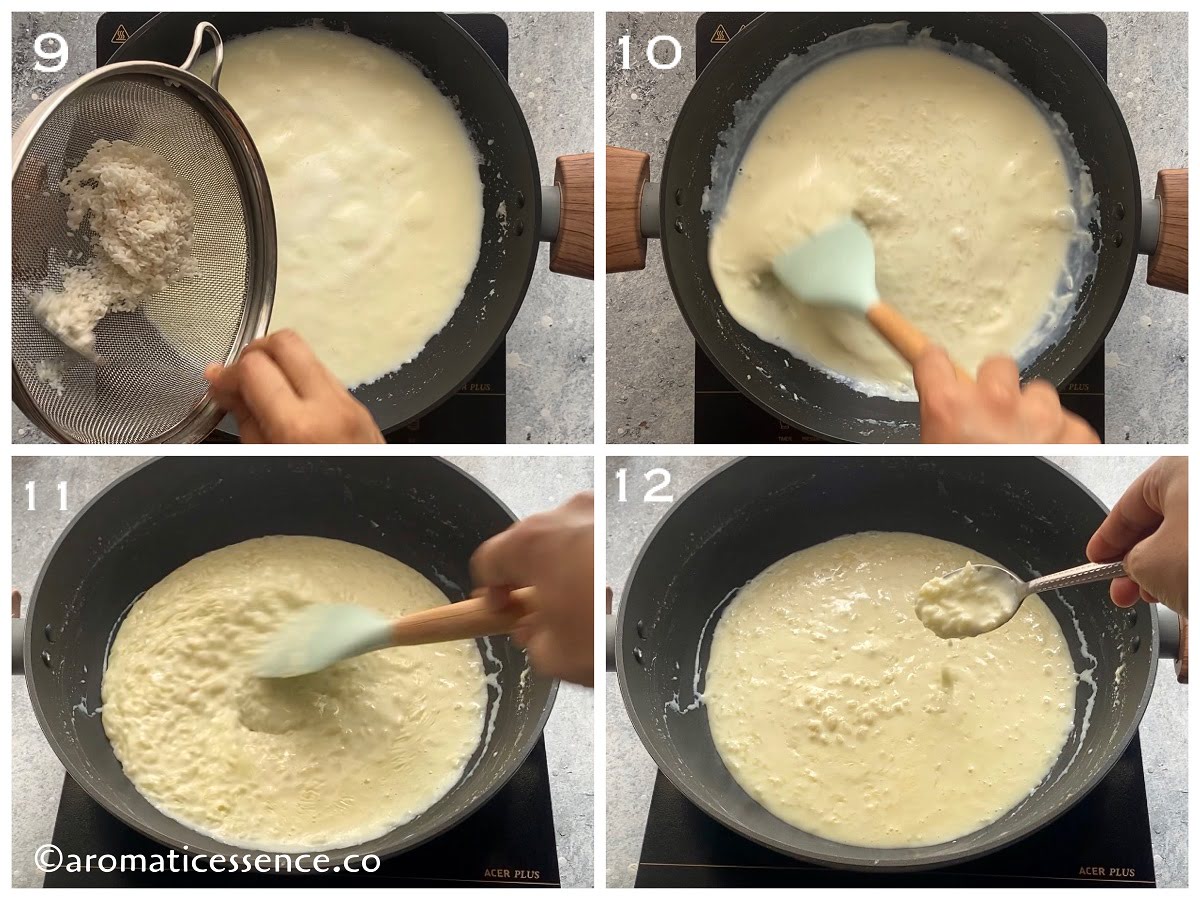
Step 3: Add drained rice and cook until thickened
After it comes to a boil, add the drained rice, mix well. ( Photos 9 and 10 )
Cook over medium-low heat until the rice cooks completely and the milk thickens about 25 to 30 minutes. ( Photos 11 and 12 )
Stir occasionally every 2-3 minutes to prevent the milk from sticking and burning at the bottom of the pan.
To check for the correct consistency: If you drop some mixture from a spoon, the rice and milk should fall in one stream and not separately.
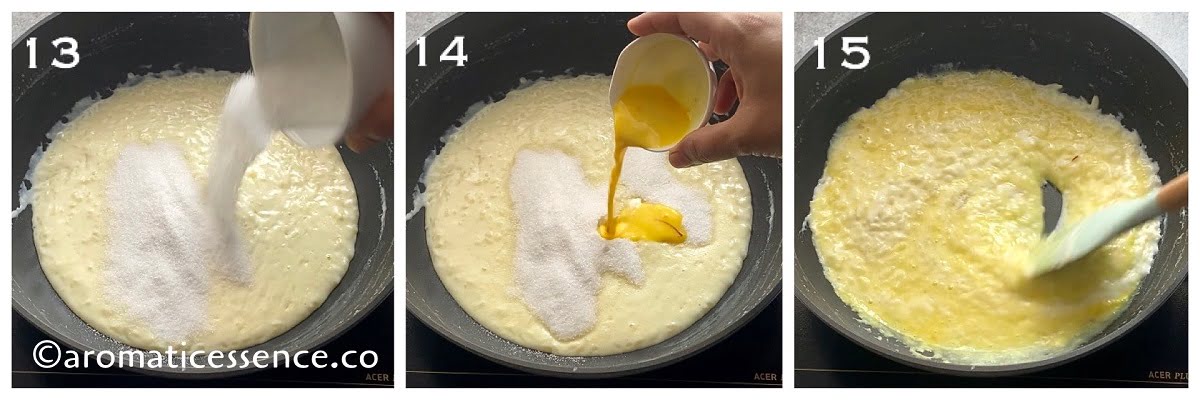
Step 4: Add sugar and remaining ingredients
Add 100 grams sugar and saffron-infused milk, continue cooking for another 5 minutes over medium-low heat. ( Photos 13 to 15 )
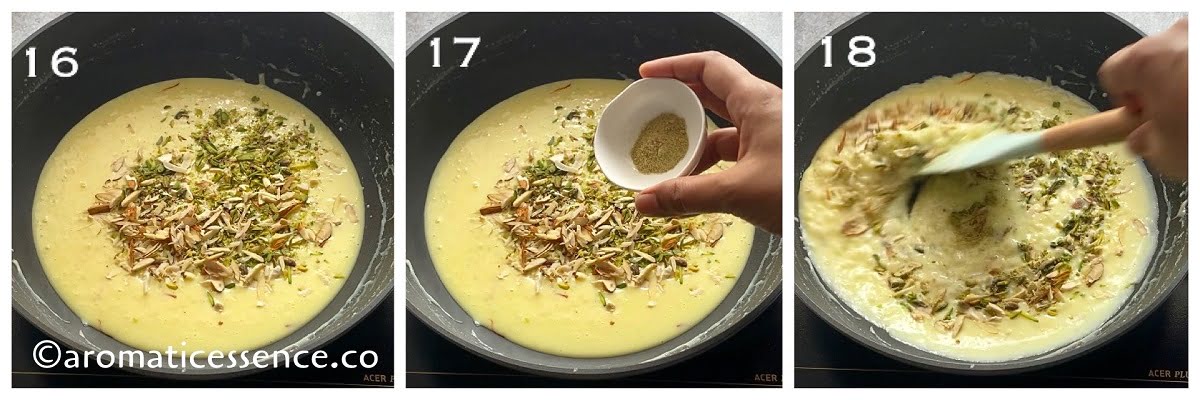
Add 1/4 to 1/2 teaspoon of cardamom powder and 1 tablespoon each of chopped cashew nuts, almonds, and pistachios. Cook for another minute. ( Photos 16 to 18 )
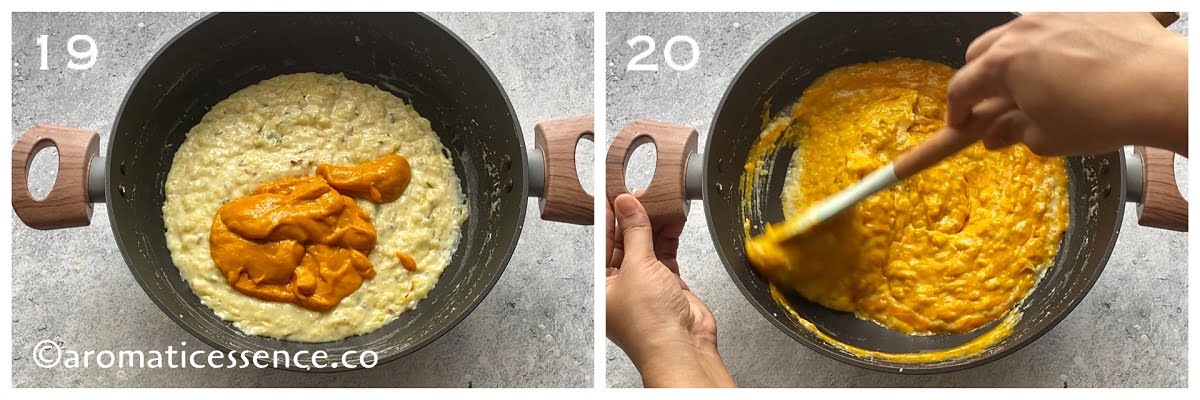
Switch off the heat and let the mixture cool down completely.
Add 1 cup of fresh mango pulp, mix well. ( Photos 19 and 20 )
Transfer to an airtight bowl, cover, and refrigerate until ready to serve.
Serving suggestions
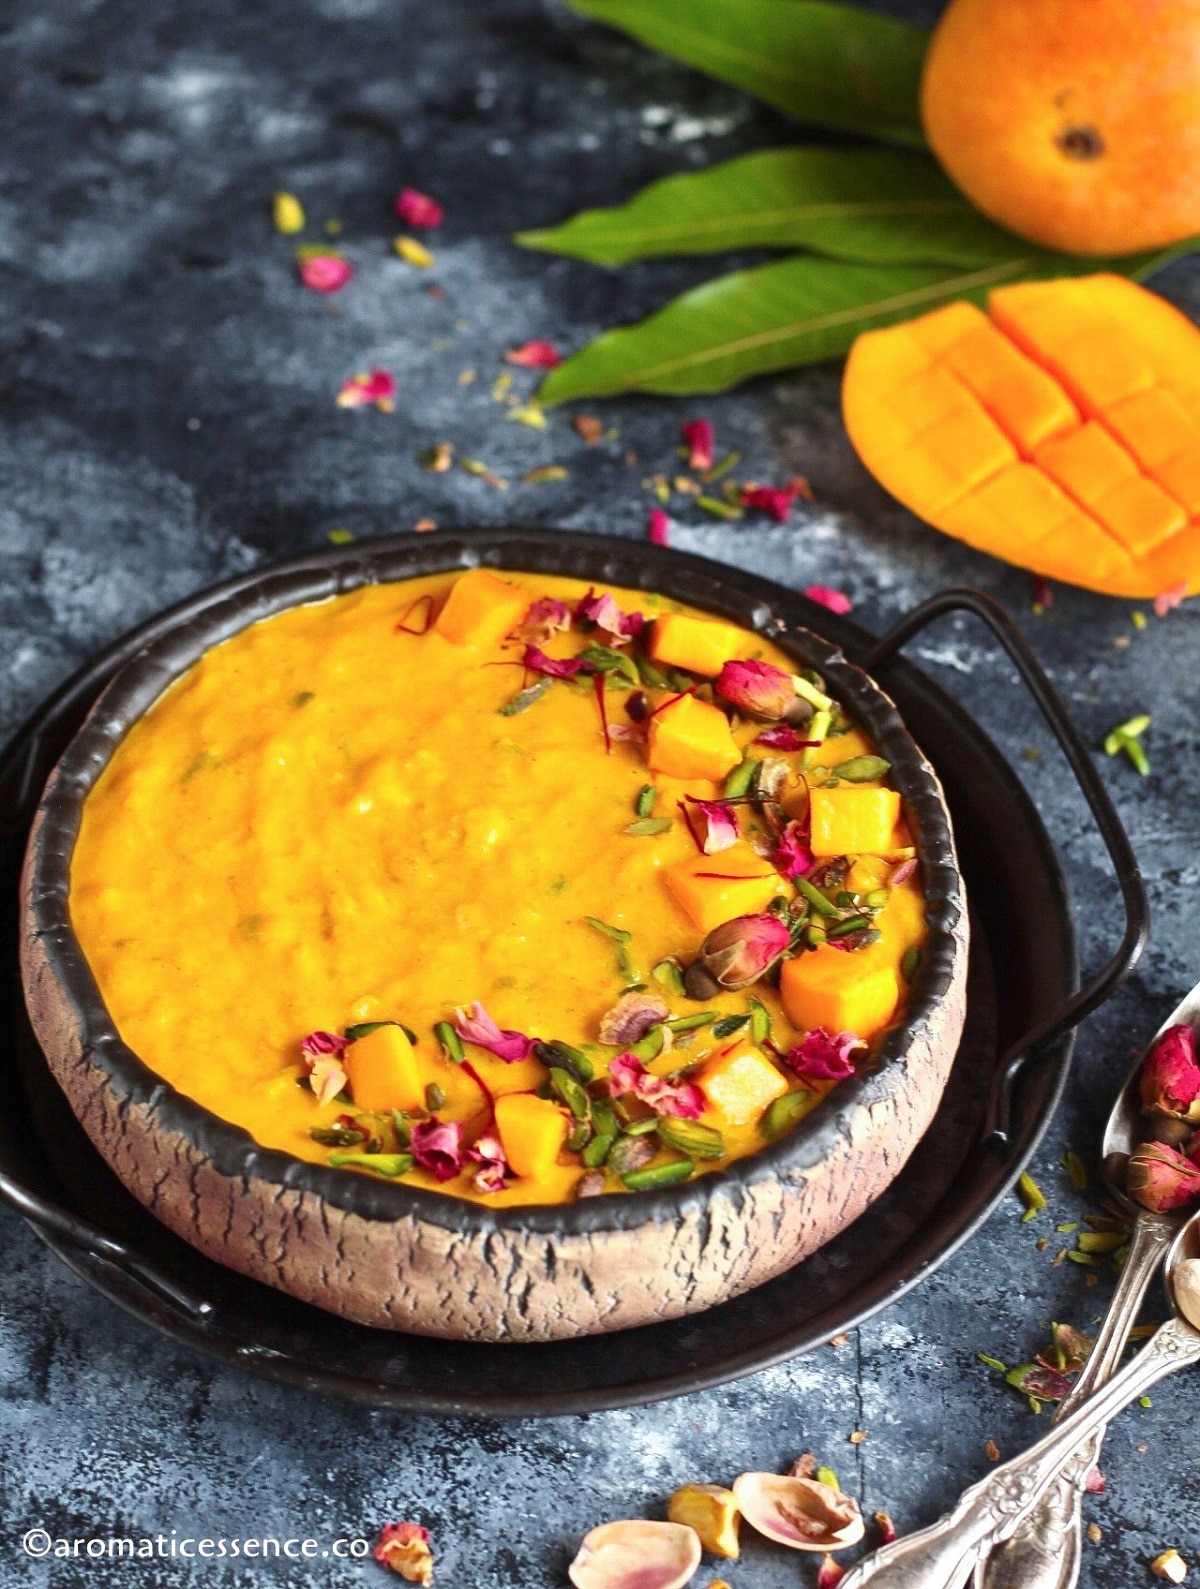
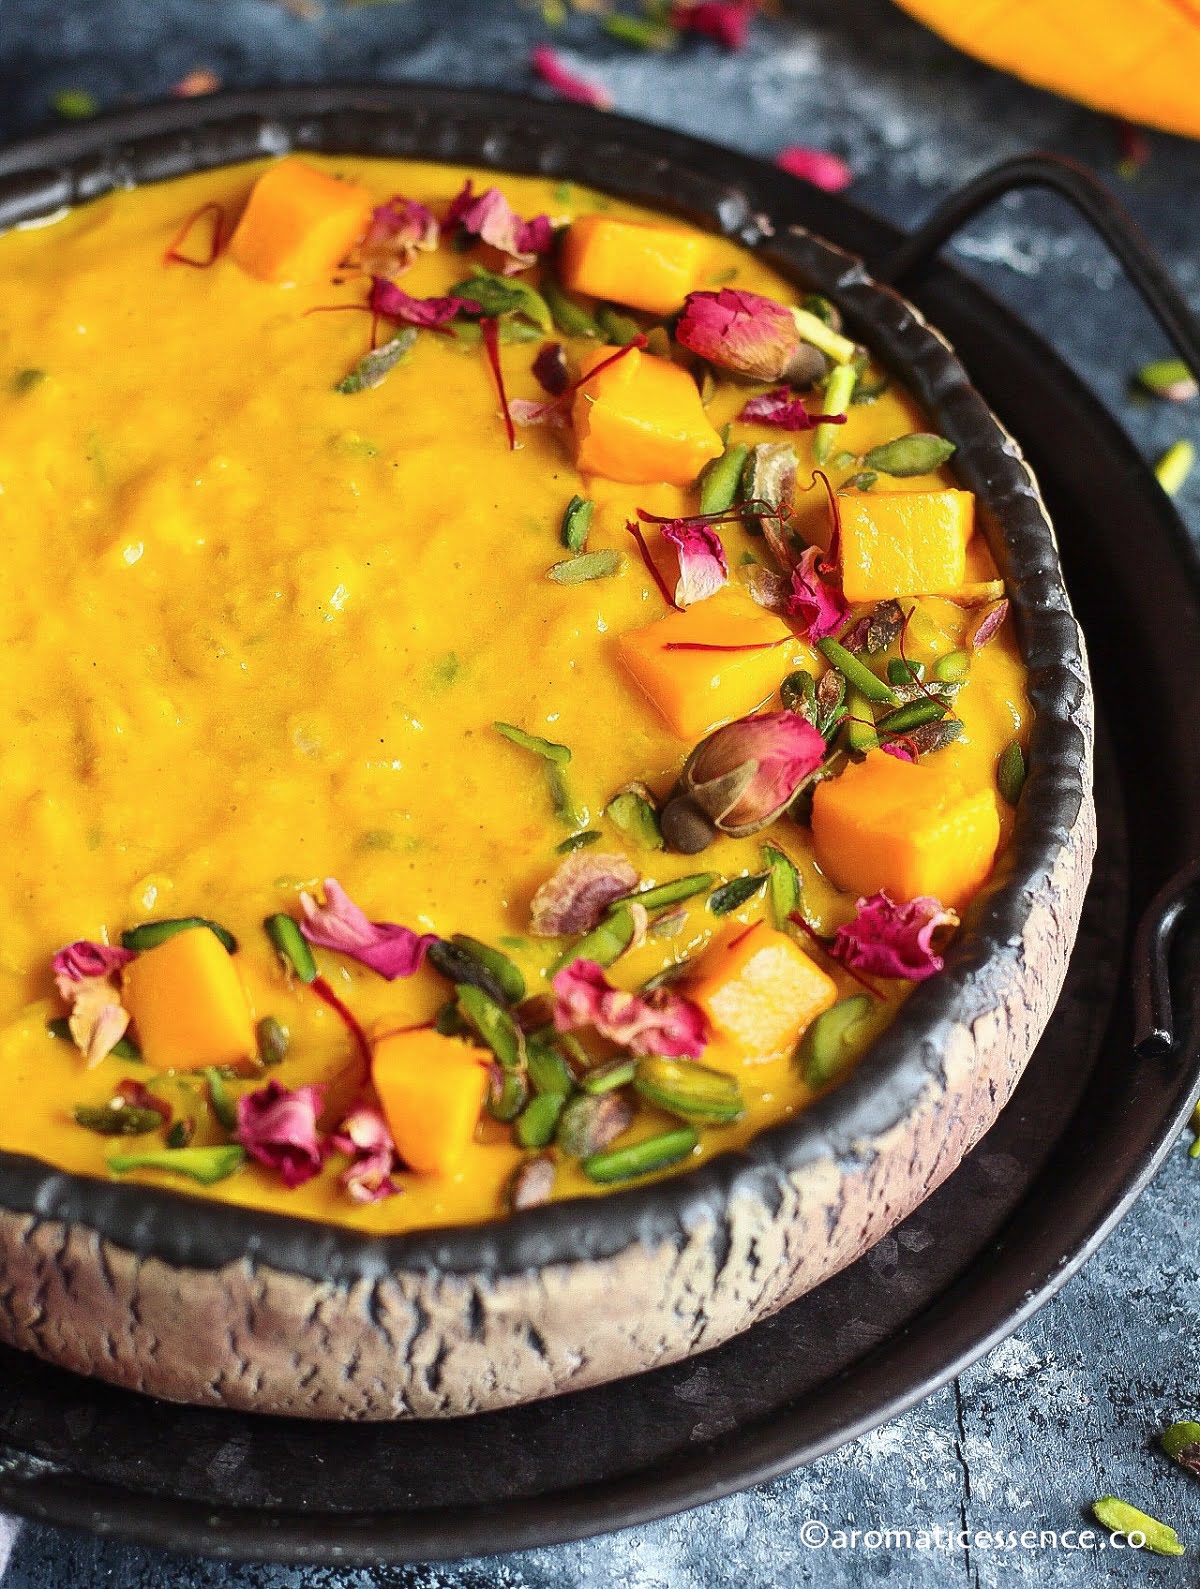
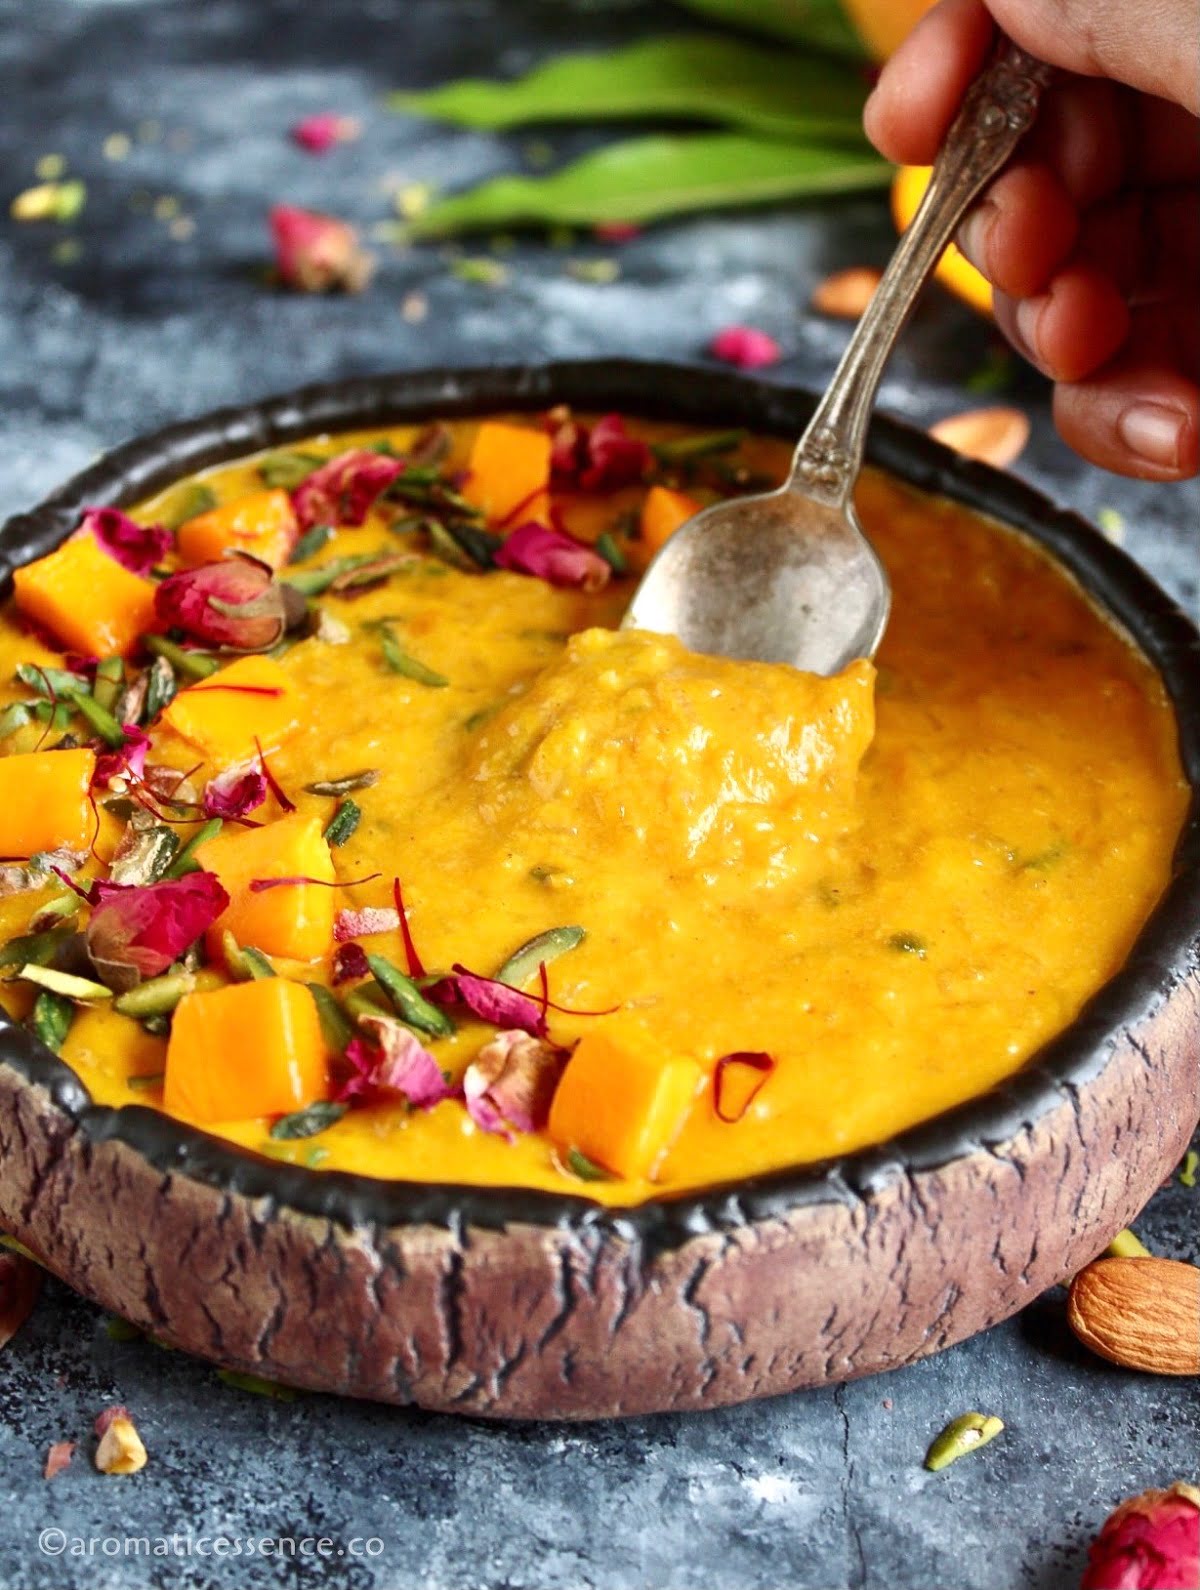
Mango kheer is a delicious dessert that can be served warm or cold. We love chilled kheer during the summers and warm kheer during the winters.
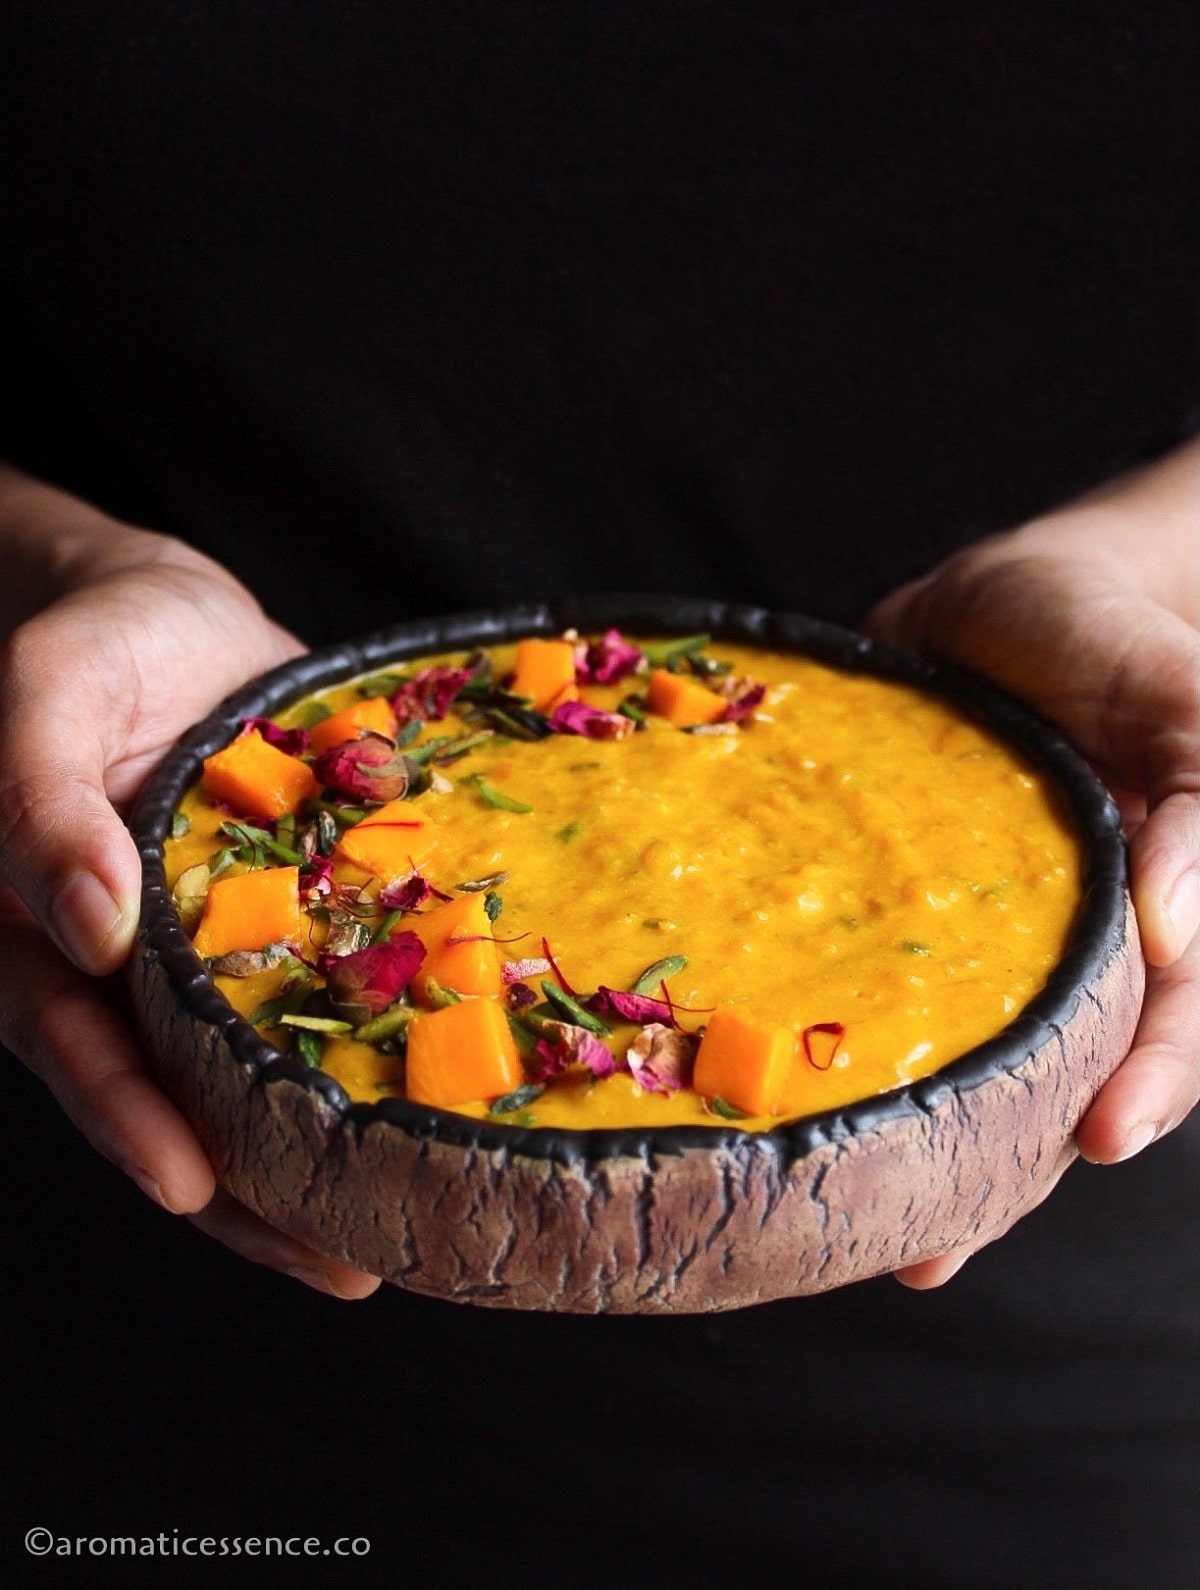
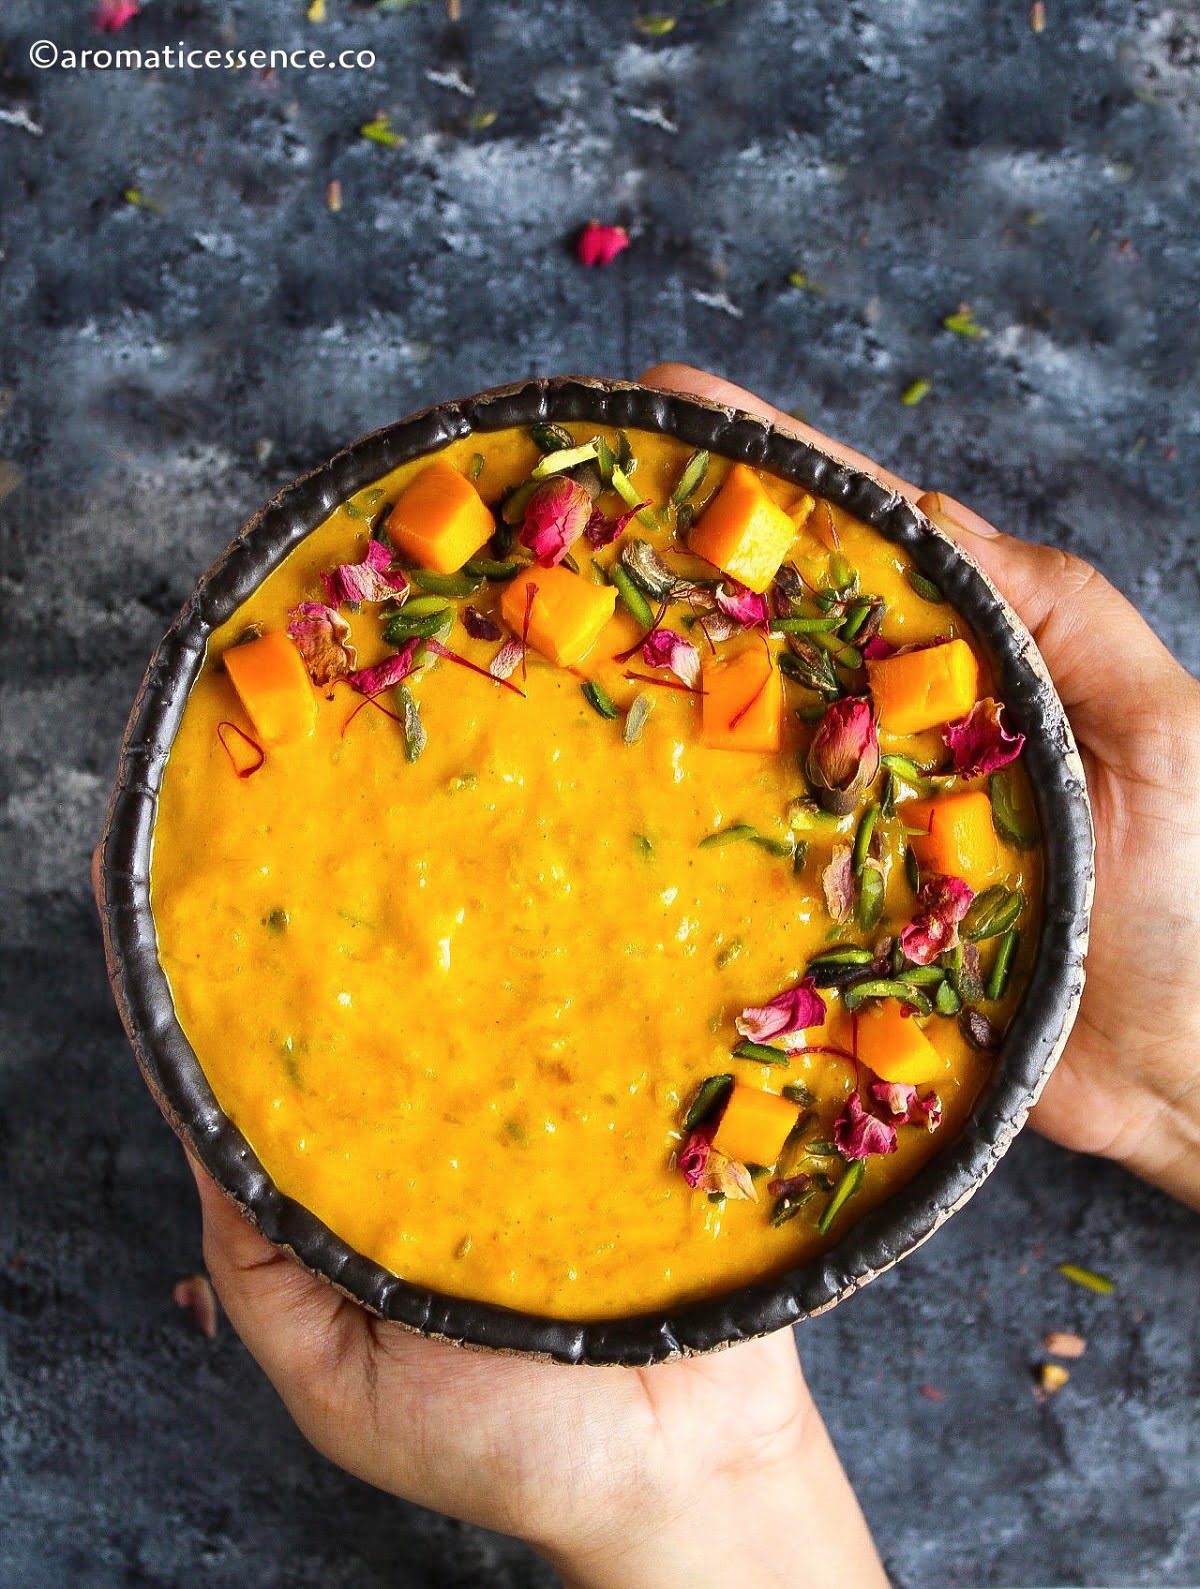
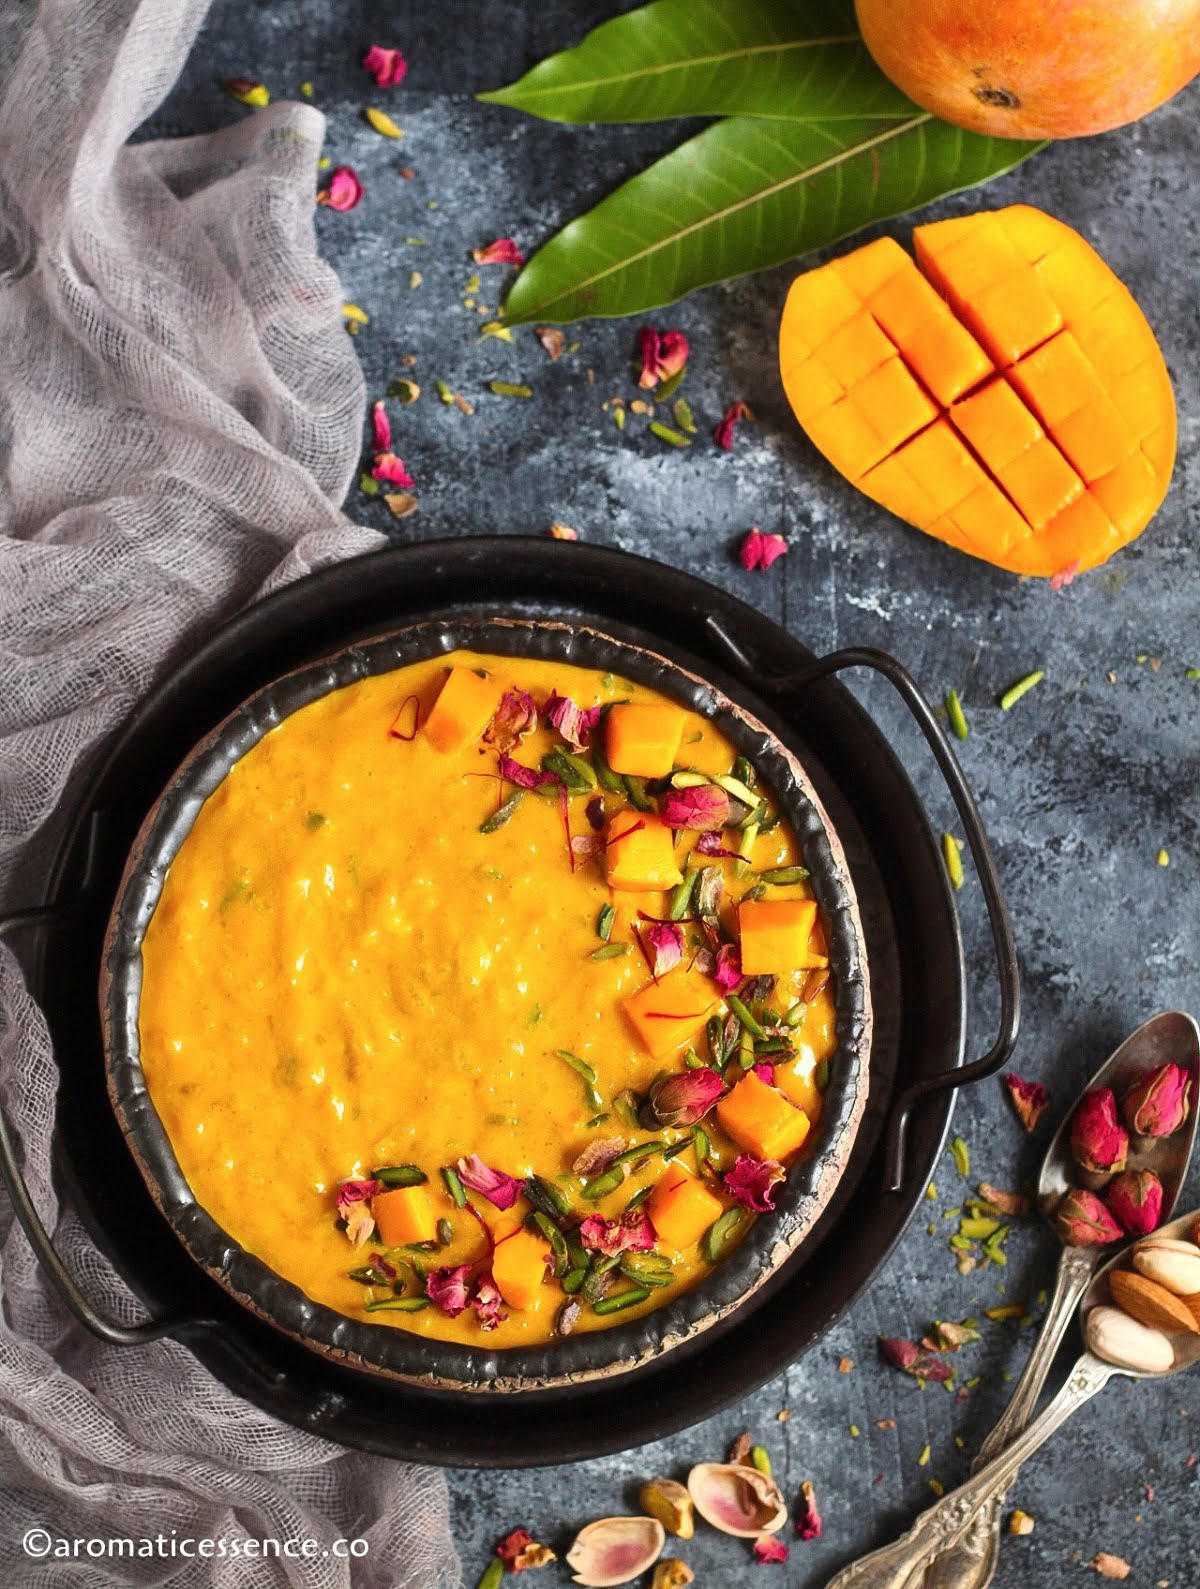
Top it with some diced mangoes, nuts, edible flowers for visual appeal. You can roast the nuts and raisins in ghee and use that to garnish this mango kheer as well.
Although the gorgeous golden hue is already visually appealing, a few garnishing touches make this aam ki kheer even more special.
My top tips for this recipe
Stick to the ratios: 50 grams of rice is perfect for 1 liter of milk. It looks too little a quantity for so much milk, but trust me, it is enough!
Use short-grained rice: This is the most important tip when it comes to making kheer. While basmati rice is fragrant, it is not the rice to be used in this recipe. It does not gelatinize during cooking, due to which the rice grains remain distinct and fluffy after cooking. Hence, it is not the preferred rice to be used for kheer. If you do use, then use broken basmati rice. For best results, stick to any short-grained variety of rice.
It is pretty basic science. The starch from the rice is released into the milk as it cooks, thickening the milk.
I always used basmati rice until I learned this easy tip from my friend, Prachi, while I was in the US. Now, I either use kalijeera or Gobindobhog rice, because it seriously makes the best rice kheer ever! Try it and see the difference.
Use full-fat milk: Using full-fat milk will make the kheer rich and creamy. Skimmed milk, 1% milk, or low-fat milk will not give you similar results. However, feel free to use it if you prefer a lighter kheer.
Remember to stir occasionally: Do not walk away from the stovetop. If the milk scorches and burns at the bottom of the pan, there is no way you can salvage that pot of kheer. You will have to trash it, so please remember to stir every 2-3 minutes. Also, make sure you set the heat to medium-low to minimize the chances of the milk burning.
The right time to add sugar: Always add sugar after the rice has cooked completely, or else it will take a long time to cook the rice. This is not applicable to the Instant Pot, but must be taken into account if making kheer on the stovetop.
Consistency of mango kheer: Avoid overcooking kheer too much because it thickens as it sits in the refrigerator. You can always thin it out by adding a few tablespoons of boiled and cooled milk at a time till you reach your desired consistency.
If for some reason, the kheer doesn’t thicken while cooking, you can add some cornstarch slurry. To do that, mix 1 tablespoon of cornstarch with 1-2 tablespoons of cold milk, mix well, add the slurry in the last step just before adding the nuts and cardamom powder. Stir continuously until it thickens. You should not encounter this problem if you use the right type of rice. But, you can troubleshoot this problem with this easy solution.
Type of mangoes: Use ripe, sweet, and non-fibrous mangoes for this recipe. Alphonso, kesari, banganapalli are some of my go-to mangoes for most mango desserts. If you do use a fibrous mango, just make sure you strain the pulp before using it in any mango-based dessert.
Add mango pulp when kheer cools down: Never add mangoes to hot dairy, or else it can split and curdle the milk.
What is the shelf life of kheer?
This mango kheer will keep well in an airtight container for 2 to 3 days in the fridge. You may also freeze freshly prepared kheer once it cools down. Freeze it for up to 1 month. Thaw overnight in the fridge.
For a fun twist, freeze leftovers in kulfi or popsicle molds!
Can I sweeten this mango kheer with condensed milk instead of sugar?
Yes, you can! Use about 3/4th or the entire 14 oz can of sweetened condensed milk. Adjust as per desired sweetness.
To be very honest, I have never found the need to add condensed milk in rice kheer. Just using the right type of rice and full-fat milk is enough to give you the creamiest kheer. You don’t need extra ingredients.
Can I use canned mango pulp in this recipe?
Yes, you can use it! You may need to reduce the sugar, as canned mango pulp is usually sweetened.
Canned mango pulp is also not as thick as fresh mango pulp, so the texture of the kheer may vary slightly. If you like thick kheer, then cook the mango pulp until it thickens to your liking. Cool and add it to the rice kheer.
Can I make this vegan?
I’ve not tried a vegan version of kheer yet. But I see no reason why it won’t work. Almond milk and oat milk would be great to make a vegan version.
I would not recommend soy milk as it might alter the flavor of the kheer. If you love the flavor of coconut, you can use coconut milk.
What is the difference between kheer and phirni?
The ratios are the same, though the only difference is in the way the rice is treated for both recipes. For phirni, the rice is soaked, drained, dried, and powdered. For kheer, you do not need to powder the rice grains.
Can I make this recipe in the Instant Pot?
Yes, you can use your handy Instant Pot for this kheer recipe. It is pretty much a dump-and-go recipe.
Follow these steps;
- Simply add all the ingredients except the nuts, cardamom powder, and mango pulp in the steel insert.
- Set the valve to the ‘SEALING’ position.
- Pressure cook on ‘HIGH’ for 20 minutes followed by natural pressure release (NPR) for 10 minutes. Then do a quick release as per the manufacturer’s instructions.
- Once the silver pin drops, open the lid.
- Turn on ‘SAUTE’ mode, set to ‘NORMAL’, and cook, stirring occasionally for another 10 to 12 minutes or until your reach your desired consistency of kheer.
- Add the nuts and cardamom powder, and mix well.
- Switch off the IP, and let the kheer cool down. Once cool, add the mango pulp and mix well.
You may also enjoy these mango recipes
Mango shake
Mango semolina cupcakes
Eggless mango loaf cake
Mango kulfi
You can also follow me on Facebook , Pinterest, Instagram & Twitter

Mango Kheer | Indian Mango Rice Pudding
Ingredients1x2x3x
- 50 grams short-grained rice (I’ve used Gobindobhog rice), about 1/4 cup
- 1 liter full-fat milk
- Pinch of saffron
- 100 grams castor sugar, little less than 1/2 cup, adjust as per desired sweetness
- 1 tablespoon cashew nuts
- 1 tablespoon sliced almonds
- 1 tablespoon slivered pistachios, plus more for garnishing (as required)
- 1/2 teaspoon cardamom powder
- 225 grams fresh mango pulp, about 1 cup
- Dried rose petals, for garnishing, optional
Instructions
- Rinse rice until the water runs clear. Soak the rice for 30 minutes and set it aside. Drain after 30 minutes and set aside.
- In the meanwhile, add milk in a heavy-bottomed pot, bring to boil over medium heat. Add 2 tablespoons of hot milk to saffron in a small bowl and set it aside.
- After it comes to a boil, add the drained rice, mix well, and cook over medium-low heat until the rice cooks completely and the milk thickens about 20-25 minutes, stirring occasionally every 2-3 minutes to prevent the milk from sticking and burning at the bottom of the pan.
- To check for the correct consistency: If you drop some mixture from a spoon, the rice and milk should fall in one stream and not separately.
- Add sugar and saffron-infused milk, continue cooking for another 5 minutes over medium-low heat.
- Add cardamom powder and nuts, and cook for another minute. Switch off the heat and let the mixture cool down completely.
- Add fresh mango pulp, mix well.
- Transfer to an airtight bowl, cover, and refrigerate until ready to serve.
Video
Notes
Nutrition

Mango Kheer | Indian Mango Rice Pudding
Ingredients
- 50 grams short-grained rice (I’ve used Gobindobhog rice), about 1/4 cup
- 1 liter full-fat milk
- Pinch of saffron
- 100 grams castor sugar, little less than 1/2 cup, adjust as per desired sweetness
- 1 tablespoon cashew nuts
- 1 tablespoon sliced almonds
- 1 tablespoon slivered pistachios, plus more for garnishing (as required)
- 1/2 teaspoon cardamom powder
- 225 grams fresh mango pulp, about 1 cup
- Dried rose petals, for garnishing, optional
Instructions
- Rinse rice until the water runs clear. Soak the rice for 30 minutes and set it aside. Drain after 30 minutes and set aside.
- In the meanwhile, add milk in a heavy-bottomed pot, bring to boil over medium heat. Add 2 tablespoons of hot milk to saffron in a small bowl and set it aside.
- After it comes to a boil, add the drained rice, mix well, and cook over medium-low heat until the rice cooks completely and the milk thickens about 20-25 minutes, stirring occasionally every 2-3 minutes to prevent the milk from sticking and burning at the bottom of the pan.
- To check for the correct consistency: If you drop some mixture from a spoon, the rice and milk should fall in one stream and not separately.
- Add sugar and saffron-infused milk, continue cooking for another 5 minutes over medium-low heat.
- Add cardamom powder and nuts, and cook for another minute. Switch off the heat and let the mixture cool down completely.
- Add fresh mango pulp, mix well.
- Transfer to an airtight bowl, cover, and refrigerate until ready to serve.
Video
Notes
Nutrition
These chicken pakora bites have a crispy coating and are incredibly moist and tender on the inside. Here’s a quick step-by-step recipe video to make street-style chicken pakoda at home.

The onset of the monsoon automatically makes one crave a large plate of crispy pakoras along with some chai. So that is exactly what I did last week when it began to rain cats and dogs.
I usually make onion, potato, or paneer pakoras but this time I decided to treat my family to these crispy and crunchy chicken pakoras for a change.
These street-style pakoras were a delight to the tastebuds and everyone devoured them to their heart’s content, especially the kiddos.

- What is chicken pakora?
- This murgh pakora
- Ingredients needed
- How to make chicken pakora – Step by step process
- Serving suggestions
- A few handy tips…
- Variations of this recipe
- Frequently asked questions
- You may also enjoy these delicious Indian chicken appetizers
- Chicken Pakora Recipe
What is chicken pakora?
Chicken pakoda is an Indian-style chicken fritter made using boneless chicken pieces, marinated in spices, coated with a thick chickpea flour batter, and fried to golden perfection!
Have you ever tried chicken pakoras? If your answer is not then you must definitely try these crispy and juicy chicken pakoras. While onion pakoras are the classic favorite, this chicken variation was a delicious change.
Chicken is known as ‘ murgh’ in Hindi and so these are also known as murgh pakora!
I’m sure there are various versions of chicken pakora across the length and breadth of the country. Be it a Bengali/Kolkatta version or Andhra version, I’m sharing my version of making this delicious, street-style chicken pakora at home.

This murgh pakora
✔ Is truly irresistible!
✔ Needs simple ingredients, mostly pantry-staples
✔ Is easy to prepare
✔ Is perfect to indulge in on a rainy day along with a cup of masala chai
✔ Can also be enjoyed as a side along with rice and dal, khichdi, or any other curry of your choice
Ingredients needed
To make this restaurant-style chicken pakora at home, you will need the following ingredients.
For the chicken pakora marination;
- Chicken: I’ve used boneless chicken breasts. You can use boneless chicken thighs or even bone-in chicken pieces.
- Aromatics: Freshly minced ginger and garlic.
- Spices: This includes the usual Indian spices like Kashmiri red chili powder, red chili powder, garam masala, ground turmeric, coriander powder, cumin powder, chaat masala (not in the frame below), ajwain, salt, and black pepper.
- Green chilies : For some kick.
- Fresh herbs: Coriander leaves and curry leaves
- Other ingredients: lemon juice and oil
For the chicken pakora batter you will need just 3 more ingredients which are;
- Besan (chickpea flour): A primary ingredient for the coating used in almost every pakora recipe.
- Rice flour: Added for crispiness. You can swap the rice flour with cornflour or cornstarch.
- Egg white: The egg white helps seal in the chicken juices, keeping it moist, tender, and juicy. It is a popular Chinese technique known as ‘velveting’.

The weather is just perfect to indulge in some piping hot pakoras. So what are you waiting for? Check out the recipe and go make some!
How to make chicken pakora – Step by step process
Step 1: Marinate the chicken pieces
Place the chicken pieces (500 grams) in a large bowl. Pat dry to remove any moisture. ( Photo 1 )
Add 1/2 tablespoon minced ginger, 1 tablespoon minced garlic, and finely chopped green chilies ( about 1 to 2, or as desired). ( Photo 2 )
Add 3/4th teaspoon salt and 1/2 teaspoon ground black pepper. ( Photo 3 and 4 )

Also add 2 teaspoons Kashmiri red chili powder, 1/2 to 1 teaspoon red chili powder/cayenne, 1 teaspoon garam masala, 1 teaspoon coriander powder, 1/2 teaspoon roasted cumin powder, 1/4 teaspoon turmeric powder. ( Photos 5 to 10 )

Also, add 1/4 teaspoon ajwain, 1 tablespoon lemon juice, 1 tablespoon oil, 2 tablespoons finely chopped coriander leaves, and a chopped curry leaves (about 15-16 leaves). Mix well. ( Photo 11 to 15 )

Cover the bowl and set it aside for 30 minutes. ( Photo 16 )
Step 2: Add besan, rice flour, and egg white
Add one beaten egg white, 1/2 cup besan, and 2 tablespoons rice flour or cornstarch, mix well. ( Photos 17 to 20 )
If it looks too dry, add a few tablespoons of water at a time and mix well. I added only about 2 tablespoons of water. ( Photos 21 and 22 )

Step 3: Deep fry the pakoras on medium-high heat
Heat oil for deep frying in a wok or kadai over medium heat.
Test the temperature of the oil with a candy or deep-frying thermometer (it should register 350° F/180° C). You can also test the oil temperature by dropping a little of the batter into the hot oil. It must rise to the surface slowly. That means the oil is ready for deep frying.
Slide the chicken pieces gently in the hot oil. Leave it undisturbed for a minute. (Photo 23 and 24)
After about a minute, flip the pieces with a slotted spoon and continue frying until the chicken is cooked through and turns a golden brown on all sides, about 3-4 minutes (depends on the size of your chicken pieces). If using bone-in chicken, it will take a few minutes longer. ( Photos 25 and 26 )
Transfer the chicken pakora to a plate lined with an absorbent paper napkin or on a wire rack to drain off excess oil. ( Photo 27 )
Continue frying the rest of the chicken pieces in the same way.

Step 4: Fry slit green chilies and curry leaves
The last step is to deep-fry 3-4 green chilies, slit lengthwise (very important to use only slit green chilies or peppers) and a sprig of curry leaves, until they turn crispy, about 30 seconds . ( Photo 27 )
Drain and add it over the chicken pakoras. ( Photo 28 )
Sprinkle chaat masala and serve immediately. ( Photo 29 )

Serving suggestions
This hot and crisp chicken bhajiya is best enjoyed as soon as they are prepared with a sprinkle of chaat masala for those delicious chatpata flavors.
Serve it with some green chutney , sweet chutney , or ketchup. A bite of the crispy pakoras and sweet and spicy chutneys is like an explosion of flavors in your mouth!
You can also stuff these pakoras in ladi pav slathered with chutneys of your choice.
p.s. Don’t forget that adrak wali cha i (ginger tea) 😀

A few handy tips…
This recipe is fairly simple, but I’d like to share a few tips to help you make the best chicken pakora at home.
Add water 1 tablespoon at a time: Do not add too much water for the coating. Add just enough water so that the coating sticks to the chicken pieces. Too much moisture can make these pakoras soft and soggy. If the batter is too runny, add more chickpeas flour.
Fresh ginger, garlic, and spices: Use freshly minced ginger-garlic or coarsely crushed ginger-garlic. Avoid the store-bought paste as it will not give you that flavor that you can get from using fresh and it makes a lot of difference in recipes like these. Also, make sure your ground spices are fresh and not stale.
Use only egg white: The yolks can soften the coating due to their high-fat content. If you don’t want to use egg white, then use about 2-3 tablespoons of thick yogurt.
Don’t skip the green chillies and curry leaves: The green chilies and curry leaves are added in two steps in the recipe. One, in the marinade, and second, fried in the hot oil. They add a lovely flavor to this homemade chicken pakora that cannot be missed. Please skip it only if they are not accessible to you. Also, please remember to slit the green chilies lengthwise, or else they will splatter hot oil all over the place due to the moisture content.
Right oil temperature: Heat the oil on high initially. Then turn down the heat to medium-high and fry the pakoras. If the heat is too high, the exterior will brown faster and the insides will remain uncooked. If you fry at a low temperature, the pakoras will absorb a lot of oil and turn super greasy.
Fry in batches: Whenever you deep-fry anything, always do it in batches. Overcrowding the wok will bring down the temperature of the oil.

Variations of this recipe
Sliced onions: You can add a handful of thinly sliced onions to the batter. It will add a delicious taste and texture, a cross between onion and chicken pakoras 😀
Mint: You can also add chopped mint leaves to the batter.
Chinese style: For a yummy Indo-Chinese fusion, follow these steps;
- Marinate 500 grams of boneless chicken chunks with 1 tablespoon of dark soy sauce, 2 tablespoons of chili garlic sauce or schezwan sauce, 2 teaspoons of rice vinegar or white vinegar, 1/2 teaspoon black pepper, 1 tablespoon each of minced ginger and garlic, 1 teaspoon finely chopped green chilies along with a tiny pinch of salt (since the sauces already have salt).
- For the coating, add 1 egg white, 2 tablespoons of cornstarch, and 1/4 cup of all-purpose flour.
- Mix well and deep fry as shown above.
- To check if you need more salt, fry one piece of chicken and do a test taste. You may not need salt as the sauces contain salt, but if needed, adjust as required.
Can I skip the marination if I’m pressed for time?
Yes, you can skip that step. But I highly suggest planning ahead and allowing it to marinate for a minimum of 30 minutes to overnight. The marination tenderizes the chicken and also allows the spices to be infused into the chicken resulting in a more flavorful outcome.
Why is the chicken pakora served at some places red in color?
The red color can be attributed to the addition of red food color to give it that signature, street-style look. You can definitely avoid it at home as it adds nothing to the taste.
I’ve added Kashmiri chili powder for that hint of red color in these pakoras.
Can I make a baked version of this recipe?
Yes, you can. Place the coated chicken pieces over a greased steel rack on a baking tray. Refer to the pics below. Grease the chicken pieces with some oil spray and baked them in a preheated oven at 230° C/450° F for 12 to 15 minutes or until the chicken is cooked through.

They didn’t turn as crispy as the deep-fried version, but it is a great alternative if you don’t like deep-frying anything at home. I highly suggest using chicken thighs if you do opt for the baked version as it remains moist and juicy while the exterior crisps up.
Can this be made ahead?
Unfortunately, no! You cannot make any sort of pakora in advance as it will not stay crisp for long, even with the addition of rice flour or cornstarch.
If you intend to serve these as an appetizer/starter for parties, then the least you can do is marinate the chicken pieces and coat them with the batter. Deep-fry just before serving.
Another trick is to fry the pakoras twice. Make sure the chicken is cooked through completely when you fry the pakoras once. The second frying will be very brief just to crisp up them up.
Is this gluten-free?
Yes, it is! If you swap the rice with cornstarch, make sure that it is gluten-free.
Is chicken pakora healthy?
Technically, this recipe cannot be categorized as healthy because of deep-frying. Though, it depends on your definition of healthy.
I think in terms of quality, anything homemade is always superior to street-style food. We can use good quality ingredients and also the oil is not used as many times as street-food vendors do.
I’ve provided rough nutrition info in the recipe card. Be sure to check it out.
You may also enjoy these delicious Indian chicken appetizers
Chicken 65 (baked version)
Chicken seekh kebab
Chicken lollipop
You can also follow me on Facebook , Pinterest, Instagram & Twitter

Chicken Pakora Recipe
Ingredients1x2x3x
Chicken Pakora marination
- 500 grams chicken breasts, cut into 1/2 inch cubes
- 1 tablespoon minced garlic
- 1/2 tablespoon minced ginger
- 1 to 2 green chili, finely chopped
- Salt, to taste
- 1/2 teaspoon black pepper
- 2 teaspoons Kashmiri chili powder
- 1/2 teaspoon red chili powder, add as per desired heat
- 1 teaspoon garam masala
- 1/4 teaspoon ground turmeric
- 1 teaspoon coriander powder
- 1/2 teaspoon cumin powder
- 1/4 teaspoon ajwain
- 1/4 cup finely chopped coriander leaves
- About 10-12 curry leaves chopped
- 1 tablespoon lemon juice
- 1 tablespoon oil
For the coating
- 1/2 cup besan
- 2 tablespoons rice flour or cornstarch
- 1 egg white beaten
Other ingredients
- 2 cups oil, to deep fry
- 3-4 green chilies, slit legthwise,
- Sprig of curry leaves
- 1 teaspoon chaat masala, or as required
- 2 teaspoons lemon juice, or as required
Instructions
- Place the chicken pieces in a large bowl. Pat dry to remove any moisture.
- Add all the ingredients listed under chicken pakora marination.
- Mix until the chicken pieces are well coated with the spices and herbs.
- Cover the bowl and set it aside for 30 minutes.
- Add one beaten egg white, besan, and rice flour or cornstarch, mix well.
- If it looks too dry, add a few tablespoons of water at a time and mix well. I added only about 2 tablespoons of water.
- Heat oil for deep frying in a wok or kadai over medium heat.
- Test the temperature of the oil with a candy or deep-frying thermometer (it should register 350° F/180° C). You can also test the oil temperature by dropping a little of the batter into the hot oil. It must rise to the surface slowly. That means the oil is ready for deep frying.
- Slide the chicken pieces gently in the hot oil. Leave it undisturbed for a minute.
- After about a minute, flip the pieces with a slotted spoon and continue frying until the chicken is cooked through and turns a golden brown on all sides, about 3-4 minutes (depends on the size of your chicken pieces). If using bone-in chicken, it will take a few minutes longer.
- Transfer the chicken pakora to a plate lined with an absorbent paper napkin or on a wire rack to drain off excess oil. Continue frying the rest of the chicken pieces in the same way.
- The last step is to deep-fry the green chilies, slit lengthwise (very important to use only slit green chilies or peppers) and curry leaves, until they turn crispy, about 30 seconds.
- Drain and add it over the chicken pakoras.
- Sprinkle chaat masala and serve immediately.
