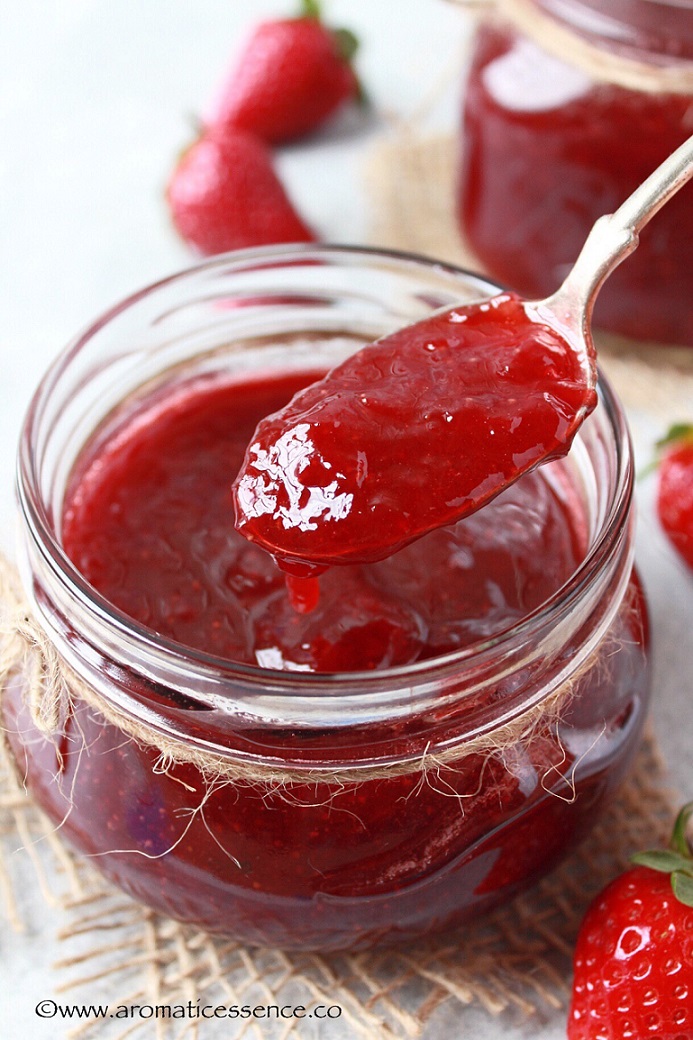
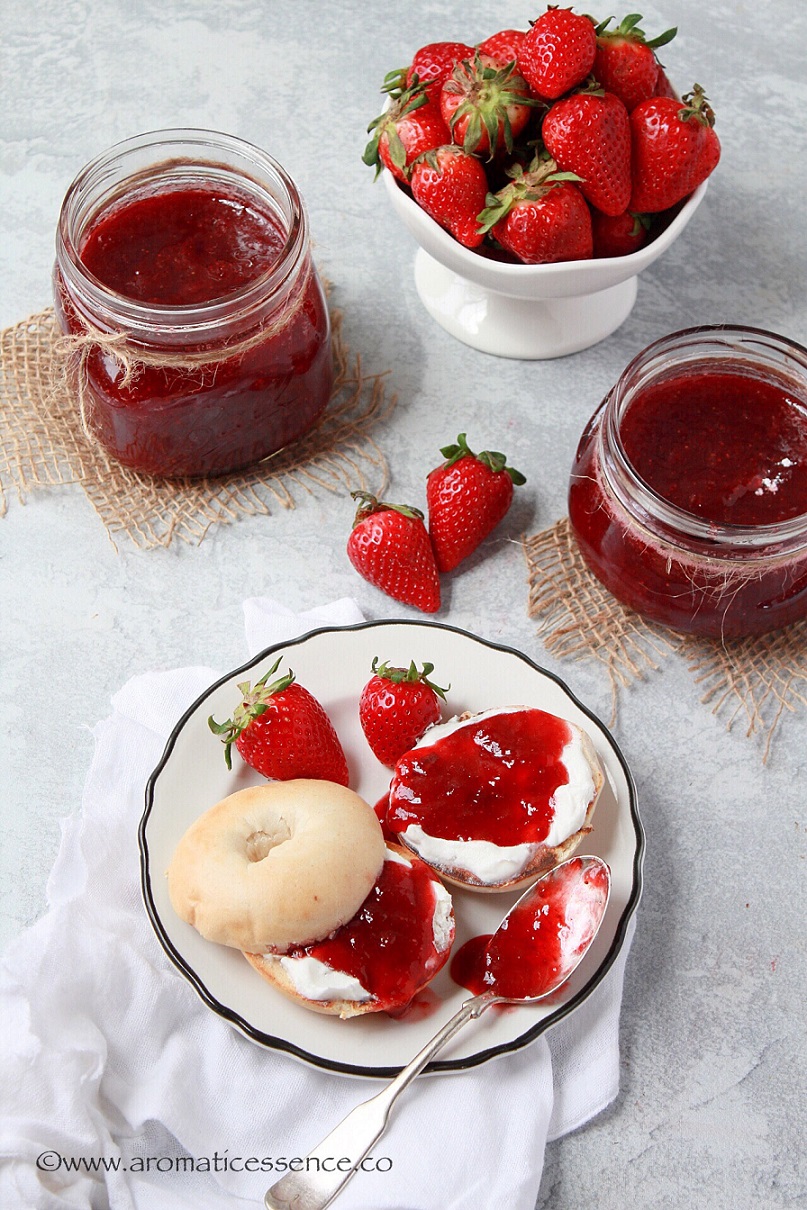
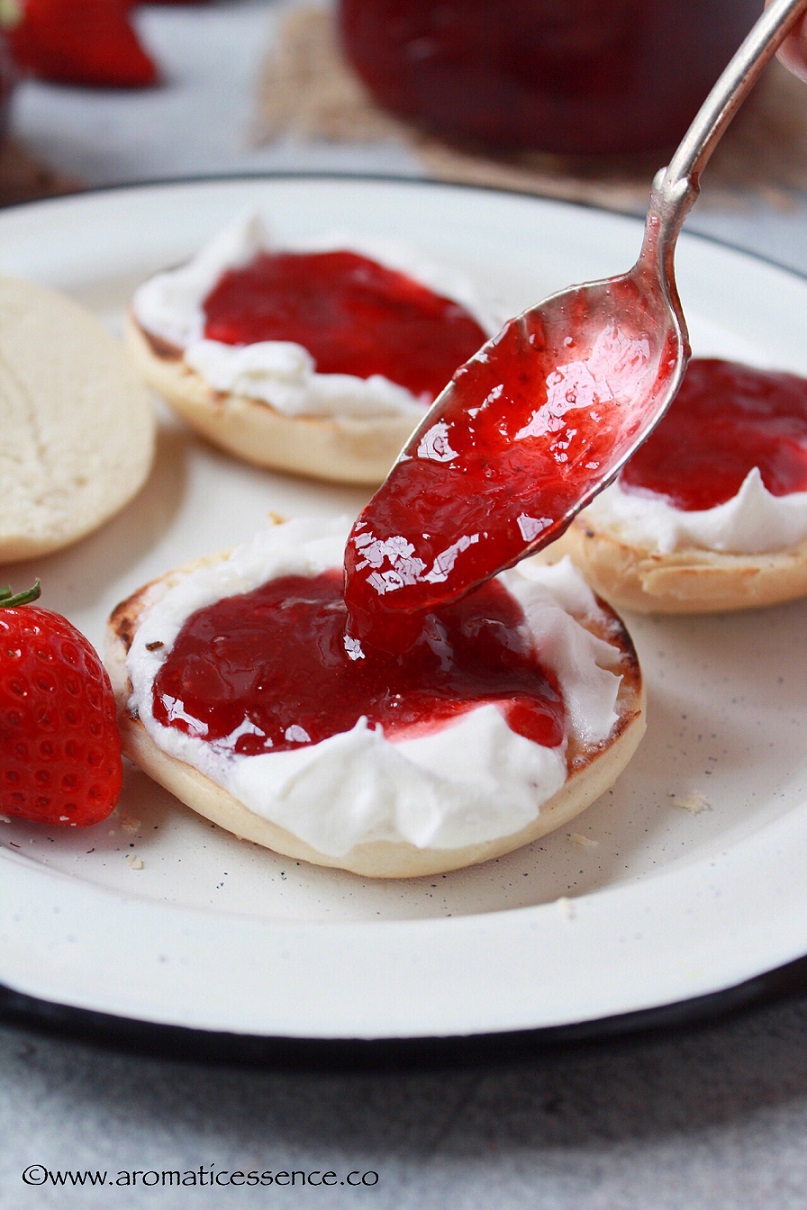
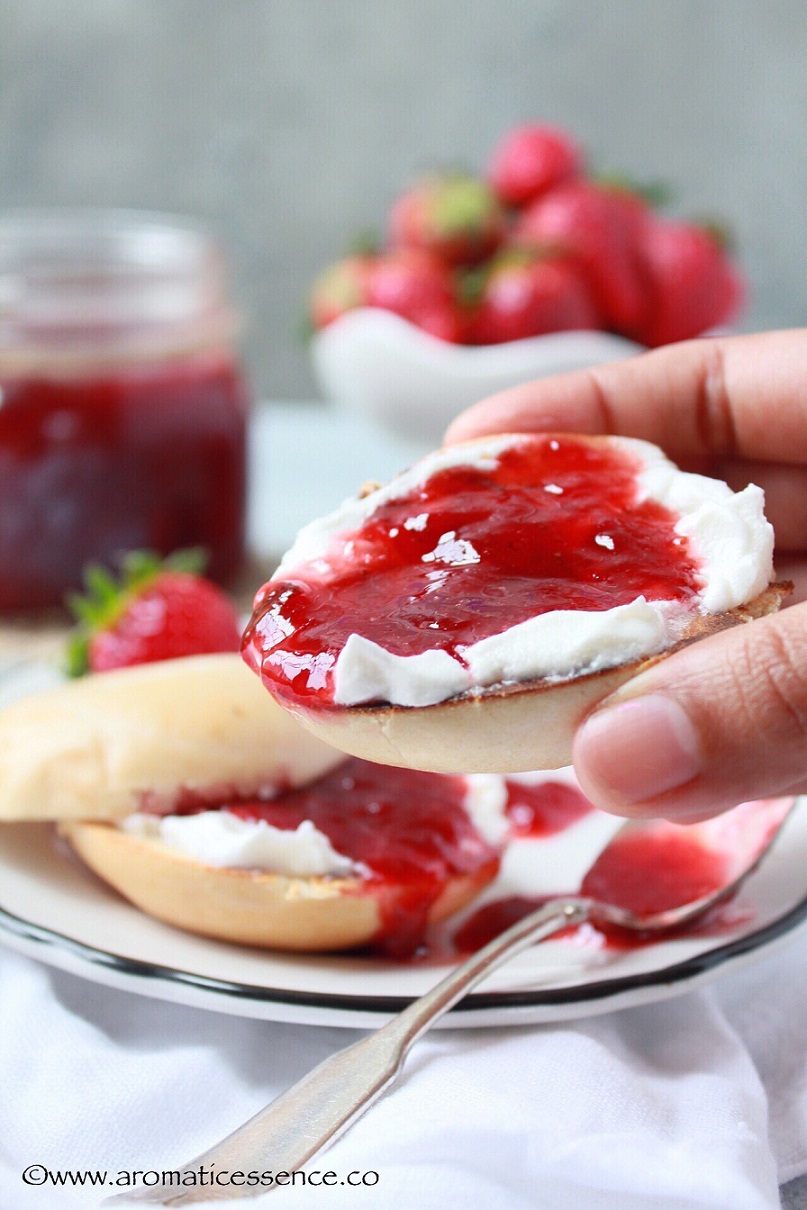
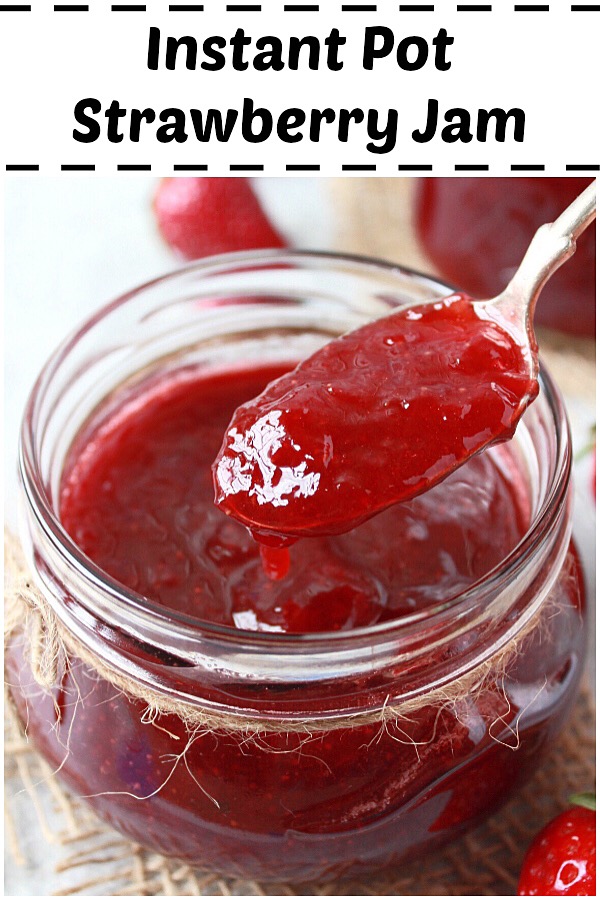
This Instant Pot strawberry jam is a delicious and soft spread, great on toasts, bagels, biscuits or anything else you fancy. You only need 3 ingredients to make this easy strawberry jam, made without pectin or cornstarch.

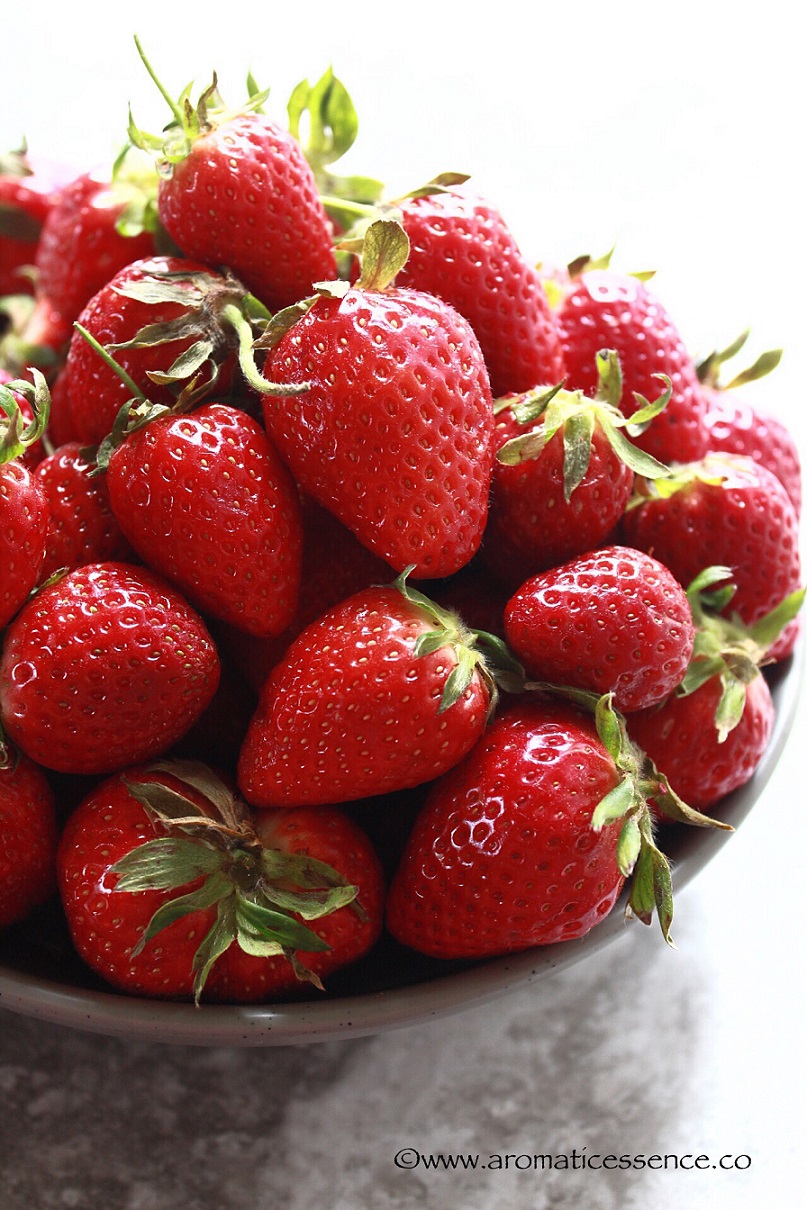
I picked up 3 pounds of strawberries from the local farmer’s market last weekend. The aroma of those fresh, juicy, fragrant, strawberries was just so amazing!
I couldn’t help but preserve that in the form of this Instant pot strawberry jam to be enjoyed in the coming weeks. Actually, they were good enough to be eaten as a dessert by itself. But it doesn’t really hurt to make a batch of jam with fresh, seasonal fruits 🙂
- What are the ingredients needed to make this pressure cooker jam?
- Why should you make strawberry jam in the Instant Pot?
- Tips to make the best pressure cooker strawberry jam
- Ideas to use this jam
- You should try this strawberry jam because
- Quick FAQs
- You may also enjoy these jam recipes
- How to make Instant Pot Strawberry jam without pectin – Step by step instructions
- Instant Pot Strawberry Jam Recipe {Without Pectin}
What are the ingredients needed to make this pressure cooker jam?
You basically just need 3 ingredients i.e. fruit, sugar and lemon juice to make any kind of jam. For this strawberry jam, we will need;
- Strawberries
Fresh seasonal strawberries, preferably organic, are your best bet to make some good quality strawberry jam. The best time to make strawberry jam is between April to June, when strawberries are in season!
- Sugar
Sugar does more than sweetening any jam. It plays an important role in;
- Thickening the jam
- Creating the gel structure
- And it also acts as a preservative to inhibit mold growth.
Ideally a 1:1 ratio of fruit : sugar is recommended. But I usually cut the sugar by half. I think it adds plenty of sweetness, and the jam sets pretty well.
- Lemon juice
Lemon juice is used in this recipe for 3 reasons;
- It is high in pectin and since we aren’t using commercial pectin, lemon juice adds the necessary pectin required for the jam to gel and set, since strawberries are naturally low in pectin.
- Lemon juice lowers the pH levels into an acidic range, which is essential for the pectin to set.
- It balances out the sweetness.

Why should you make strawberry jam in the Instant Pot?
This strawberry jam is easy as can be! Having said that, this isn’t a quick strawberry jam just because it is made in the Instant Pot. There is definitely nothing instant about making any sort of jam. It would probably take the same amount of time on the stovetop. Then why bother making it in the IP anyway, right?
From my experience of making jam over these years, I can just say the convenience the Instant Pot offers when it comes to making jam without pectin. I simply cooked the jam on ‘SAUTE’ mode after the pressure cooking step.
Because of the uniform heat surface, the jam did not stick to the pot nor was there any burning. Most of the Instant Pot jam-making procedure is hands-off, except towards the end when you need to be attentive, as you may overcook the jam.
Tips to make the best pressure cooker strawberry jam
- Fresh strawberries: Avoid overripe strawberries as they are lower in pectin and fruit acids. Besides that, it may also cause the jam to go moldy soon. Try to use fresh and firm fruit of any kind to make jam.
- Sterilize the jars so that the jam keeps well for weeks: Since this is a small-batch jam and we aren’t canning, you should definitely sterilize the jars before filling it with the jam. You can do this while the strawberries are macerating. To sterilize the jars, bring water to boil in a large pot, turn off the heat. Using tongs, transfer the glass jars and lids to boiling water, let it sit for 15 minutes. Then remove the jars and lids carefully and place them upside down on a clean kitchen napkin for 10-15 minutes. Turn it upright and let it air dry completely. (This is only for short term storage, for long term storage, can the jars as per canning instructions).
- Cover the jars once the jam has cooled down completely: Let the jam cool completely before closing the jars or else the condensation will fall back in and cause the jam to spoil faster.
Ideas to use this jam
This luscious strawberry jam is good to be eaten on its own, but, here are some ways in which you can use it;
- Yogurt granola parfaits
- Topping for these cute little IP cheesecake jars
- Use it to top pancakes, waffles, French toasts
- As a filling for crepes, cupcakes or donuts
- Add a dollop of jam on oatmeal
- Jam crumble bars
- Swedish jam thumbprint cookies (eggless)
You should try this strawberry jam because
- It is so delicious! I won’t blame you if you find yourself eating spoonfuls of this yummy jam 😀
- It is such an easy recipe that doesn’t need much elbow grease, and yet you will have this real strawberry jam that just celebrates the sweet flavor of the strawberries. My whole house smelled so good, I can’t put it in words here.
- Devoid of high fructose corn syrup, artificial preservatives , and colors .
- Homemade is the best!
How can I reduce the cooking time?
You can reduce the cooking time and still thicken the jam using either of the two options below:
- Cornstarch: Use a cornstarch slurry (2 tbsp cornstarch mixed in 1/4 cup cold water). Add it in step 5, on the saute mode, keep stirring until the jam thickens.
- Chia seeds: Chia seeds are a great option for thickening jam, the natural gelling properties of chia seeds would help the jam set. Mash the strawberries roughly using an immersion blender after step 4. Add 1/3 cup chia seeds, mix well. Cover the pot, no need of sealing. Let it sit at room temperature for about 4 hours. Then transfer the jam to jars, cover and refrigerate. Enjoy this variation of strawberry chia seeds jam.
Can I reduce the amount of sugar in this recipe?
Like I mentioned above, sugar does play an important role in creating the gel structure in any jam. If you make a strawberry sauce, for instance, you wouldn’t need as much sugar. But since we are making jam and it needs to reach the gel stage in order to set, I do not recommend cutting back a lot on the sugar.
Ideally, equal parts of sugar and fruit are required, but cutting down the sugar by half has always worked well for me, so that’s what I do.
The jam has the perfect amount of sweetness, fruit flavor and sets well. At the most, you may cut it down to 1 cup of sugar in this recipe for a reduced-sugar strawberry jam.
What can I substitute for refined sugar?
You can use monk fruit sweetener. It is much sweeter as compared to sugar, so you might want to reduce the amount you use for this jam. Start off with 2/3 cups of monk fruit sweetener for 2 lbs of strawberries.
Can I use frozen strawberries or frozen mixed berries instead of fresh?
Yes, you definitely can! Place frozen berries in the inner pot of the IP, add sugar and mix well. During the maceration process, strawberries will leave out juices, give it a stir occasionally in between.
Once the strawberries have completely thawed, about 1.5 to 2 hours, proceed with the recipe. You may also thaw the strawberries overnight in the refrigerator, and use it in place of fresh in this recipe.
For frozen mixed berries, mash them slightly after pressure cooking.
Can I double this recipe?
You may double this recipe as far as it is not above the max line of the inner pot. Pressure cooking time will remain the same, the cooking time on saute mode will increase. I’m not sure how long it will take, as I haven’t tried doubling the recipe. If you do, please let me know about it.
I don’t think tripling the recipe is a good idea, cooking in two batches would be more feasible.
Don’t have an IP? You can make this jam on a stovetop
Use a heavy-bottomed pot to macerate the strawberries. After macerating the strawberries, turn on the heat to low, and cook till the sugar dissolves completely.
If the sugar does not dissolve completely, the jam may recrystallize after it has set. Once the sugar has completely dissolved, turn on the heat to high and boil till the jam has thickened and reaches 220 degrees F or you may refer to the freezer test to check if the jam is done as mentioned in the instructions below.
You may also enjoy these jam recipes
- Blood Orange marmalade
- Mango jam without pectin
How to make Instant Pot Strawberry jam without pectin – Step by step instructions
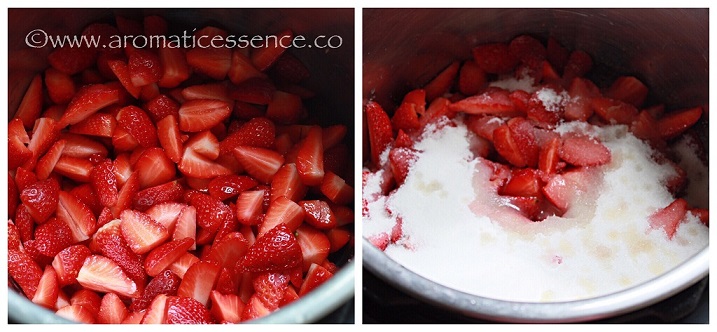
Step 1: Preparing the strawberries
Wash 2 lbs of strawberries well. Slice off the green tops, hull and slice large strawberries into quarters and small ones into halves.

Step 2: Macerating the strawberries
Place the chopped strawberries along with 2 cups sugar and 2 tbsp lemon juice in the inner liner of the IP. Mix well and set aside for 30 minutes.
Step 3: Pressure cooking the strawberries
The strawberries will leave their juices, which is enough for the IP to come to pressure. Do not add any water. Close the lid of the Instant Pot with the valve on ‘SEALING’ position. Press the manual or pressure cook button and pressure cook on high for 1 minute. It will take some time for the pressure to build up (about 5 minutes), after which the timer will start.

Step 4: Natural pressure release (NPR)
Let it depressurize naturally, about 18 minutes. Once the silver pin drops, turn the knob to ‘VENTING’ and open the lid. There will be a lot of liquid in the pot.
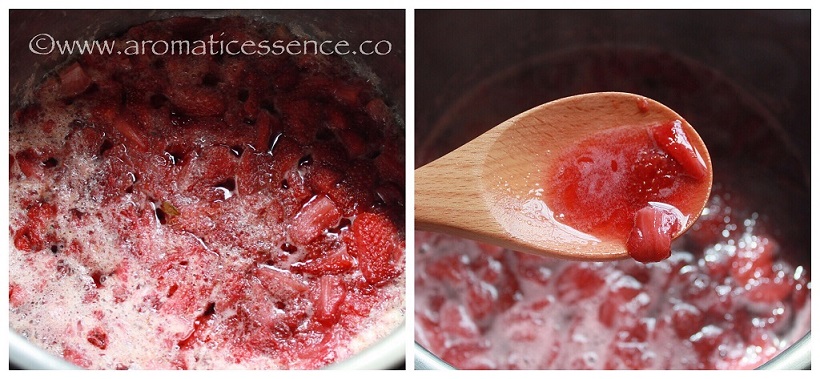
Step 5: Cook the jam until it reaches the gel stage
Press ‘CANCEL’ to turn off the keep warm mode. Press the ‘SAUTE’ on normal mode and cook for the next 20-23 minutes, stirring every 5 minutes, until the jam has thickened and reached the gel stage (220 degrees F on the candy thermometer). Skim off the foam during the cooking process.
The strawberries naturally break apart during this process. The resultant jam will be chunky. If you prefer a really smooth jam, use a blender to puree the mixture before you saute the jam.
You will know the jam is nearing the gel stage when the bubbling reduces, and the jam coats the back of a spoon. Test for the setting point at this stage. Remove the inner pot from the Instant Pot while you test, or else there is a possibility that you could overcook the jam.

How to check the setting point of jam? A candy thermometer is your best bet to know if the jam is done. If you don’t have one follow the freezer test .
Place 2-3 small plates in the freezer after step 4. When the mixture begins to thicken, start testing if the jam is done. Put a tablespoon of jam onto the cold plate. Return the plate back to the freezer for 2 minutes. Run your finger through the jam, if it wrinkles and stays apart (as shown in the pic) it is done, if it is runny, it needs to be cooked for a few more minutes.

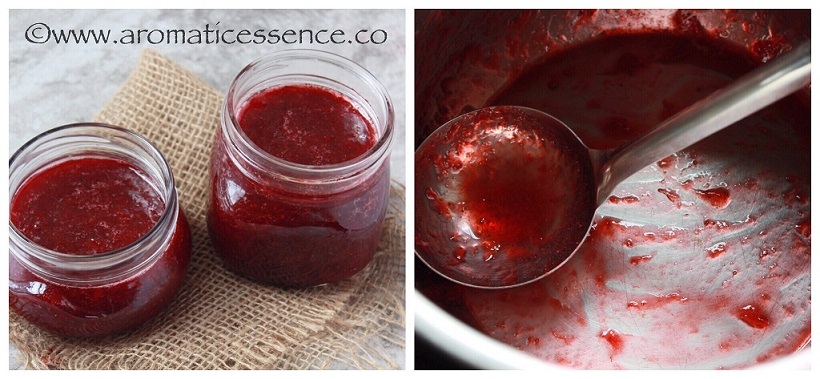
Step 6: Transfer the jam to sterilized jars
Ladle the jam into hot, sterilized containers leaving 1/4 inch of headspace. Let it cool completely before closing the jars. It will keep well for about 3 weeks in the refrigerator if only it lasts that long 😀
Note
Make sure the sealing ring is free of odors to avoid transferring any funky smell to the jam. Some folks like to use separate rings for sweet and savory food, so you can consider doing that.
You can also follow me on Facebook , Pinterest, Instagram & Twitter

Instant Pot Strawberry Jam Recipe {Without Pectin}
Equipment
- Instant Pot 6 quart
Ingredients1x2x3x
- 2 lb fresh firm strawberries, or frozen strawberries
- 2 cups sugar
- 2 tbsp lemon juice
Instructions
- Wash strawberries well. Slice off the green tops, hull and slice large strawberries into quarters and small ones into halves.
- Place the chopped strawberries along with sugar and lemon juice in the inner liner of the IP. Mix well and set aside for 30 minutes
- The strawberries will leave their juices, which is enough for the IP to come to pressure. Do not add any water. Close the lid of the Instant Pot with the valve on sealing position. Press the manual or pressure cook button and pressure cook on high for 1 minute. It will take some time for the pressure to build up (about 14 minutes), after which the timer will start.
- Let it depressurize naturally, about 18 minutes. Once the silver pin drops, turn the knob to venting and open the lid. There will be a lot of liquid in the pot.
- Press ‘CANCEL’ to turn off the keep warm mode. Press the ‘SAUTE’ on normal mode and cook for the next 20-23 minutes, stirring every 5 minutes, until the jam has thickened and reached the gel stage (220 degrees F on the candy thermometer).
- Ladle the jam into hot, sterilized containers leaving 1/4 inch of headspace. Let it cool completely before closing the jars. It will keep well for about 3 weeks in the refrigerator.
Notes
- Make sure the sealing ring is free of odors to avoid transferring any funky smell to the jam. Some folks like to use separate rings for sweet and savory food, so you can consider doing that.
- Measuring cup used, 1 cup = 250 ml, 1 tsp = 5 ml
Nutrition

Instant Pot Strawberry Jam Recipe {Without Pectin}
Equipment
- Instant Pot 6 quart
Ingredients
- 2 lb fresh firm strawberries, or frozen strawberries
- 2 cups sugar
- 2 tbsp lemon juice
Instructions
- Wash strawberries well. Slice off the green tops, hull and slice large strawberries into quarters and small ones into halves.
- Place the chopped strawberries along with sugar and lemon juice in the inner liner of the IP. Mix well and set aside for 30 minutes
- The strawberries will leave their juices, which is enough for the IP to come to pressure. Do not add any water. Close the lid of the Instant Pot with the valve on sealing position. Press the manual or pressure cook button and pressure cook on high for 1 minute. It will take some time for the pressure to build up (about 14 minutes), after which the timer will start.
- Let it depressurize naturally, about 18 minutes. Once the silver pin drops, turn the knob to venting and open the lid. There will be a lot of liquid in the pot.
- Press ‘CANCEL’ to turn off the keep warm mode. Press the ‘SAUTE’ on normal mode and cook for the next 20-23 minutes, stirring every 5 minutes, until the jam has thickened and reached the gel stage (220 degrees F on the candy thermometer).
- Ladle the jam into hot, sterilized containers leaving 1/4 inch of headspace. Let it cool completely before closing the jars. It will keep well for about 3 weeks in the refrigerator.
Notes
- Make sure the sealing ring is free of odors to avoid transferring any funky smell to the jam. Some folks like to use separate rings for sweet and savory food, so you can consider doing that.
- Measuring cup used, 1 cup = 250 ml, 1 tsp = 5 ml
Nutrition
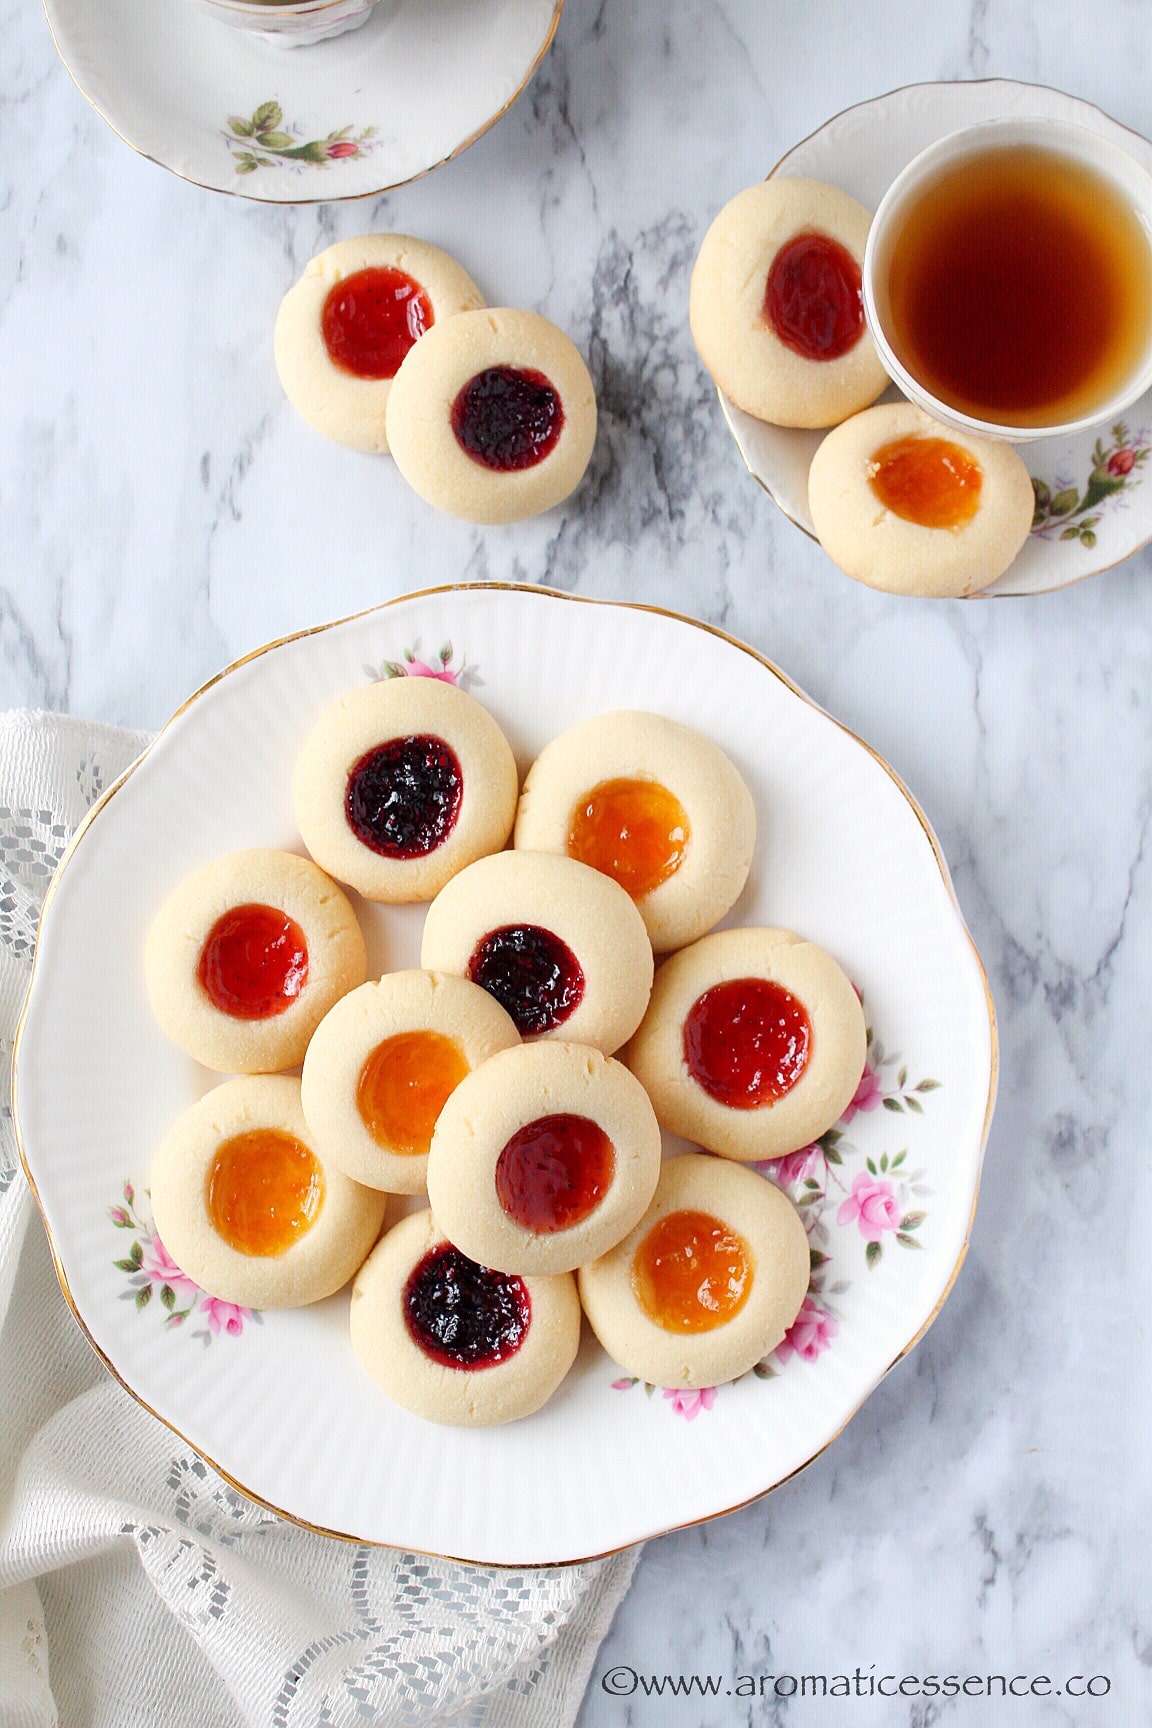
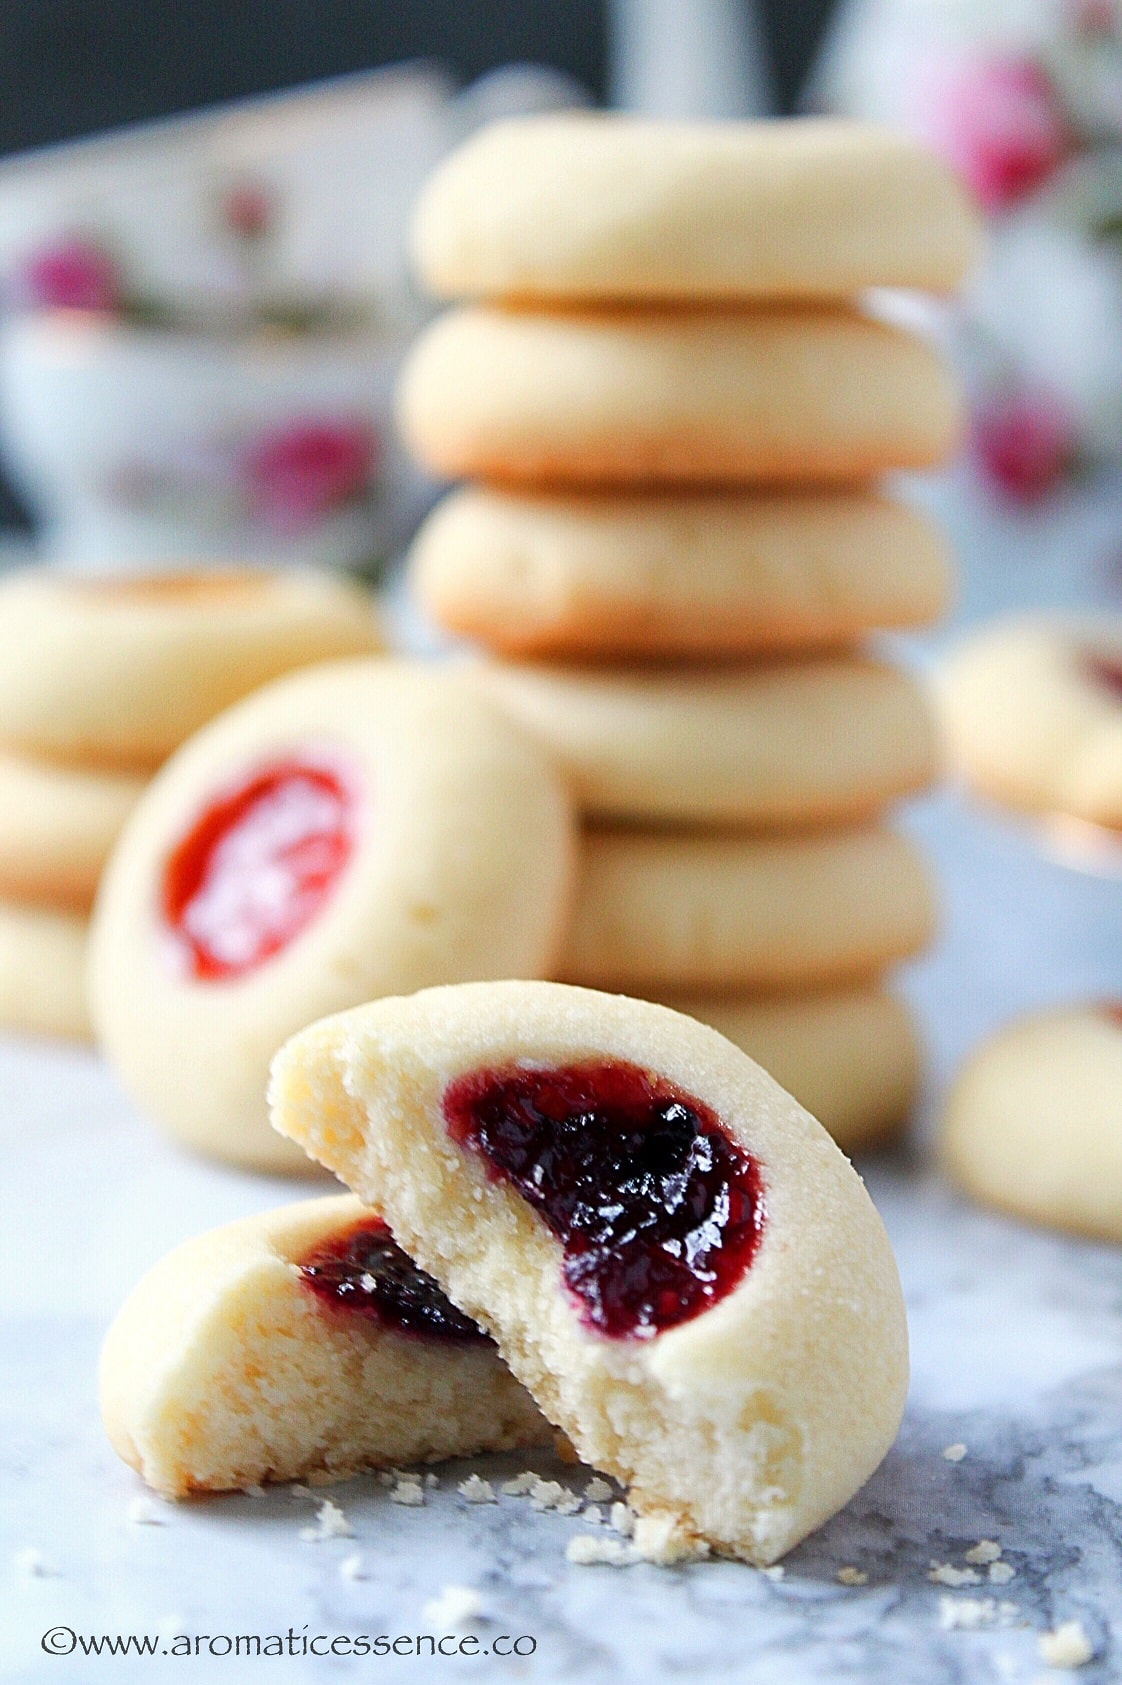
These Eggless thumbprint cookies | shortbread thumbprint cookies | shortbread jelly cookies are rich, buttery, tender, crumbly and melt in the mouth. Made with just five basic ingredients, these are easily adaptable to endless variations. Bake up a batch, or two or more this Holiday season coz they will be gone sooner than you think!

The Holidays are going to be upon us pretty soon. And I’ve made a list of goodies to share with you guys, starting with this classic Holiday favorite- Thumbprint Cookies, traditionally known as rosenmunnar , which are basically, buttery Swedish cookies with jam in the middle .
If you are looking for some easy Holiday cookies | Christmas cookie recipes , you have to add these awesome homemade thumbprint cookies to your cookie platter because –
- They are really easy , I promise. You just need about 15-20 mins of prep time for the cookie dough, shaping, and filling it with jam.
- There is no chilling or rolling involved . So no worries about the dough cracking and sticking and loads of other issues.
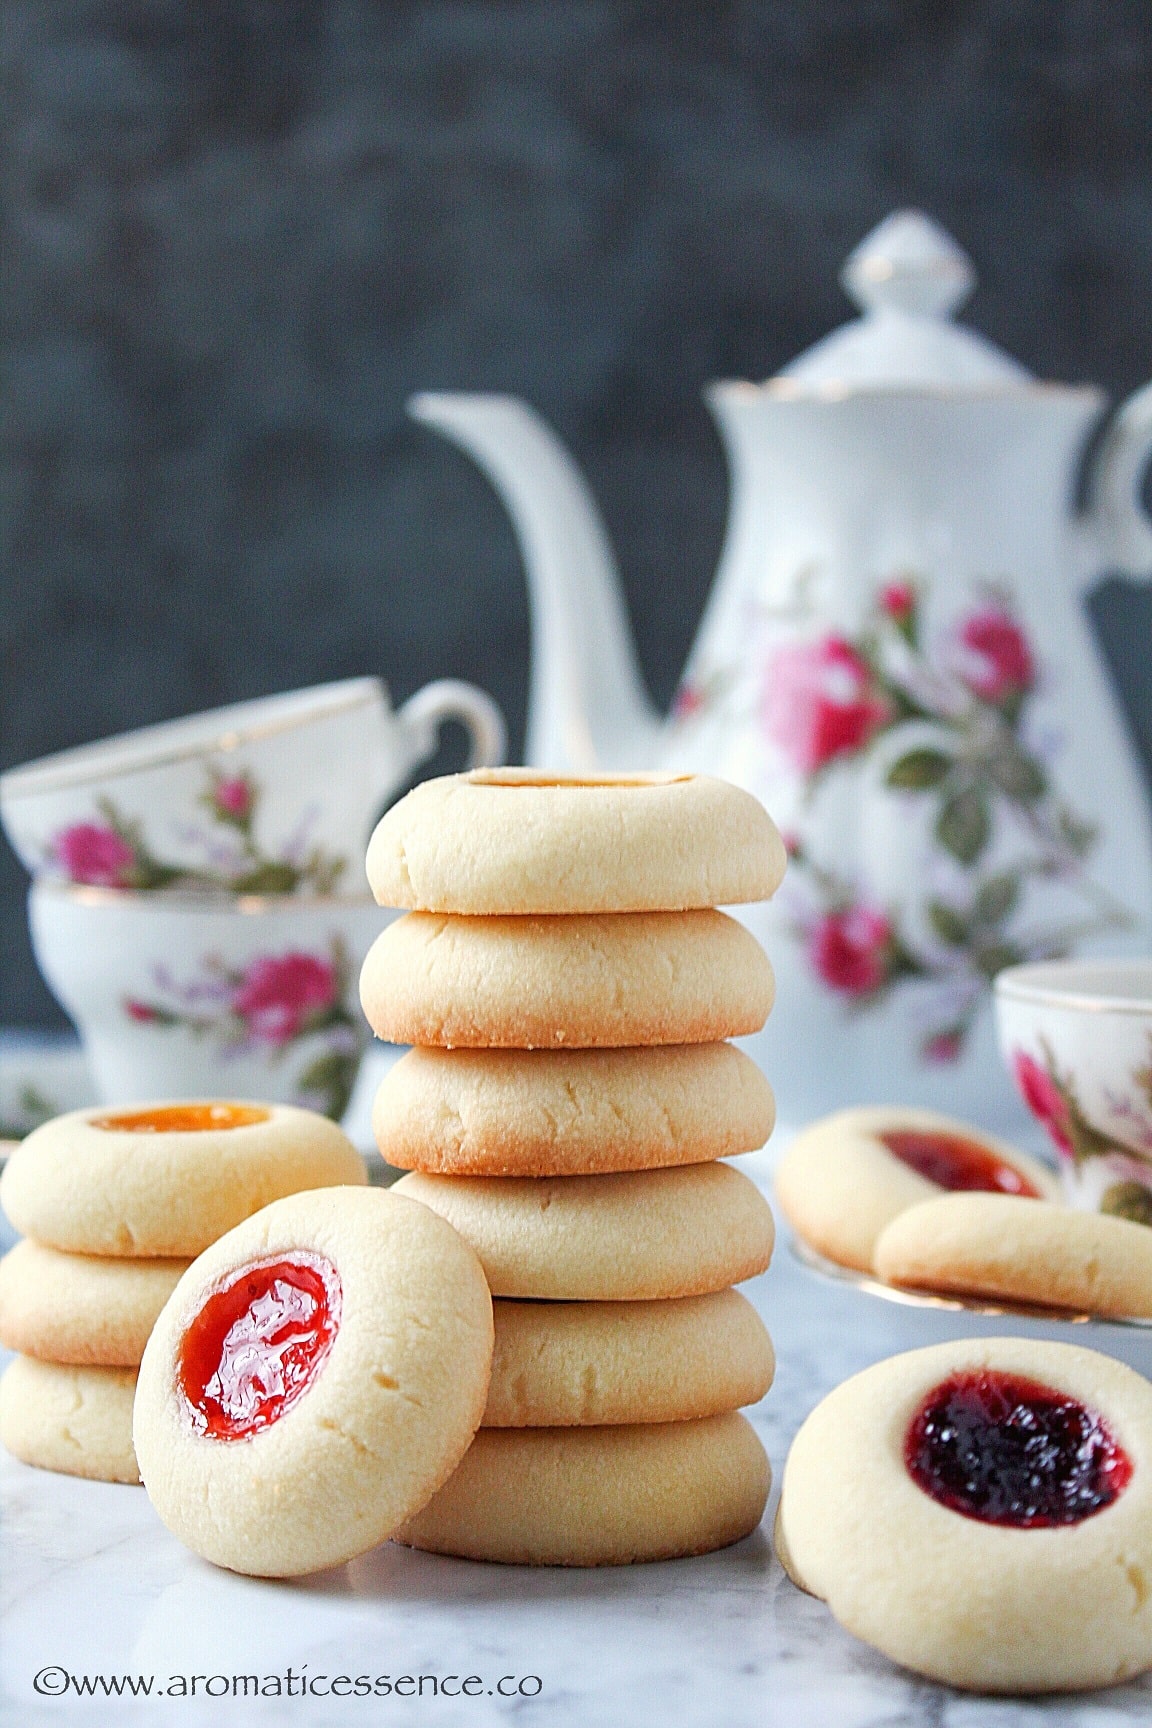
- Plus guys, look how pretty they look especially when you fill them with an assortment of jams or jellies.
- The taste – what it all comes down to after all. These jelly-filled cookies taste amazing, imagine taking a bite of these cookies, they are crisp yet so tender they literally crumble in your mouth with a little bit of the chewy texture from the sweet jam/jelly. These are little bites of heaven!
EGGLESS THUMBPRINT COOKIES INGREDIENTS | WHAT ARE THE INGREDIENTS FOR THUMBPRINT COOKIES?
These easy thumbprint cookies require just 5 basic ingredients , not counting salt and your flavoring agents.
- Butter, salted or unsalted both work in this recipe.
- Flour
- Cornstarch, an ingredient that makes these cookies really light and gives it an amazing crisp-tender texture. You can skip the cornstarch if you don’t have it and substitute it with flour instead. But if you do have some in your pantry, I highly recommend using it in this recipe.
- Confectioners sugar or powdered/icing sugar, another ingredient which also gives a nice, light texture to these eggless thumbprint cookies.
- Jams, jellies or preserves of choice. I’ve used an assortment of mixed berry, strawberry and mango jam. It did make for a stunning and gorgeous cookie platter!

These thumbprint cookies are adapted from my Karachi Fruit Biscuits, which is basically similar to a shortbread cookie. It is one of the most tried and tested recipes on my blog, and it has been loved by all those who have tried it. It is that one cookie dough that I always have at the back of my hand. I don’t even need to look at the recipe, because I have made it so many times that I’ve literally lost track of the number of cookies I’ve dished out using that failproof cookie dough recipe.
The best part is how versatile it is, either slice-and-bake, or roll it out and make cut-outs, or roll the dough into balls, flatten and make individual cookies. It always yields such amazing treats to enjoy sans the eggs. This is the best thumbprint cookie recipe ever, without the eggs, and after trying these out I’m sure you will agree with me on this one. You could also use this dough to make reindeer cookies and many other theme related shapes for any occasion.
You could also make vegan thumbprint cookies by using vegan butter instead.
I’ve flavored these jam thumbprints | jelly thumbprint cookies with pure vanilla extract to make a vanilla thumbprint cookie recipe . You can get creative here and create your own variations. Don’t know from where to start? I’ve given a list of variations further down and how to go about it. I bet you will enjoy those flavors too:)

VARIATIONS OF THUMBPRINT COOKIES USING THIS BASIC COOKIE DOUGH
These eggless thumbprint cookies are a gorgeous and lovely treat all year round. I don’t think they should be reserved only for the Holidays, they would be apt for any occasion. Here’s a very basic thumbprint cookie recipe along with numerous variations. So pick a few, and make some of these goodies to treat your family and friends this Holiday season.
Thumbprint cookies with kisses | Hershey thumbprint cookies: Press a Hershey’s kisses candy into each indentation as soon as you remove it from the oven.
Candy thumbprint cookies: Roll the cookie dough into 1-inch balls and press a candy melt in the center of each cookie. Bake for about 15 mins until edges are golden brown.
Red and green thumbprint cookies | Holiday thumbprint cookies: Press red or green candy melts or a halved candied cherry in the center of the cookies and bake as directed below. You can also roll the cookie dough in red or green sugar or use red and green sprinkles after filling the indentations with melted chocolate, Nutella etc
Caramel thumbprint cookies: Use about 10 caramels, such as Kraft’s. Melt the caramels with 1 tbsp heavy cream in the microwave or in a pot over medium-low heat until smooth. Take it off the heat and set aside. Once the caramel is warm, fill each indentation of the baked cookies up to the brim. You may sprinkle sea salt or nuts. Let it cool completely before serving.
Raspberry almond shortbread thumbprint cookies: Use 1/2 teaspoon almond extract instead of vanilla extract and use raspberry preserves or jelly to fill the indentations. Bake as directed in the recipe below.
Walnut or pecan thumbprint cookies: Use about 1/2 to 3/4 cup of crushed walnuts or pecans for this recipe. Roll the cookie dough ball in flax egg or egg white and then coat it by rolling the ball in crushed nuts. Place them on a baking sheet, make the indentation and proceed with the recipe.
Lemon raspberry thumbprint cookies: Add about 1/2 tbsp of lemon zest along with vanilla extract to the dough. Fill the indentations with raspberry preserves or jelly. Bake as directed in the recipe below.
Nutella thumbprint cookies: Fill the indentation with Nutella after the cookies have cooled down. Transfer the Nutella into a piping bag or ziplock bag (ends snipped off) and fill the cookies. Top with shredded coconut, sprinkles etc
Raspberry thumbprint cookies: Use raspberry jam/jelly to fill the indentation.
Blueberry thumbprint cookies: Use blueberry jam/jelly to fill the indentation.
Apricot thumbprint cookies: Use apricot preserves/jelly to fill the indentation.
Cinnamon thumbprint cookies: Swap 1/2 teaspoon of vanilla extract with the same amount of ground cinnamon.
Cardamom thumbprint cookies: Swap 1/2 teaspoon of vanilla extract with the same amount of green cardamom powder.
Thumbprint cookies with icing: For the icing, take 1/2 cup of powdered sugar and 1-2 teaspoons of milk, some lemon zest. Adjust the consistency of the icing with more milk if required. Combine everything and drizzle over the cookies once they cool down.
Chocolate thumbprint cookies: Use this recipe of chocolate cookies, and make thumbprint cookies instead.
HOW TO STORE THUMBPRINT COOKIES?
CAN YOU FREEZE THUMBPRINT COOKIES? IF YES, THEN HOW TO FREEZE THUMBPRINT COOKIES?
YOU MAY ALSO LIKE THESE EASY EGGLESS COOKIE RECIPES
STEP BY STEP INSTRUCTIONS TO MAKE EGGLESS THUMBPRINT COOKIES | BUTTER AND JAM THUMBPRINTS | SHORTBREAD BUTTER THUMBPRINT COOKIES
HOW TO MAKE EGGLESS THUMBPRINT COOKIES | JAM COOKIES? | THUMBPRINT BISCUITS RECIPE?
Eggless Thumbprint Cookies | Shortbread Thumbprint Cookies | Rosenmunnar
HOW TO STORE THUMBPRINT COOKIES?
Once you fill the thumbprints they are good for around 2 days at room temperature, as the moisture in the jams tends to soften them. If you plan on making these thumbprint cookies in advance, bake them without adding the jam. Store the baked thumbprints in an airtight container and fill in the jam only before serving. This way they will keep for longer.
CAN YOU FREEZE THUMBPRINT COOKIES? IF YES, THEN HOW TO FREEZE THUMBPRINT COOKIES?
Yes, you can definitely freeze the cookies. Simply follow these steps-
- Place all the thumbprints in a good airtight container such as Tupperware.
- Place parchment paper or wax paper between each layer of cookies so that they don’t stick together.
- Make sure the container is sealed tightly as you don’t want other odors passing on to the cookies.
- Place the container in a foil and then into a plastic bag to avoid as much air from getting into the container.
- If you have the time and patience you may also wrap each cookie individually in waxed paper and place them all in a container or zip lock bag.
- Thaw it overnight in the refrigerator or at room temperature for about 30 mins before serving. You can freeze them with or without the jam.
- Eggless Bourbon biscuits
- Eggless badam pista biscuits, Karachi bakery style
- Coconut cookies
- Nankhatai (Indian shortbread cookies)
- Linzer cookies
STEP BY STEP INSTRUCTIONS TO MAKE EGGLESS THUMBPRINT COOKIES | BUTTER AND JAM THUMBPRINTS | SHORTBREAD BUTTER THUMBPRINT COOKIES
1.Line a baking sheet with Silpat or parchment paper. Sift the flour, cornstarch, and salt in a large mixing bowl.

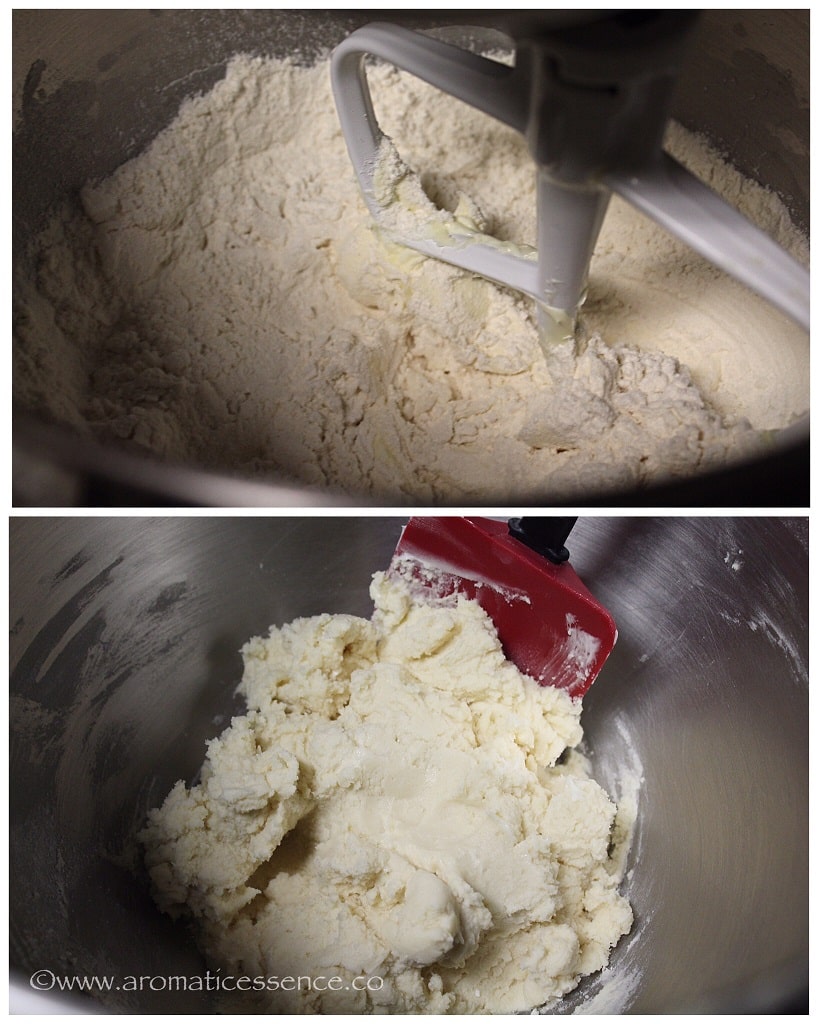
2.Place butter in the bowl of your stand mixer (you can use your hand mixer or a whisk too), sift in powdered sugar, beat on low heat initially, until the powdered sugar is mixed with the butter, then increase the speed to medium and beat until pale, light and creamy, scraping down the bowl in between.

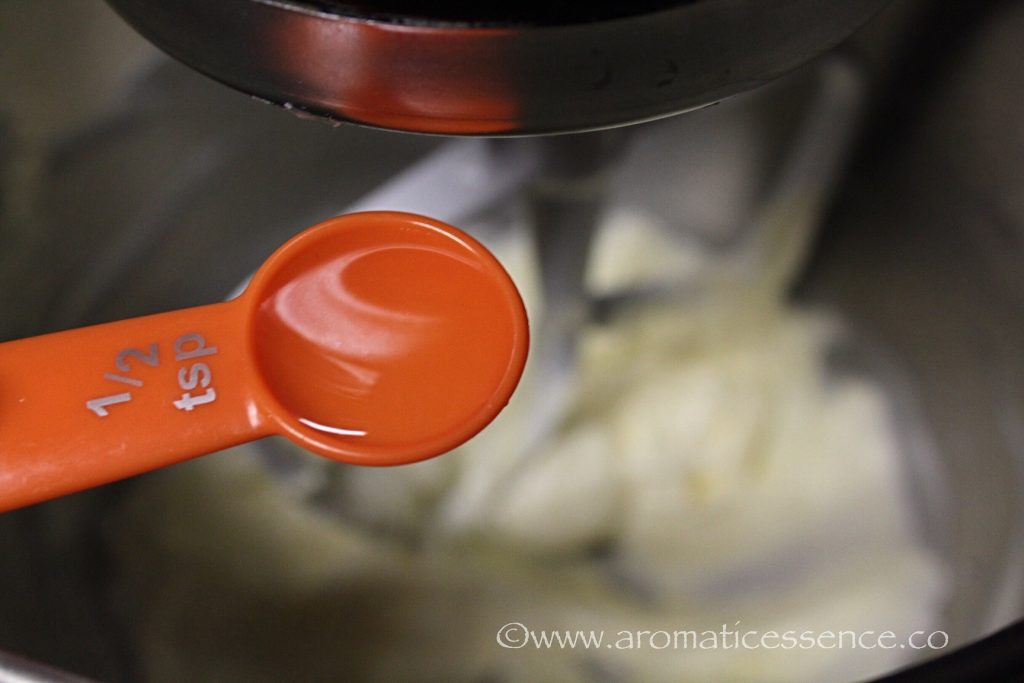
3.Add vanilla extract and mix well.
4.Now, switch to the lowest speed and add the dry ingredients in two parts, scraping down the bowl in between until well mixed. Gently bring the dough together. Do not knead. If at all the dough is dry, sprinkle few teaspoons of milk at a time, do not add too much. I didn’t require any milk. The dough should be soft.
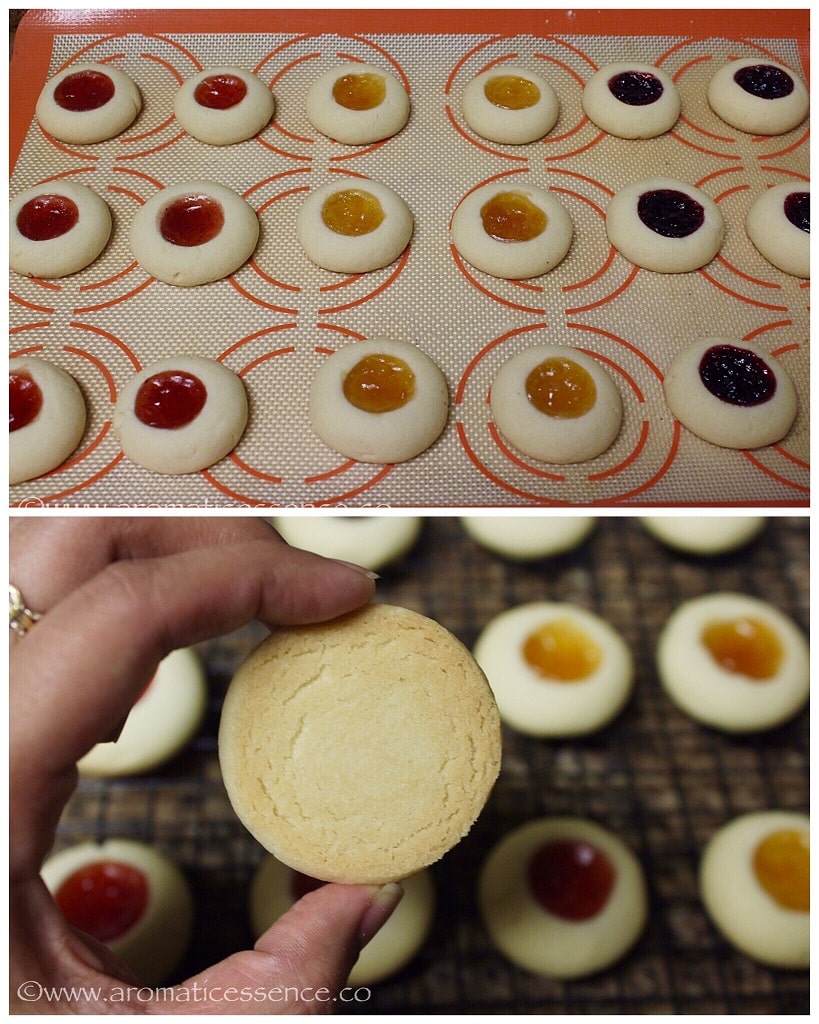
5.Preheat the oven to 350 degrees F/180 degrees C. Shape the dough into 1 inch balls. I used a tablespoon and half to measure out the dough and form the balls, just so they are all uniform. Place the balls on the baking tray, about 2-inches apart.

6.Make an indentation in the center of each cookie gently, using your thumb or the back of a rounded 1/4 teaspoon. If the edges crack, simply fix it with your fingers. Or just leave it as it is, it doesn’t really matter.

7.Fill the centers of the cookies with jam right up to the brim, about 1/4 teaspoon.

8.Bake for 13-15 minutes or just until the edges are golden brown. Let it stand on the cookie sheet for about a minute, then transfer to a cooling rack and cool completely.
NOTE
- The butter should be soft but not so soft that it is mushy. If you push the butter with your finger, it should slide with some resistance, leaving a dent behind. That is the correct consistency of the butter to be used in this recipe. Leave it for no more than 1 hour on the countertop to reach this stage. When the butter is too soft, you may end up using more flour as the dough might be sticky. Simply avoid this situation by ensuring the butter is not too soft.
- If the jam is too firm, transfer it to a microwave safe bowl and microwave for about 10 seconds or transfer to a heavy bottomed pot over medium-low heat, stir it well to loosen it and fill the cookies. Make sure it is not very hot.
- If it is too hot and humid where you live, you may want to refrigerate the cookies after making the indentation. Doing so will prevent the cookies from spreading while baking. Add the jam after the refrigerating the cookies and bake as directed.
HOW TO MAKE EGGLESS THUMBPRINT COOKIES | JAM COOKIES? | THUMBPRINT BISCUITS RECIPE?

Eggless Thumbprint Cookies | Shortbread Thumbprint Cookies | Rosenmunnar
Ingredients1x2x3x
Measuring cup used, 1 cup = 250 ml, 1 tsp = 5 ml
- 1 cup all-purpose flour, spooned and leveled
- 2 tbsp cornstarch
- 1/2 cup unsalted butter softened (leave the butter on the counter top, until soft)
- 1/2 cup Confectioner’s sugar/powdered sugar, you may even reduce it to 1/3 cup if you prefer less sweeter cookies
- 1/2 tsp vanilla extract
- 1/4 tsp salt, skip if using salted butter
- 1/4 to 1/3 cup jam/jelly/preserves, of choice
Instructions
- Line a baking sheet with Silpat or parchment paper. Sift the flour, cornstarch, and salt in a large mixing bowl.
- Place butter in the bowl of your stand mixer (you can use your hand mixer or a whisk too), sift in powdered sugar, beat on low heat initially, until the powdered sugar is mixed with the butter, then increase the speed to medium and beat until pale, light and creamy, scraping down the bowl in between.
- Add vanilla extract and mix well.
- Now, switch to the lowest speed and add the dry ingredients in two parts, scraping down the bowl in between until well mixed. Gently bring the dough together. Do not knead. If at all the dough is dry, sprinkle few teaspoons of milk at a time, do not add too much. I didn’t require any milk. The dough should be soft.
- Preheat the oven to 350 degrees F/180 degrees C. Shape the dough into 1 inch balls. I used a tablespoon and half to measure out the dough and form the balls, just so they are all uniform. Place the balls on the baking tray, about 2-inches apart.
- Make an indentation in the center of each cookie gently, using your thumb or the back of a rounded 1/4 teaspoon. If the edges crack, simply fix it with your fingers. Or just leave it as it is, it doesn’t really matter.
- Fill the centers of the cookies with jam right up to the brim, about 1/4 teaspoon.
- Bake for 13-15 minutes or just until the edges are golden brown. Let it stand on the cookie sheet for about a minute, then transfer to a cooling rack and cool completely.
Notes
- The butter should be soft but not so soft that it is mushy. If you push the butter with your finger, it should slide with some resistance, leaving a dent behind. That is the correct consistency of the butter to be used in this recipe. Leave it for no more than 1 hour on the countertop to reach this stage. When the butter is too soft, you may end up using more flour as the dough might be sticky. Simply avoid this situation by ensuring the butter is not too soft.
- If the jam is too firm, transfer it to a microwave safe bowl and microwave for about 10 seconds or transfer to a heavy bottomed pot over medium-low heat, stir it well to loosen it and fill the cookies. Make sure it is not very hot.
- If it is too hot and humid where you live, you may want to refrigerate the cookies after making the indentation. Doing so will prevent the cookies from spreading while baking. Add the jam after the refrigerating the cookies and bake as directed.

I hope you guys enjoyed this easy thumbprint cookie recipe. I would love to hear from you if you try them out.
Please feel free to share your feedback with photos and suggestions to me at aromaticessence77@gmail.com
You can also follow me on :
Facebook @ Aromaticessence
Pinterest @ Aromatic Essence
Instagram @ aromatic_essence77
Twitter @ freda_dias
Regards,
Freda
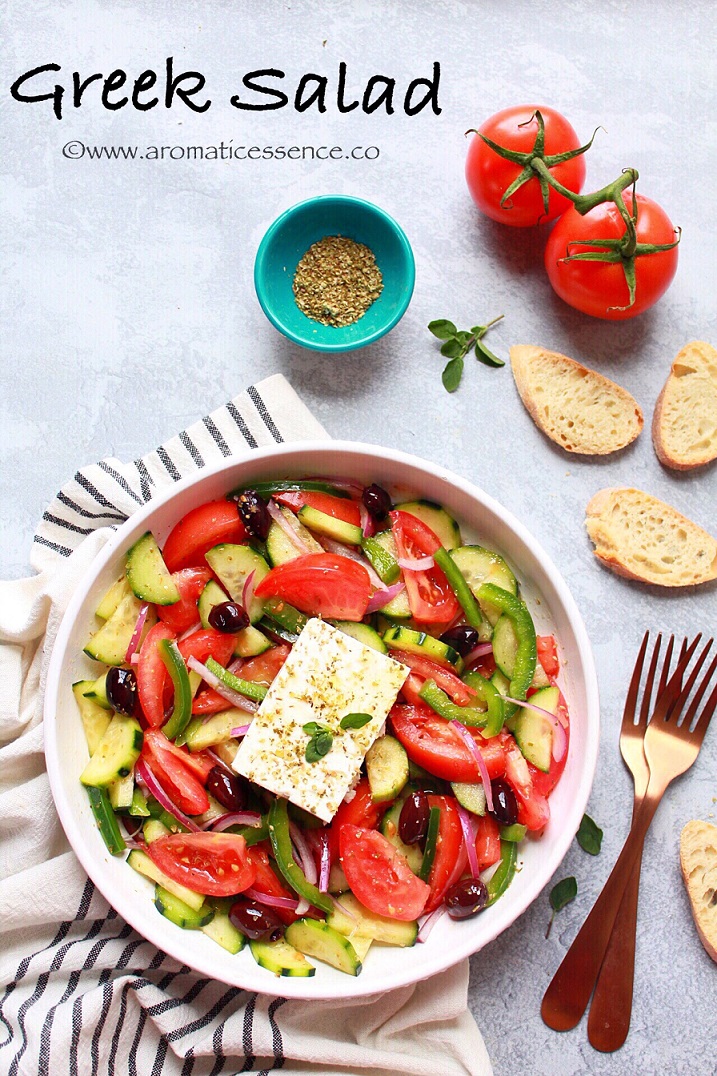
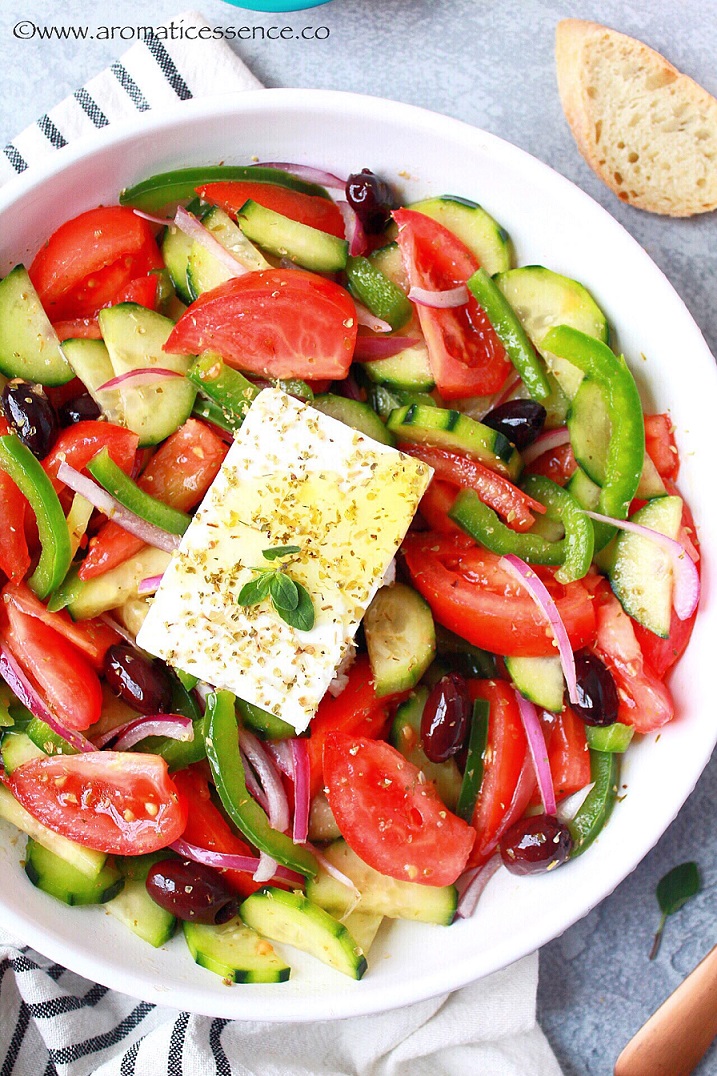
This refreshing Greek salad, loaded with vegetables, kalamata olives, and feta cheese is a delicious summer treat. Greek vegetable salad, traditionally known as horiatiki or xoriatiki salata is a meal in itself, super simple to put together and so good for you!
Visiting Greece has been on my bucket list like forever. I hope that comes true someday. What’s not to love about this beautiful Mediterranean country? The rich history, culture, breathtaking views and for a foodie like me, obviously the food. Food from different cultures has always intrigued me.
Having lived in a multicultural country like India for the better part of my life, I’ve learned how food differs regionally, and have come to appreciate the variety!
Mediterranean diet is considered to be one of the healthiest diets in the world. Fruits, vegetables, legumes, lean meats, whole grains, and nuts are a part of this healthy diet, and of course olive oil and some red wine too!
This Greek Salad or Horiatiki/Xoriatiki Salata as it is traditionally known as is one of the simplest Greek recipes and one that you should have at the back of your hand. ‘Horiatiki’ simply means village or peasant salad.
While it’s true that this salad will taste best in Greece because of the local produce that goes into the salad, you can still enjoy this salad even if you are not in Greece. Just remember to use really good quality and if possible organic vegetables.
- What’s a Greek salad?
- Horiatiki salad ingredients
- Variations
- How to make a good traditional Greek salad?
- What dressing goes on this salad?
- Is this salad healthy?
- What to serve with Greek salad?
- You may also enjoy these fresh salad recipes
- How to make Greek salad recipe – step by step instructions
- Greek Salad Recipe {Horiatiki Salad/Xoriatiki Salata}
What’s a Greek salad?
Xoriatiki Salata, also known as a Greek village salad is a rustic, refreshing, and delicious salad made with fresh summer produce.
This salad is quite popular in Greece (but obviously) and also in Cyprus. Let’s have a detailed look at the ingredients that go into a Xoriatiki Salata.
Horiatiki salad ingredients
A traditional Greek salad is made with;
- Juicy tomatoes
- Cucumbers
- Red onions
- Green bell pepper
- Plump kalamata olives
- Seasoned with some Greek oregano.
- The salad is dressed with olive oil and a splash of red wine vinegar.
- Traditionally, a slab of feta cheese is placed over all the ingredients in a bowl.
The ingredients vary from region to region. Some may include green bell pepper, while others may not. Some also add capers.
Lettuce and lemon juice are not a part of a traditional Greek Salad. Lettuce is pretty much a part of ‘American’ Greek Salad, I think it is not a bad addition after all.
If you like lettuce, go ahead and use it, after all, you are going to eat the salad, so customize it as per your needs. I see no reason why you can’t make this salad with lettuce even though the authentic version has none.
One of the major reasons that I read was that lettuce is basically a winter produce, whereas the rest of the ingredients that go into this salad are all fresh, summer produce, which could explain why lettuce is not used for this salad in Greece. But here in the US, lettuce, that too all kinds, are available throughout the year, so if you love lettuce in this salad, add some.
Variations
Avocado: To make a this salad with a twist, try adding avocados! Greek salad with avocados? Heck yes, try it, the creamy, buttery avocados add a nice dimension to this salad. Of course, if you don’t like avocados in the first place, this variation won’t work.
Pasta or grains: You can add cooked pasta like tortellini or small pasta like orzo, couscous or grains like barley or a seed like quinoa to this Grecian salad to make it heartier.
Vary the salad dressing: Try changing up Greek vinaigrette, by including some minced garlic, mustard etc. Play around with the ingredients if you are feeling particularly adventurous!

How to make a good traditional Greek salad?
The best Greek salad is filled with clean, delicious flavors and textures. This has got to be one of the easiest salads you can ever make
Using good quality, fresh ingredients is the only key in making a really delicious Greek peasant salad.
Start off by cutting tomatoes into wedges. The best tomatoes for Greek salad should be ripe, and juicy. That is why it makes sense to make this salad during the summers when tomatoes are at their peak. You can also use cherry tomatoes, they are so good all year round.
Next, the cucumbers, you may or may not peel them. Slice it into rounds and then into half-moons. I recommend using English cucumbers, they have fewer seeds. I, however, could find none the day I went grocery shopping, so I used regular cucumbers.
Slice the onions thinly and green bell pepper too if using.
Add the tomatoes, cucumbers, onions, and bell peppers in a shallow bowl. Add the kalamata olives. Kalamata olives are the best olives for Greek salad, so definitely try and use those.
As for the spices and herbs in Greek salad, you only need to sprinkle some Greek oregano and a tiny pinch of salt, since the feta is salty.
Then drizzle some extra virgin olive oil, and red wine vinegar. Toss to combine everything very gently.
Finally, place a slab of sheep’s milk feta cheese, drizzle some more olive oil and Greek oregano over the feta cheese. This the classic Greek salad presentation.
However, you can also cut the feta cheese in smaller cubes if you prefer it that way. Or use crumbled feta cheese if that is what you have.
What dressing goes on this salad?
If you are wondering what kind of dressing to use for Greek salad, then let me tell you that the best dressing for a Greek Salad are simply;
- Good quality extra virgin oil
- A splash of aged red wine vinegar
- And some Greek oregano.
That’s all there is to this easy homemade Greek dressing, you don’t even need to add these to a separate bowl and whisk, just pour them over the salad ingredients and toss everything.
Feta cheese is already salty, so you may skip adding salt.
A lot of folks use lemon juice in this Greek salad recipe. While it is okay, lemon juice is not traditionally used in the classic Greek salad.

Is this salad healthy?
Considering all the ingredients that go into a classic and authentic Horiatiki salad, they are definitely good-for-you ingredients packed with nutrients, vitamins, and anti-oxidants.
A simple and clean dressing with good quality olive oil and red wine vinegar is so much better than the commercially available dressings that are sold in the name of Greek dressing. You don’t need these and are much better off making your own at home.
You must keep in mind though that feta cheese is high in calories, so consume it in moderation.
Otherwise, this is a really nutritious salad, and you must definitely make the most of it during the fresh seasonal produce, having it every day if you may, just as the Greeks do during the summers.
What to serve with Greek salad?
Serve this healthy Greek Salad as a light meal along with some crusty bread to soak up all that juices at the bottom of the bowl.
If I’m serving Greek Salad as a side dish, I love to make Greek Moussaka or Chicken Souvlaki as the main dish.
Greek lamb cutlets, Greek lasagna, or Greek meatballs would be lovely choices for a hearty Greek fare too.

You may also enjoy these fresh salad recipes
- Strawberry Spinach Salad
- Caprese Salad
- Watermelon Cucumber Feta Salad
- Mediterranean Quinoa and Chickpea Salad
- Blood Orange Salad
How to make Greek salad recipe – step by step instructions
Step 1: Slice the tomatoes & cucumber
Cut the tomatoes into wedges. Peel the cucumber to create a striped pattern (optional). Slice into 1/4 inch thick rounds, and then into half moons.

Step 2: Slice the bell pepper and onion
Core and seed the bell pepper, and cut into thin round or strips, whatever you prefer.
Slice the onions thinly. Tip: If you do not like raw onions, you may soak the onion slices in ice cold water for 10-15 minutes, drain and then use in the salad. This step removes the pungency of the onions. If you do this step, then start off by slicing the onions first, and let it soak while you prep the other veggies.

Step 3: Assemble the salad
Place all the veggies in a shallow bowl. Add the Kalamata olives.

Drizzle olive oil and red wine vinegar.
Sprinkle dried oregano along with a tiny pinch of salt (not much, since feta is already salty) and toss everything gently.

Next, place a slab of feta cheese on top. Drizzle some more olive oil, and some more dried oregano. Enjoy!


You can also follow me on Facebook , Pinterest, Instagram & Twitter

Greek Salad Recipe {Horiatiki Salad/Xoriatiki Salata}
Ingredients1x2x3x
Measuring cup used, 1 Cup = 250 ml, 1 tsp = 5 ml
- 3 fresh, juicy tomatoes, cut into wedges
- 1 English cucumber, cut into half-moons
- 1 green bell pepper, cored, seeded, and sliced
- Half a red onion, thinly sliced
- 15 to 20 Kalamata olives
- 4 oz slab of feta cheese
- 1/4 cup extra virgin olive oil
- 2 tbs red wine vinegar
- Pinch of dried Greek oregano
- Sea salt, as required
Instructions
- Cut the tomatoes into wedges. Peel the cucumber to create a striped pattern (optional). Slice into 1/4 inch thick rounds, and then into half moons.
- Core and seed the bell pepper, and cut into thin round or strips, whatever you prefer. Slice the onions thinly. If you do not like raw onions, you may soak the onion slices in ice cold water for 10-15 minutes, drain and then use in the salad. This step removes the pungency of the onions. If you do this step, then start off by slicing the onions first, and let it soak while you prep the other veggies.
- Place all the veggies in a shallow bowl. Add the Kalamata olives.
- Drizzle olive oil and red wine vinegar. Sprinkle dried oregano along with a tiny pinch of salt (not much, since feta is already salty) and toss everything gently.
- Next, place a slab of feta cheese on top. Drizzle some more olive oil, and some more dried oregano. Enjoy!

