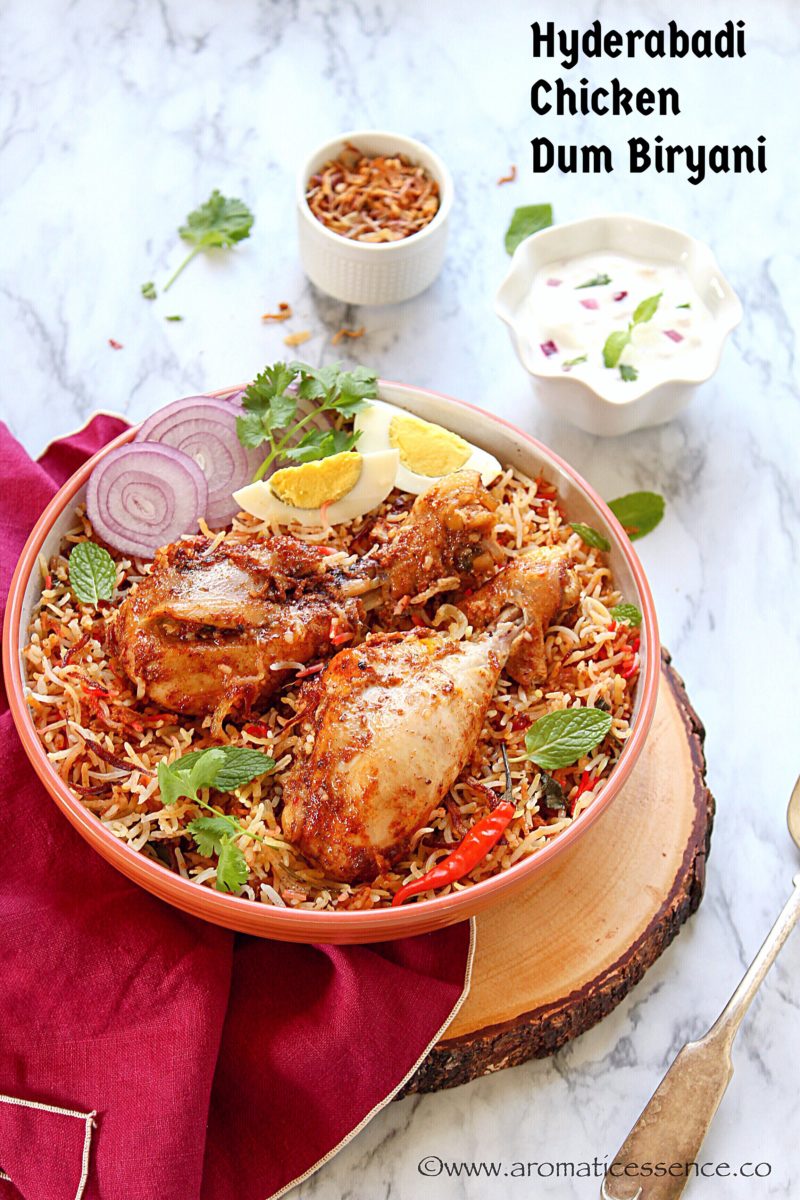
Hyderabadi Chicken Biryani | Hyderabadi Dum Biryani | H yderabadi kachi chicken biryani recipe with step-by-step pictures. As daunting as it may seem to cook a delicious pot of chicken biryani, making one is not as hard. Learn how to make the best Hyderabadi biryani with this simple recipe.

Hyderabadi Chicken dum biryani is one of the most popular chicken biryanis across India. Dum has originated from the Persian word Dum’Pukht which means air-cooked. So basically, in this biryani, marinated chicken and rice are layered in an earthen pot and the lid is sealed with dough all around. This causes an increase in pressure within the vessel due to the rise in temperature. The pressure built up helps in cooking the meat, while also keeping all the flavors intact.
I came across this recipe for Hyderabadi Chicken biryani by Priyanka, when I first joined an FB foodie group and had bookmarked the recipe right away, lest I forgot! I must admit I was quite skeptical about the outcome, as this Hyderabadi Chicken dum biryani involves directly cooking the marinated chicken with rice, that’s why it is also called kachi dum biryani.
There were initial doubts about the entire endeavor. Would the chicken cook through? Would the rice turn too mushy? The fact that I had never made biryani before only added to my fears. The DH was craving some biryani, and it was time I put my fears aside and take the plunge. Which I did, and my oh my, I can’ t tell you the resultant biryani was nothing short of worthy.

I know of people who need a couple of tries to get a biryani right, it definitely needs that level of expertise, as it is a labor-driven dish. Every step needs to be perfect to be able to enjoy those layers of flavor- perfectly cooked rice and the meat ever so succulent, that it just falls off the bone!
- HYDERABADI CHICKEN BIRYANI RECIPE IS PRETTY STRAIGHTFORWARD AND DIVIDED INTO 5 PARTS
- ENJOYED THIS HYDERABADI CHICKEN BIRYANI? YOU MAY ALSO LIKE THESE BIRYANI RECIPES
- STEP BY STEP INSTRUCTIONS TO MAKE HYDERABADI CHICKEN BIRYANI RECIPE | HYDERABADI BIRYANI
- HOW TO MAKE HYDERABADI CHICKEN DUM BIRYANI | HYDERABADI BIRYANI | KACHI CHICKEN BIRYANI?
- Hyderabadi Chicken Biryani | Hyderabadi Biryani Recipe
HYDERABADI CHICKEN BIRYANI RECIPE IS PRETTY STRAIGHTFORWARD AND DIVIDED INTO 5 PARTS
- Make the birista, deep fried crisp golden onions
- Make the Hyderabadi biryani spice mix or biryani masala spice mix, a mixture of aromatic spices and dried red chillies
- Marinate the chicken
- Par cook the rice
- Layering and cooking the biryani
This Hyderabadi murgh biryani is a cinch to pull off once you are done with the first 3 time-consuming parts. You can reduce your work if you have birista ready, or even use store-bought ones. I highly recommend making the biryani spice mix at home since it adds so much flavor. This biryani is fairly spicy, you can reduce the red chillies if you wish to.
The chicken is usually done in 20 minutes. If you are making it for the first time, do check if it has cooked through, if not cook it further for another 5-10 minutes. If you have time to spare, do seal the lid to the pot with chapati dough. It’s the traditional and most effective way of cooking a biryani. I, however, use an aluminum foil and it works great too.

- Hariyali jinga biryani
- Cauliflower dum biryani .

STEP BY STEP INSTRUCTIONS TO MAKE HYDERABADI CHICKEN BIRYANI RECIPE | HYDERABADI BIRYANI
1.Prepare the birista (crisp deep fried onions) – Heat oil in a kadai, add sliced onions, fry until golden brown. Drain on an absorbent napkin.

2.Grind the whole spices (listed under for the biryani masala ).

3.Mix the ground spice powder with coriander powder and garam masala.

- Marinate the chicken: In a sufficiently large bowl, add chicken, yogurt, ginger garlic paste, coriander & mint leaves, oil, half of the brown onions, biryani masala prepared in step 3, Kashmiri chilli powder, lemon juice, and about 2 tsp salt or to taste. You can also add some chopped or slit green chillies. Mix well to coat the pieces well with the marinade ingredients and keep aside for a minimum of half an hour or overnight.

- Preparation of the rice: Prepare a spice bag by keeping all the ingredients in a muslin cloth.

6.Boil sufficient water, put the spice bag into it with some salt. Add washed rice and cook until the rice is 70% percent done. Drain in a colander, collect the water in a bowl to be used in further steps and discard the spice bag.

7.In a heavy bottom pan, place the marinated chicken along with all the marinade.

8.Add 3/4th of the 70% cooked rice. Also, add approx 3-4 tbsp of reserved water from step 6.

9.Sprinkle brown onions, garam masala, coriander, and mint leaves, salt and ghee.

10.Repeat the same procedure for the second layer of rice. Sprinkle the saffron milk and red food color (optional)

11.Cover the pan with an aluminum foil and then the lid.Switch on the gas, cook on high heat for the first 5-7 minutes and as soon as the steam forms keep a heavy bottom tava/skillet below the pot and turn the flame to medium-low, cook for another 15-20 minutes.

12.Once done, let it stand undisturbed for about 15 minutes, then open the pot, mix lightly with a ladle. Enjoy with raita.

HOW TO MAKE HYDERABADI CHICKEN DUM BIRYANI | HYDERABADI BIRYANI | KACHI CHICKEN BIRYANI?
Hyderabadi Chicken Biryani | Hyderabadi Biryani Recipe
Ingredients1x2x3x
Measuring cup used, 1 cup = 250 ml, 1 tsp = 5 ml
- 1 lb bone-in chicken
For biryani masala
- 2 cinnamon sticks
- 2-3 bay leaves
- 2 black Cardamom
- 6-8 green Cardamom
- 6-8 cloves
- 4-5 whole dried red chillies
- 1 tsp shah jeera
- 1 tbsp coriander powder
- 1 tsp garam masala
For the rice
- 2 cups Basmati rice, washed and soaked in water for 30 minutes
- 1 inch cinnamon stick
- 2 bay leaves
- 2-4 green cardamom
- 2-4 cloves
- 4-5 black peppercorns
- 1 tsp cumin seed
- Salt, to taste
Other ingredients
- 3/4 cup yogurt
- 2.5 tbsp ginger- garlic paste
- 1 tbsp Kashmiri Red chilli powder
- 3 cups sliced onion
- Handful of chopped cilantro leaves
- Handful of chopped mint leaves
- 5-6 saffron strands soaked in 1 tbsp warm milk
- 1 tbsp lemon juice
- 2-3 tbsp ghee
- 2 tbsp oil
Instructions
- Prepare the birista (crisp deep fried onions) - Heat oil in a kadai, add sliced onions, fry until golden brown. Drain on an absorbent napkin.
- Grind the whole spices (listed under for the biryani masala).
- Mix the ground spice powder with coriander powder and garam masala.
- Marinate the chicken: In a sufficiently large bowl, add chicken, yogurt, ginger garlic paste, coriander & mint leaves, oil, half of the brown onions, biryani masala prepared in step 3, Kashmiri chilli powder, lemon juice, and about 2 tsp salt or to taste. You can also add some chopped or slit green chillies. Mix well to coat the pieces well with the marinade ingredients and keep aside for a minimum of half an hour or overnight.
- Preparation of the rice: Prepare a spice bag by keeping all the ingredients in a muslin cloth.
- Boil sufficient water, put the spice bag into it with some salt. Add washed rice and cook until the rice is 70% percent done. Drain in a colander, collect the water in a bowl to be used in further steps and discard the spice bag.
- In a heavy bottom pan, place the marinated chicken along with all the marinade.
- Add 3/4th of the 70% cooked rice. Also, add approx 3-4 tbsp of reserved water from step 6.
- Sprinkle brown onions, garam masala, coriander, and mint leaves, salt and ghee.
- Repeat the same procedure for the second layer of rice. Sprinkle the saffron milk and red food color (optional).
- Cover the pan with an aluminum foil and then the lid. Switch on the gas, cook on high heat for the first 5-7 minutes and as soon as the steam forms keep a heavy bottom tava/skillet below the pot and turn the flame to medium-low, cook for another 15-20 minutes.
- Once done, let it stand undisturbed for about 15 minutes, then open the pot, mix lightly with a ladle. Enjoy with raita.

I would love to hear from you! Please feel free to share your feedback with photos and suggestions to me at aromaticessence77@gmail.com
You can also follow me on :
Regards,
Freda

Hyderabadi Chicken Biryani | Hyderabadi Biryani Recipe
Ingredients
Measuring cup used, 1 cup = 250 ml, 1 tsp = 5 ml
- 1 lb bone-in chicken
For biryani masala
- 2 cinnamon sticks
- 2-3 bay leaves
- 2 black Cardamom
- 6-8 green Cardamom
- 6-8 cloves
- 4-5 whole dried red chillies
- 1 tsp shah jeera
- 1 tbsp coriander powder
- 1 tsp garam masala
For the rice
- 2 cups Basmati rice, washed and soaked in water for 30 minutes
- 1 inch cinnamon stick
- 2 bay leaves
- 2-4 green cardamom
- 2-4 cloves
- 4-5 black peppercorns
- 1 tsp cumin seed
- Salt, to taste
Other ingredients
- 3/4 cup yogurt
- 2.5 tbsp ginger- garlic paste
- 1 tbsp Kashmiri Red chilli powder
- 3 cups sliced onion
- Handful of chopped cilantro leaves
- Handful of chopped mint leaves
- 5-6 saffron strands soaked in 1 tbsp warm milk
- 1 tbsp lemon juice
- 2-3 tbsp ghee
- 2 tbsp oil
Instructions
- Prepare the birista (crisp deep fried onions) - Heat oil in a kadai, add sliced onions, fry until golden brown. Drain on an absorbent napkin.
- Grind the whole spices (listed under for the biryani masala).
- Mix the ground spice powder with coriander powder and garam masala.
- Marinate the chicken: In a sufficiently large bowl, add chicken, yogurt, ginger garlic paste, coriander & mint leaves, oil, half of the brown onions, biryani masala prepared in step 3, Kashmiri chilli powder, lemon juice, and about 2 tsp salt or to taste. You can also add some chopped or slit green chillies. Mix well to coat the pieces well with the marinade ingredients and keep aside for a minimum of half an hour or overnight.
- Preparation of the rice: Prepare a spice bag by keeping all the ingredients in a muslin cloth.
- Boil sufficient water, put the spice bag into it with some salt. Add washed rice and cook until the rice is 70% percent done. Drain in a colander, collect the water in a bowl to be used in further steps and discard the spice bag.
- In a heavy bottom pan, place the marinated chicken along with all the marinade.
- Add 3/4th of the 70% cooked rice. Also, add approx 3-4 tbsp of reserved water from step 6.
- Sprinkle brown onions, garam masala, coriander, and mint leaves, salt and ghee.
- Repeat the same procedure for the second layer of rice. Sprinkle the saffron milk and red food color (optional).
- Cover the pan with an aluminum foil and then the lid. Switch on the gas, cook on high heat for the first 5-7 minutes and as soon as the steam forms keep a heavy bottom tava/skillet below the pot and turn the flame to medium-low, cook for another 15-20 minutes.
- Once done, let it stand undisturbed for about 15 minutes, then open the pot, mix lightly with a ladle. Enjoy with raita.
Kalakand recipe with step-by-step pictures using fresh homemade paneer. Learn how to make this moist, juicy and absolutely delicious Indian kalakand sweet at home with this recipe.

And I’m preparing this delicious treat to celebrate a special milestone in my blogging existence! Yes, folks, my blog completed 3 years on the 17th of this month.
As I write this post, I’m filled with nostalgic moments. I remember signing up with the free version of WordPress on my mobile at midnight. Just like that, on a whim:) And from there to the present day, I’ve always had mixed feelings about my decision. Sometimes I wonder if the efforts I put into this blog are worth the time and energy I spend. I’m still trying to figure out the nuances that come along with blogging.
What has touched me most throughout this journey is all the amazing feedback I get from you people. It also kind of keeps me going to share more. So for now, I intend to stick around and see how it goes from here.

An occasion needs some celebration and this time I’m sharing a dessert as I usually do. Kalakand is a labor-intensive sweet, and there are shortcuts and the instant versions where you can make kalakand with ricotta cheese, which will help you make some yummy kalakand in a matter of minutes.
But I’m sharing with you the long way! Why? Simply since I had excess milk in the refrigerator which was nearing expiration. And it was also perfect to indulge in some good stuff for an occasion 😀
The version I’m sharing involves making kalakand from paneer and sweetened condensed milk, both of which are made from scratch. I anyways, prefer to use fresh, homemade paneer for this recipe, as it makes the end product so moist and juicy.
This is not an authentic recipe to make kalakand, but yields results that are comparable to the ones sold at the sweet marts.
- WHAT IS KALAKAND?
- KALAKAND INGREDIENTS
- HOW TO MAKE KALAKAND AT HOME? | HOW TO MAKE INDIAN MILK CAKE?
- KALAKAND RECIPE WITH CONDENSED MILK
- ENJOYED THIS KALAKAND? THEN DON’T FORGET TO CHECK OUT SOME MORE DELICIOUS INDIAN SWEETS THAT I’VE SHARED ON THE BLOG
- STEP BY STEP INSTRUCTIONS TO MAKE KALAKAND RECIPE WITH MILK | INDIAN MILK CAKE
- HOW TO MAKE KALAKAND SWEET?
- Kalakand | How To Make Kalakand | Indian Milk Cake
WHAT IS KALAKAND?
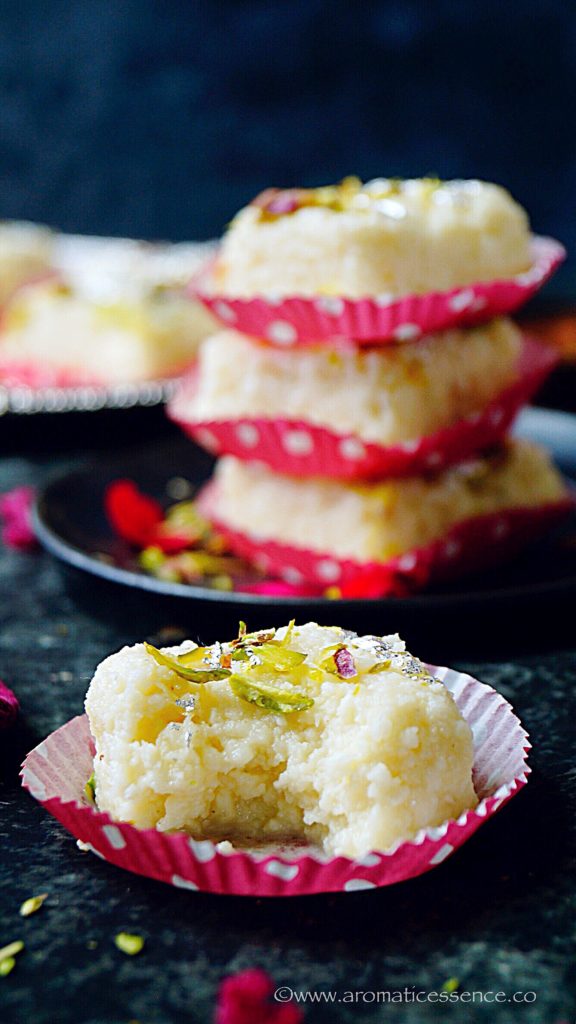
Kalakand is heavenly Indian sweet, a sort of milk fudge. The granular texture of this fudge is what gives it it’s characteristic specialty. I ndian sweet, kalakand is moist, insanely delicious and a real treat for sweet lovers!
KALAKAND INGREDIENTS
For this Kalakand recipe, you will just need 4 basic ingredients
- Milk
- Vinegar/lemon juice
- Sugar
- cardamom powder
HOW TO MAKE KALAKAND AT HOME? | HOW TO MAKE INDIAN MILK CAKE?
The traditional recipe requires us to simmer and thicken down the milk, then alum is added to get the granular texture, lastly, sugar is added and the mixture is further cooked until you get this fudgy consistency.
The shorter method just requires to combine paneer or ricotta cheese and sweetened condensed milk, cook for about 10-15 minutes, and set it. Or you could make kalakand in the microwave, by cooking these 2 ingredients.
Now the milk here is different as compared to the milk available in India, it’s difficult to get layers of cream on boiling the milk as we do in India. So it doesn’t tend to be as rich, to compensate that I’ve added some mawa or khoya (milk solids), which is totally optional and can be avoided and not an ingredient that would require you to make a special trip to the grocery store. So feel free to skip it.
KALAKAND RECIPE WITH CONDENSED MILK
For 225-250 grams paneer, use half a tin of condensed milk, about 200 grams. Mix the two, and microwave it, keep stirring in intervals.
Or transfer the mixture to a nonstick skillet, cook till it leaves sides. Do not dry it out else it may crumble when you try to cut it into pieces. A little moisture should be retained. Add a few tablespoons of milk if the mixture looks too dry.
When you used condensed milk, I highly recommend you use fresh homemade paneer, the readymade paneer doesn’t give that soft texture.

One bite of this kalakand burfi and you can feel the juices trickling down your throat. I can’t explain how good this is, if you have eaten some then you already know. But if you haven’t, then my friend, you have to!
ENJOYED THIS KALAKAND? THEN DON’T FORGET TO CHECK OUT SOME MORE DELICIOUS INDIAN SWEETS THAT I’VE SHARED ON THE BLOG
- Kesar peda
- Chocolate peda
- Mango burfi
- Badam pista burfi
- No-cook instant shahi rabdi
- No-cook kesar pista kulfi
- Rasmalai
- Gulab Jamun
- Rava laddu
STEP BY STEP INSTRUCTIONS TO MAKE KALAKAND RECIPE WITH MILK | INDIAN MILK CAKE
TO MAKE THE PANEER
1.Bring milk to boil in heavy bottomed pot/pan. Stir in between to avoid the milk from burning or sticking at the bottom of the vessel.

2.Once the milk boils, switch off the heat and let it stand for about 5 minutes. Now add vinegar/ lemon juice, 1 tablespoon at a time, stirring with each addition, until the milk splits and you see the greenish whey.

3.Line a strainer with muslin cloth over a big bowl, drain the split milk, collect the whey. You can use this whey for kneading dough for bread’s/ chapatis or even make a soup.

4.Gather the edges of the muslin cloth, squeeze out the water ( exercise precaution as it will be very hot ). Wash the chenna well under running water to get rid of the vinegar or lemon juice smell.

5.Make a knot/ or secure with a thread /rubber band and hang it for about 30 minutes. Do not let it dry completely, let it retain little moisture.

6.After 30 minutes, open the assembly, transfer it to a bowl, since it is fresh you can easily crumble the paneer with your hands. Set aside. (Will yield approx 250 grams of paneer ).

TO MAKE THE KALAKAND
1.Heat 1 litre / 4 cups milk in a heavy-bottomed pot (I prefer to use a wide pan to speed up things). Also, grease the tin in which you intend setting the kalakand and keep it aside.

2.Bring the milk to a boil, stirring often to avoid the milk from burning or sticking at the bottom of the vessel. Continue boiling until it reduces to 1.5 cups.

3.Add sugar, stir until sugar dissolves.

4.Lower the heat and add the crumbled paneer, mix well.

5.Also, add the mava if using, stir continuously, cook until most of the moisture is gone, and the entire mixture is thick and homogeneous. Do not dry it out completely. If the mixture is dry , when it sets, and you try to cut it into pieces, it will crumble.
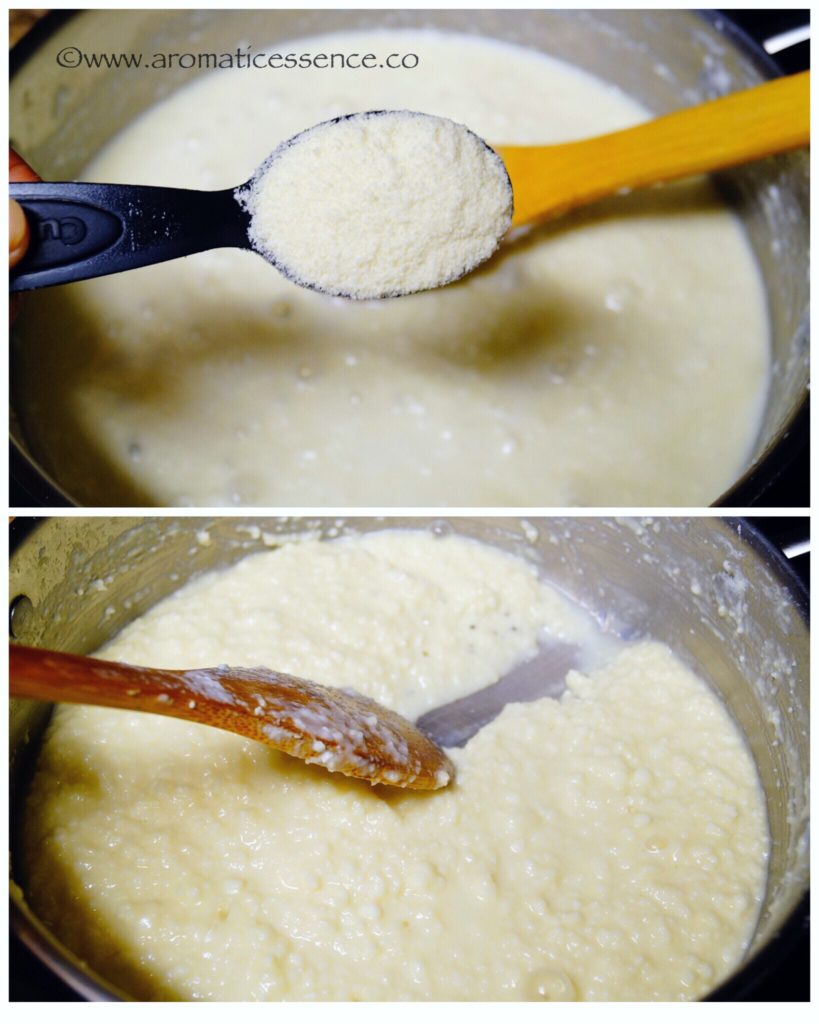
6.When the mixture stops bubbling and begins to clump, it is ready, add cardamom powder, mix and switch off the heat.

7.Transfer to a greased tin/thali, to a height of 1/2 to 1 inches, or as you desire. Sprinkle slivered pistachios or any other nuts of your choice. Press the nuts into the mixture with the help of a spatula. Decorate with silver varak (optional). Leave it to set for about 2-3 hours. Slice and serve. Since this is a milk based sweet, it is best to store it in the refrigerator up to 4-5 days.

NOTE
1.You can skip making paneer at home, and use store-bought instead. If using frozen, bring it to room temperature and use.
HOW TO MAKE KALAKAND SWEET?

Kalakand | How To Make Kalakand | Indian Milk Cake
Ingredients1x2x3x
Measuring cup used, 1 cup = 250 ml, 1 tsp = 5 ml.
For the paneer
- 1.5 litres whole milk
- 2 tbsp white distilled vinegar/lemon juice, as required
For the kalakand
- 1 litre whole milk
- 3/4 cup sugar, adjust as per desired sweetness
- 250 grams freshly prepared paneer
- 2 tbsp milk mava powder/grated or crumbled mava, optional
- 1/4 tsp green cardamom powder
- 1/2 tsp ghee, to grease the tin
- 1 tbsp sliced pistachios
- 1/2 sheet silver leaf/ silver varak, optional
Instructions
To make the paneer
- Bring milk to boil in heavy bottomed pot/pan. Stir in between to avoid the milk from burning or sticking at the bottom of the vessel.
- Once the milk boils, switch off the heat and let it stand for about 5 minutes. Now add vinegar/ lemon juice, 1 tablespoon at a time, stirring with each addition, until the milk splits and you see the greenish whey.
- Line a strainer with muslin cloth over a big bowl, drain the split milk, collect the whey. You can use this whey for kneading dough for bread’s/ chapatis or even make a soup.
- Gather the edges of the muslin cloth, squeeze out the water (exercise precaution as it will be very hot). Wash the chenna well under running water to get rid of the vinegar or lemon juice smell.
- Make a knot/ or secure with a thread /rubber band and hang it for about 30 minutes. Do not let it dry completely, let it retain little moisture.
- After 30 minutes, open the assembly, transfer it to a bowl, since it is fresh you can easily crumble the paneer with your hands. Set aside. (Will yield approx 250 grams of paneer).
To make the kalakand
- Heat 1 liter / 4 cups milk in a heavy-bottomed pot (I prefer to use a wide pan to speed up things). Also, grease the tin in which you intend setting the kalakand and keep it aside.
- Bring the milk to a boil, stirring often to avoid the milk from burning or sticking at the bottom of the vessel. Continue boiling until it reduces to 1.5 cups.
- Add sugar, stir until sugar dissolves.
- Lower the heat and add the crumbled paneer, mix well.
- Also, add the mava if using, stir continuously, cook until most of the moisture is gone, and the entire mixture is thick and homogeneous. Do not dry it out completely. If the mixture is dry, when it sets, and you try to cut it into pieces, it will crumble.
- When the mixture stops bubbling and begins to clump, it is ready, add cardamom powder, mix and switch off the heat.
- Transfer to a greased tin/thali, to a height of 1/2 to 1 inches, or as you desire. Sprinkle slivered pistachios or any other nuts of your choice. Press the nuts into the mixture with the help of a spatula. Decorate with silver varak (optional). Leave it to set for about 2-3 hours. Slice and serve. Since this is a milk-based sweet, it is best to store it in the refrigerator up to 4-5 days.
Notes
- You can skip making paneer at home, and use store-bought instead. If using frozen, bring it to room temperature and use.

I would love to hear from you! Please feel free to share your feedback with photos and suggestions to me at aromaticessence77@gmail.com
You can also follow me on :
Facebook @ Aromaticessence
Pinterest @ Aromatic Essence
Instagram @ aromatic_essence77
Twitter @ freda_dias
Regards,
Freda
