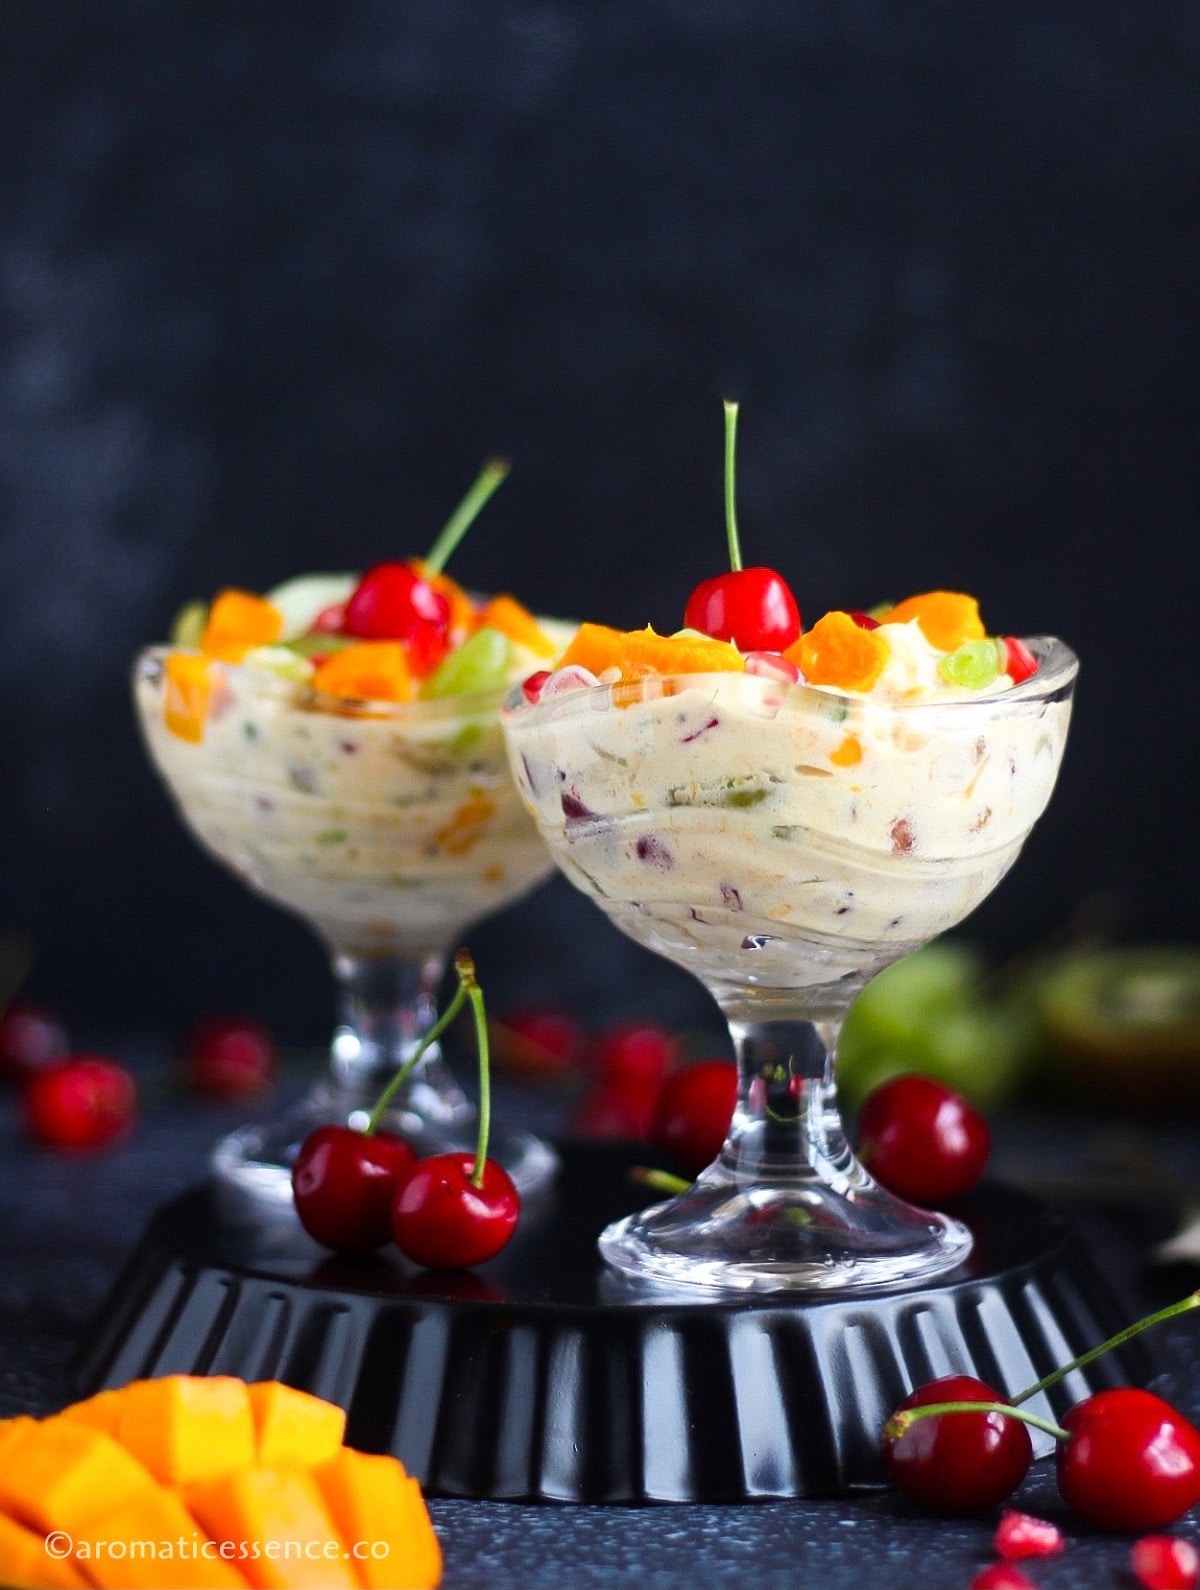
Fruit Cream is a simple and delicious Indian dessert made with a mix of fresh fruits, nuts, and sweetened whipped cream. It is light, creamy, refreshing, and a perfect summer treat!
I love whipping up desserts in my kitchen, be it the baked or the no-bake kinds. But sometimes, I really want something simple that tastes delicious and is equally effortless to prepare.
This Indian fruit cream dessert is one of the easiest desserts you will ever make. The beauty of this recipe lies in its simplicity.
Fruit salad with cream tastes refreshing when served chilled. No two spoonfuls of this dessert will taste the same, thanks to the variety of fruits that have been incorporated into it. Each fruit adds its own unique taste and texture to this dessert.
Whenever I have a lot of fruits sitting in the fruit basket, I always make fruit custard, fruit cream, or a simple fruit salad. My kids enjoy eating their fruits this way, guessing the fruits as they bite into each spoonful 😀
I added some mangoes to this recipe because they are in season now and they elevate the taste of this humble dessert.
The only time-consuming part of this recipe is dicing the fruits. Other than that, you can whip up this creamy fruit salad in minutes.
If you are looking for an easy summer dessert recipe that needs no cooking, then do try this recipe. I’m sure you will love it!
- Why you will love this fruit salad with cream
- Ingredients needed
- How to make fruit cream dessert – Step by step process
- Storage
- Variations of this fruit salad with cream recipe
- Frequently asked questions
- You might also enjoy these no-cook dessert recipes
- Fruit Cream | Fruit Salad With Cream
Why you will love this fruit salad with cream
✔ Easy, no-cook/no-bake dessert
✔ Lightly sweetened
✔ Light and creamy, packed with a mix of fruits and nuts of varying colors and textures
✔ Perfect for potlucks, backyard barbecue parties, or get-togethers
✔ Can easily be scaled to suit your servings
✔ Kid-friendly
✔ Adaptable to whatever fruits you have at hand, seasonal fruits are best used in this recipe
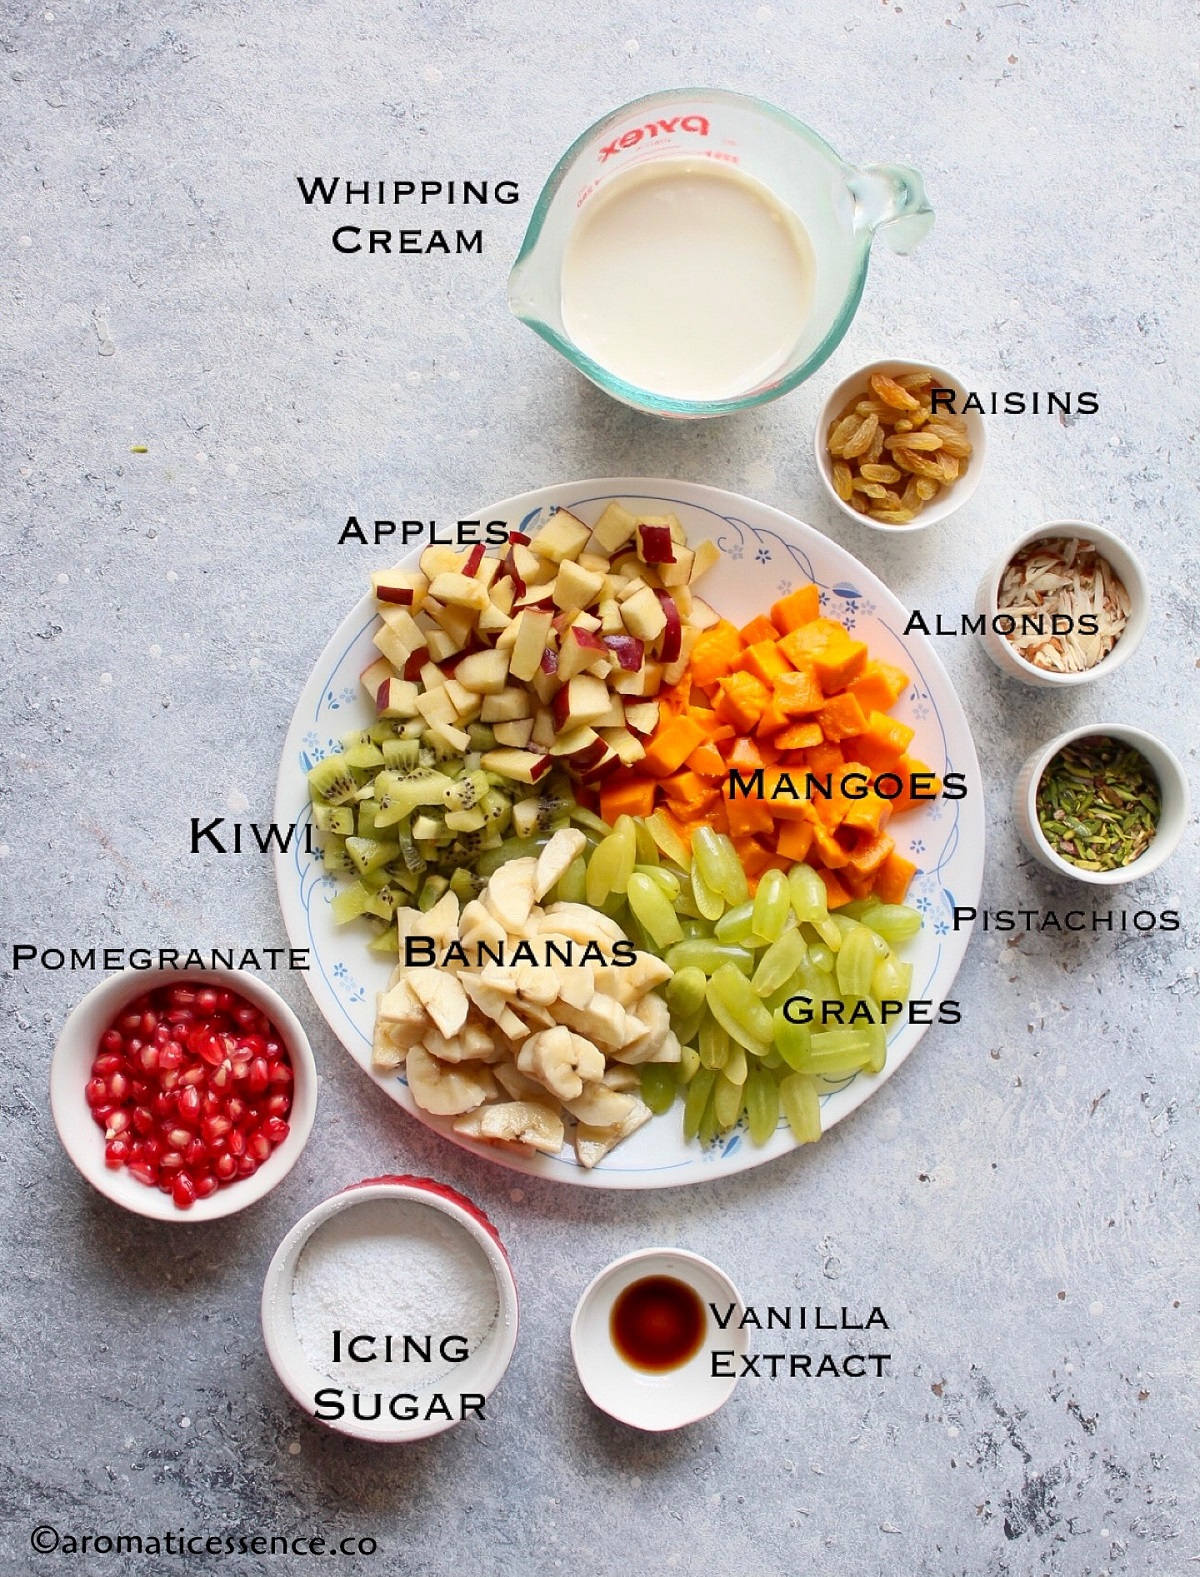
Ingredients needed
To make this ridiculously easy fruit cream recipe at home, you will need;
Cream: I’ve used Amul whipping cream here. You can also use Amul fresh cream. If you are in the US, any brand of heavy cream will work in the recipe. I mostly used Horizon organic heavy cream while I was in the US.
Icing sugar: To lightly sweeten the cream. You can adjust as per your desired sweetness. You can also add the same quantity of condensed milk. After all, condensed milk makes anything taste good, right? But I didn’t want to open a can considering I’d need so little here. If you have some leftovers from another recipe, then it would be ideal to be used here.
Vanilla extract: Adds a nice flavor.
Mixed diced fruits: I’ve used a mix of mangoes, bananas, apples, kiwi, grapes, and pomegranate.
Dried fruits and nuts: I’ve used a mix of pistachios, almonds, and raisins for some textural variation. Again, feel free to add any nuts of your choice or skip them if anyone has any nut allergies. You can also add some tutti frutti (candied papaya).
created by photogrid
How to make fruit cream dessert – Step by step process
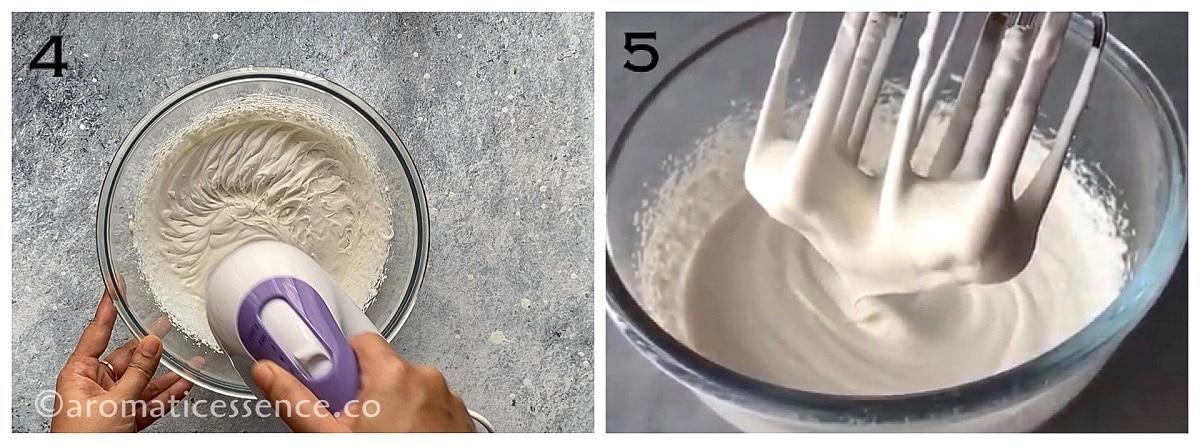
Step 1: Whip the cream
In a sufficiently large bowl, add 3/4 cup of chilled whipping cream, 1/4 cup icing sugar (sifted), and 1/2 teaspoon vanilla extract. ( Photos 1 to 3 )
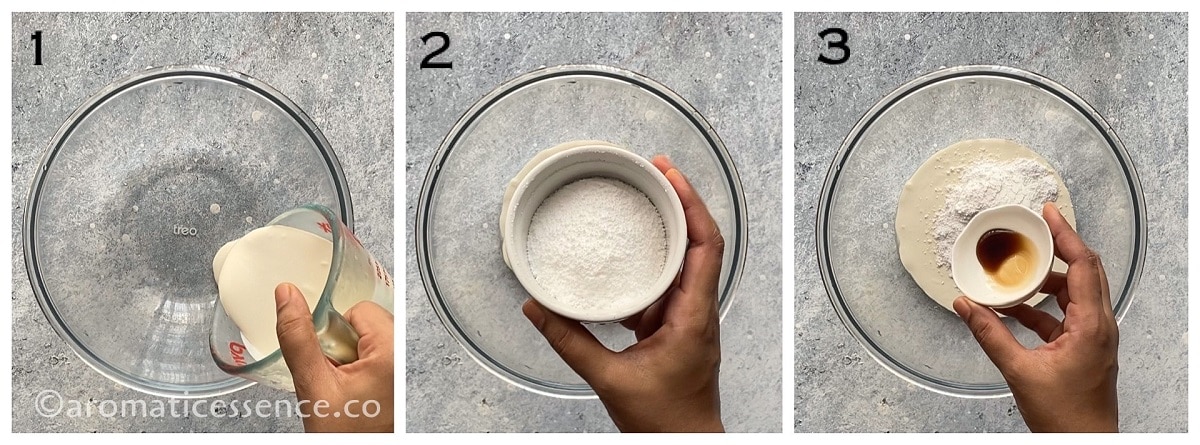
Using a hand mixer, beat on low speed initially to incorporate all the ingredients.
Increase the speed to medium-high, and beat until soft peaks form. We do not need stiff peaks for this recipe. ( Photos 4 and 6 )
Step 2: Add the fruits, nuts, and mix
Add the diced fruits (1 cup each of diced mango, banana, apple, green grapes, 1/2 cup each of pomegranate arils, and diced kiwi, 2 tablespoons each of slivered almonds, pistachios, and raisins. (Reserve some for garnishing). ( Photo 6 )
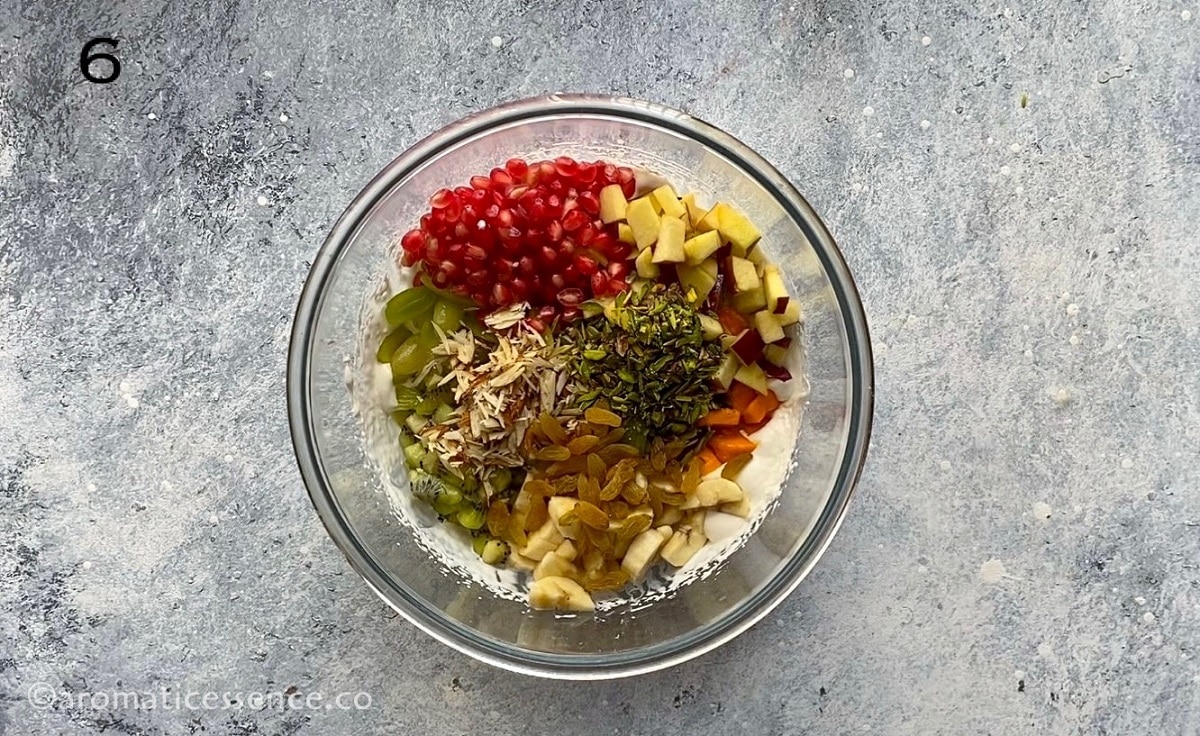
Mix gently using a spatla, until the fruits are coated with the whipped cream. You may serve immediately or cover the bowl and refrigerate for 1 to 2 hours before serving.

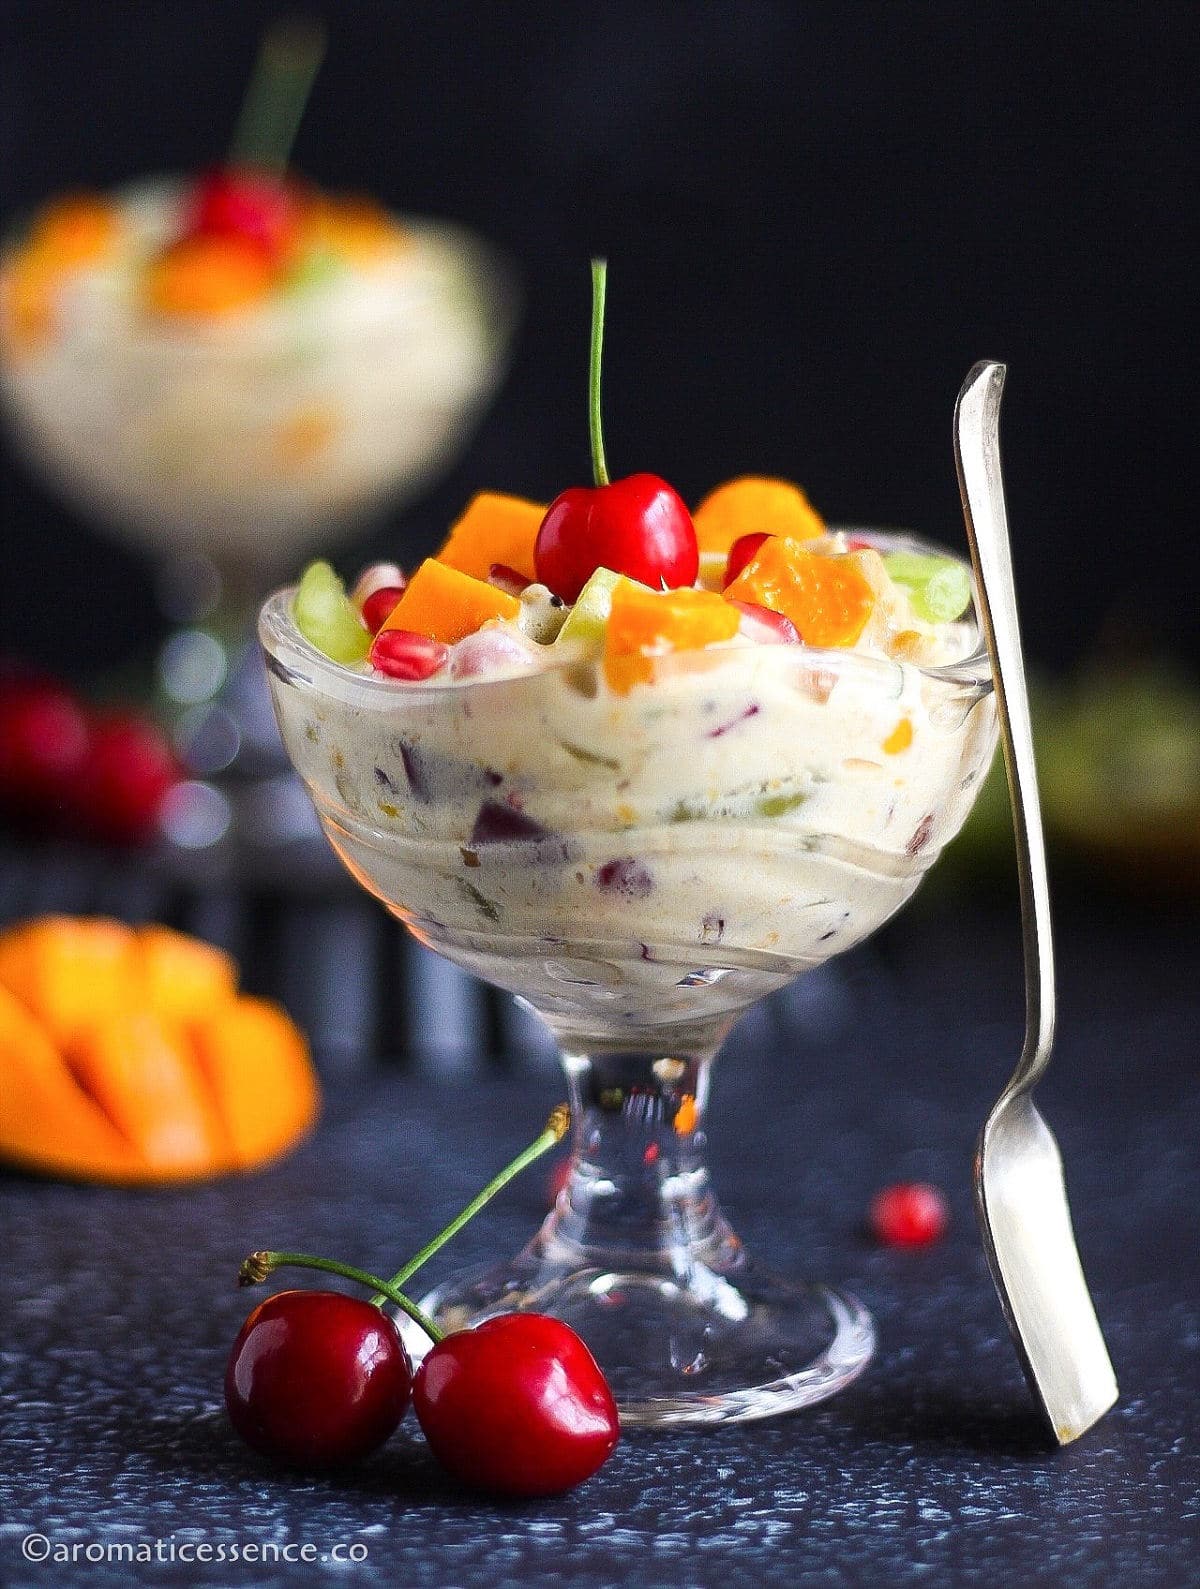
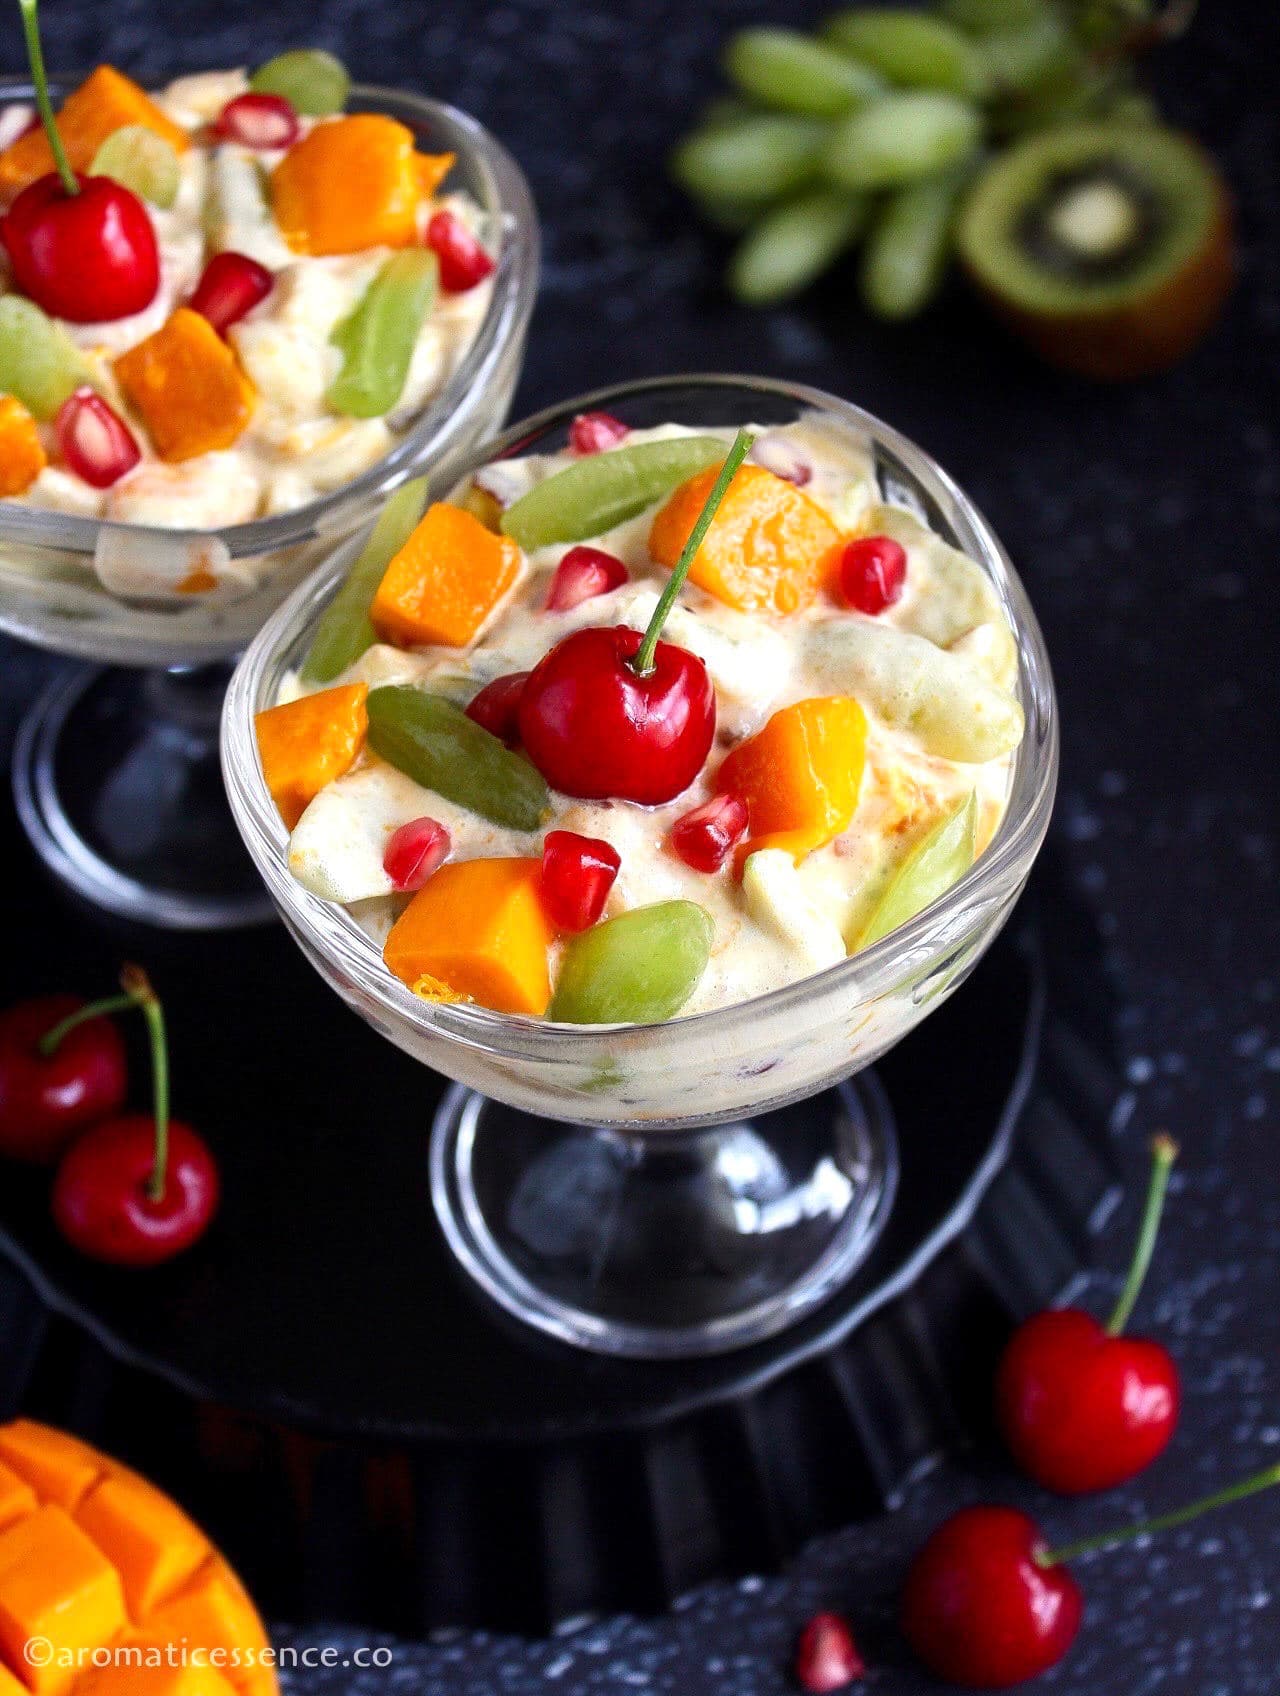
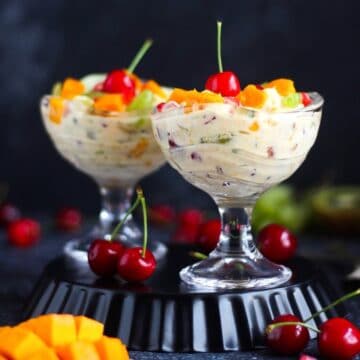
Step 3: Serve
Transfer to serving bowls, top with reserved fruits and nuts. Garnish with cherries, if desired.

Storage
This creamy fruit salad will keep fresh for at least 1 to 2 days in an air-tight container in the refrigerator. If you do add fruits like melon, pineapple, oranges, etc, then avoid storing it and consume it as soon it is prepared.
Variations of this fruit salad with cream recipe
Shahi version: Add about 2 tablespoons of hot milk to a fat pinch of saffron in a small bowl. Lightly crush the saffron before adding milk for optimal flavor and color. Let this saffron milk sit for 10 minutes, then add it after whipping the cream. Also add a few drops of rose essence, followed by the diced fruits, and some dried rose petals, give everything a good mix.
Fruit salad with cream cheese: Whip 3/4 cup whipping cream to soft peaks and set aside. In another bowl, beat 4 oz of cream cheese with 1/4 cup powdered sugar until smooth and creamy. Fold in the whipped cream, followed by the fruits and nuts.
Yogurt: You can add a cup of Greek yogurt to this recipe. Regular yogurt might water down the salad as it sits. If you use regular yogurt, make sure to drain off the excess whey. Adjust the sugar to compensate for any added tartness.
Fruit cream with ice cream: Top a serving of fruit cream with a scoop of vanilla ice cream or your favorite flavored ice cream. Mango ice cream would be amazing! You may also skip the cream, and top the mixed fruits and nuts with ice cream instead.
Flavoring: You can add other flavors such as cardamom, rose, etc instead of vanilla.
Canned fruit cocktail: To make this recipe easier, especially when scaling it up for a crowd, use canned fruit cocktail. Drain the syrup and add the diced fruits to the whipped cream. Adjust the consistency by adding more canned fruit cocktail.
Jello: Prepare jello as per package instructions and let it set. Then cut it into small cubes and add it along with the fruits and nuts, mix gently.
Layered fruit cream: You can layer the fruits and whipped cream alternately in fancy serving glasses for an impressive dessert.
Can I make this vegan?
Yes, you can! Use non-dairy whipping cream. In India, Tropolite is a good brand of non-dairy whipping cream that will work well in this recipe. Just remember, that Tropolite is already sweetened, so you won’t need to add as much icing sugar. You can also use coconut cream in this recipe.
Which fruits can I use in this recipe?
I’ve used apples, bananas, grapes, kiwi, mango, and pomegranate in this recipe. You can add any fruits of your choice. Some other fruits worth considering are mixed berries such as strawberries, blueberries, raspberries, pears, peaches, nectarines, plums, pitted cherries, papaya, sapota, etc
However, I would not suggest adding fruits of the melon or citrus varieties as they will make this fruit cream watery.
Another suggestion here would be to opt for fruits that are sweet and not tart or else this creamy fruit salad will not taste as good.
Since mangoes are in season, do try and include them in this recipe. You can prepare this recipe, regardless of the season, just be sure to always include local, seasonal produce for the best-tasting fruit cream.
Can I use store-bought whipped cream?
Yes, you can! Transfer the whipped cream to a bowl, add the diced fruits, and fold it in gently.
You might also enjoy these no-cook dessert recipes
Strawberry cream
Banana pudding parfait
Mango cream
Serradura
Coconut ice
You can also follow me on Facebook , Pinterest, Instagram & Twitter
Fruit Cream | Fruit Salad With Cream
Ingredients1x2x3x
- 3/4 cup whipping cream, chilled
- 1/4 cup icing sugar/Confectioner’s sugar, sifted
- 1/2 teaspoon pure vanilla extract
- 1 cup diced mangoes
- 1 cup sliced banana
- 1 cup diced apples
- 1 cup green grapes, halved
- 1/2 cup diced kiwi
- 1/2 cup pomegranate arils
- 2 tablespoons slivered pistachios
- 2 tablespoons sliced almonds
- 2 tablespoons raisins/cranberries
- Few cherries, for garnishing, optional
Instructions
- In a sufficiently large bowl, add chilled whipping cream, icing sugar, and vanilla extract.
- Using a hand mixer, beat on low speed initially to incorporate all the ingredients.
- Increase the speed to medium-high, and beat until soft peaks form. We do not need stiff peaks for this recipe.
- Add the diced fruits and nuts. (Reserve some for garnishing)
- Mix gently using a spatla, until the fruits are coated with the whipped cream. You may serve immediately or cover the bowl and refrigerate for 1 to 2 hours before serving.
- Transfer to serving bowls, top with reserved fruits and nuts. Garnish with cherries, if desired.
Video
Notes
Nutrition

Fruit Cream | Fruit Salad With Cream
Ingredients
- 3/4 cup whipping cream, chilled
- 1/4 cup icing sugar/Confectioner’s sugar, sifted
- 1/2 teaspoon pure vanilla extract
- 1 cup diced mangoes
- 1 cup sliced banana
- 1 cup diced apples
- 1 cup green grapes, halved
- 1/2 cup diced kiwi
- 1/2 cup pomegranate arils
- 2 tablespoons slivered pistachios
- 2 tablespoons sliced almonds
- 2 tablespoons raisins/cranberries
- Few cherries, for garnishing, optional
Instructions
- In a sufficiently large bowl, add chilled whipping cream, icing sugar, and vanilla extract.
- Using a hand mixer, beat on low speed initially to incorporate all the ingredients.
- Increase the speed to medium-high, and beat until soft peaks form. We do not need stiff peaks for this recipe.
- Add the diced fruits and nuts. (Reserve some for garnishing)
- Mix gently using a spatla, until the fruits are coated with the whipped cream. You may serve immediately or cover the bowl and refrigerate for 1 to 2 hours before serving.
- Transfer to serving bowls, top with reserved fruits and nuts. Garnish with cherries, if desired.
Video
Notes
Nutrition
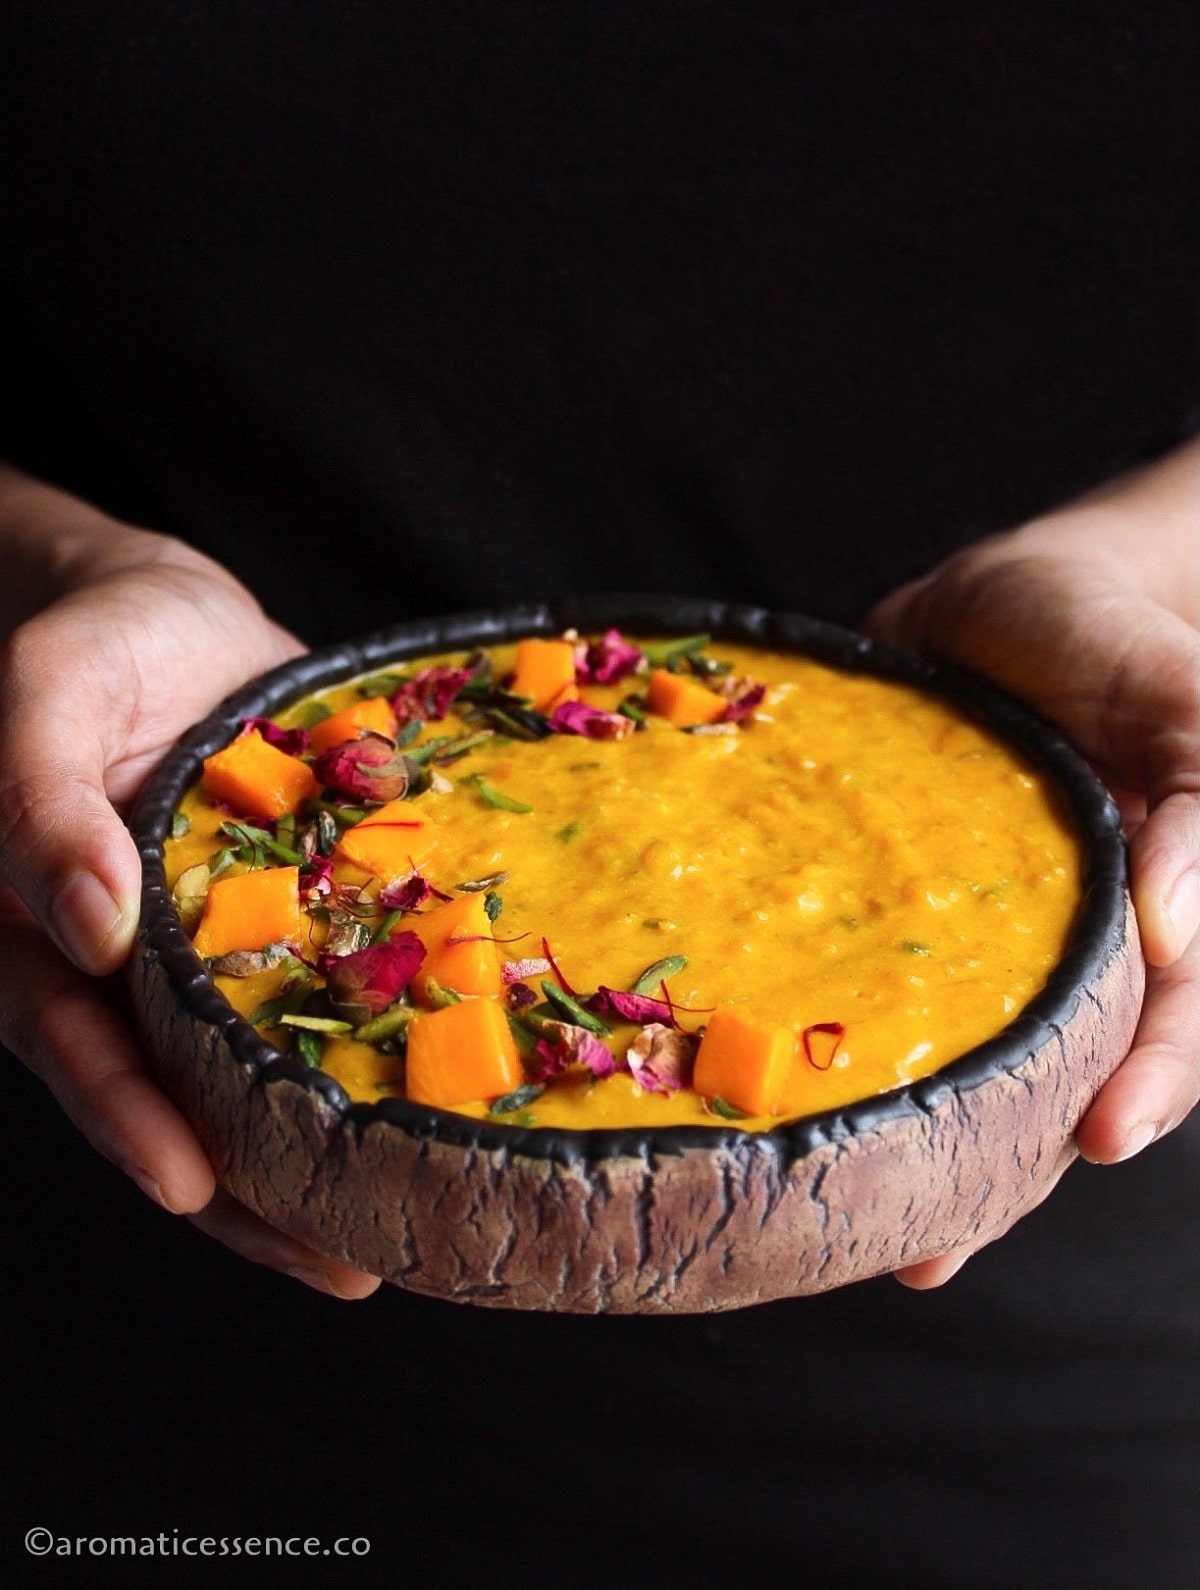
This mango kheer is a delicious, Indian-style rice pudding flavored with sweet and aromatic mango pulp. You need a few ingredients to make this creamy and yummy mango rice pudding.
I love adding a seasonal twist to traditional Indian desserts. Since mangoes are in season, I decided to add some tropical twist to one of my favorite Indian desserts, kheer!
Kheer is made with the most basic ingredients, yet the end result is nothing short of phenomenal. And this mango rice kheer turned out to be so good that it had to be shared on the blog.
This recipe for mango kheer is simple, although the stovetop version is time-consuming. It is not laborious per se, nor do you need elbow grease, it’s just the slow cooking process that takes time.
You can even make mango payasam or mango vermicelli kheer, but I’ll leave that post for another time.
With this mango rice kheer, I am winding up my share of mango posts. I’m just going to enjoy them as such in the next few weeks or in the form of a milkshake for the kiddos before they disappear from the market.
I’m definitely going to make a big batch of mango jam so that I can still continue enjoying mangoes in the coming months 😀
If you are not up to making jam, then simply freeze fresh mango pulp or mango chunks to enjoy in your favorite mango recipes 🙂
If you love mangoes as much as we do, do make the most of the seasonal mangoes by giving this delicious kheer recipe a go!
- You will love this recipe because it is
- Ingredients needed for mango rice pudding
- How to make mango kheer – Step by step process
- Serving suggestions
- My top tips for this recipe
- Frequently asked questions
- You may also enjoy these mango recipes
- Mango Kheer | Indian Mango Rice Pudding
You will love this recipe because it is
✔ So creamy and delicious!
✔ No eggs in the Indian version of rice pudding.
✔ Made with simple ingredients.
✔ You don’t need extra ingredients like condensed milk.
✔ One of the best desserts to be served for parties since it can be made ahead.
✔ Has a beautiful mango flavor that is not very overpowering.
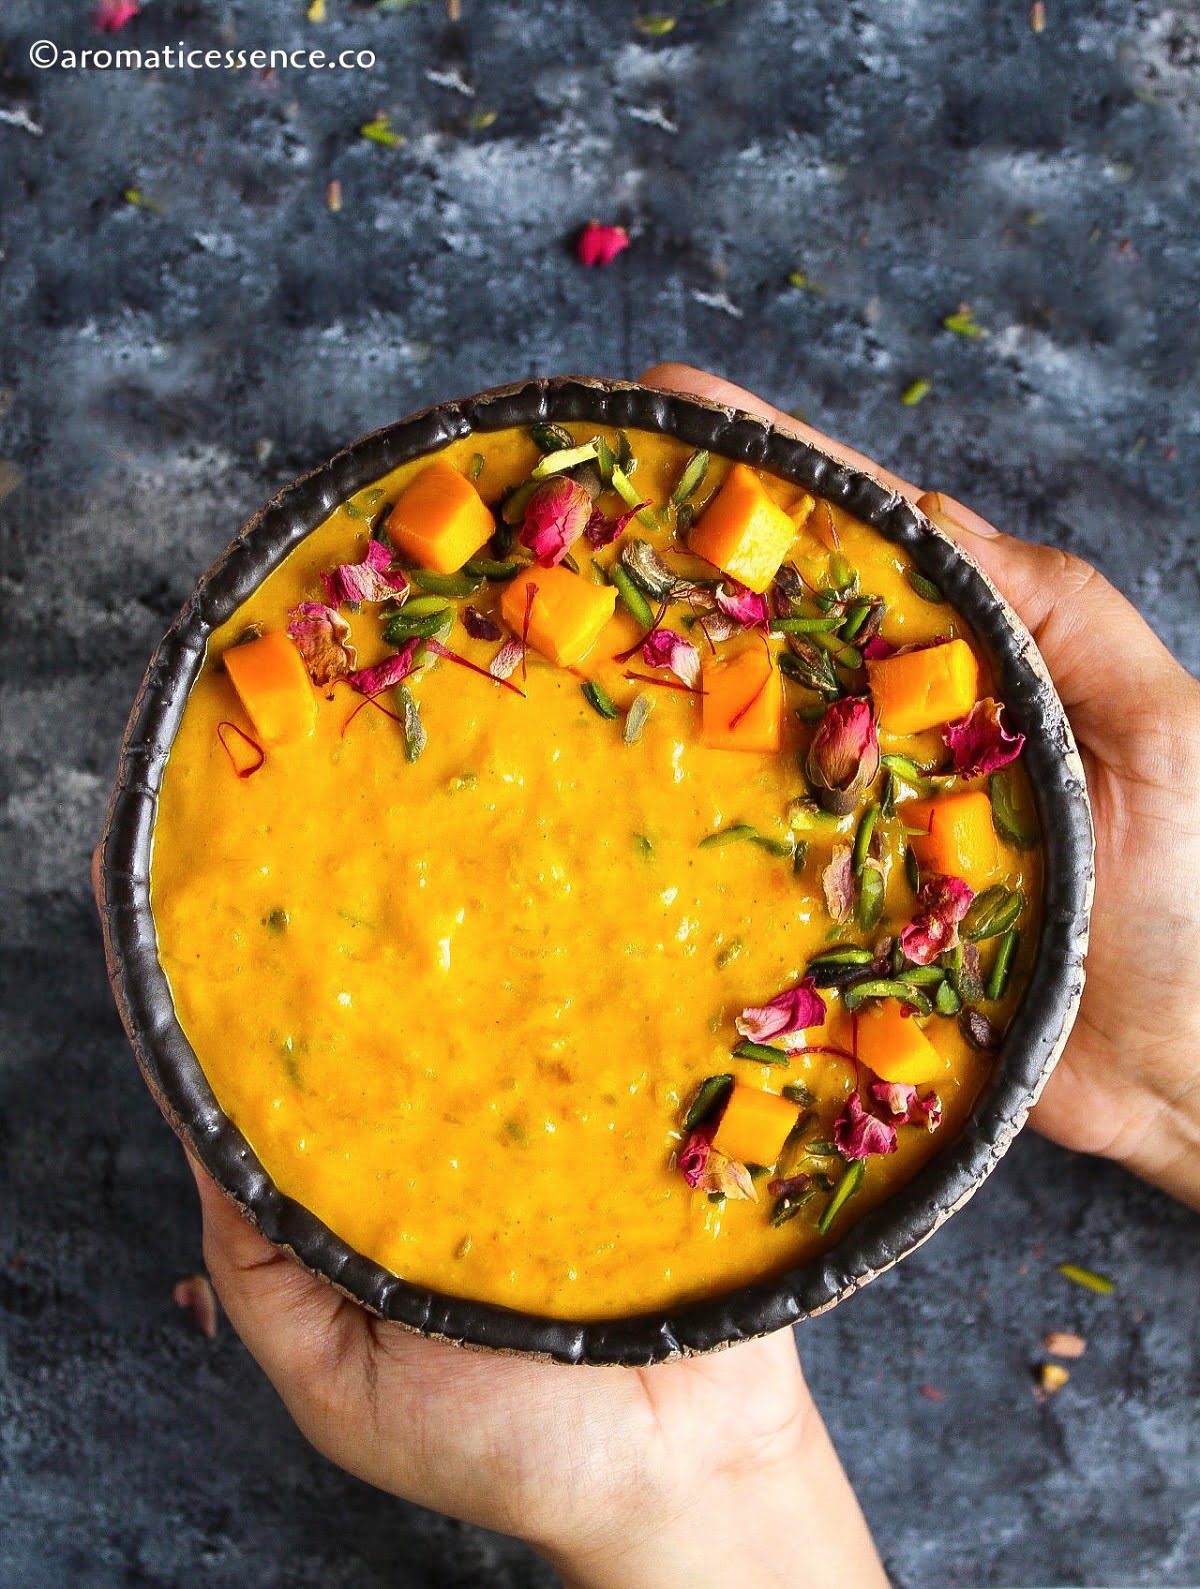
✔ Looks gorgeous with its lovely golden hue
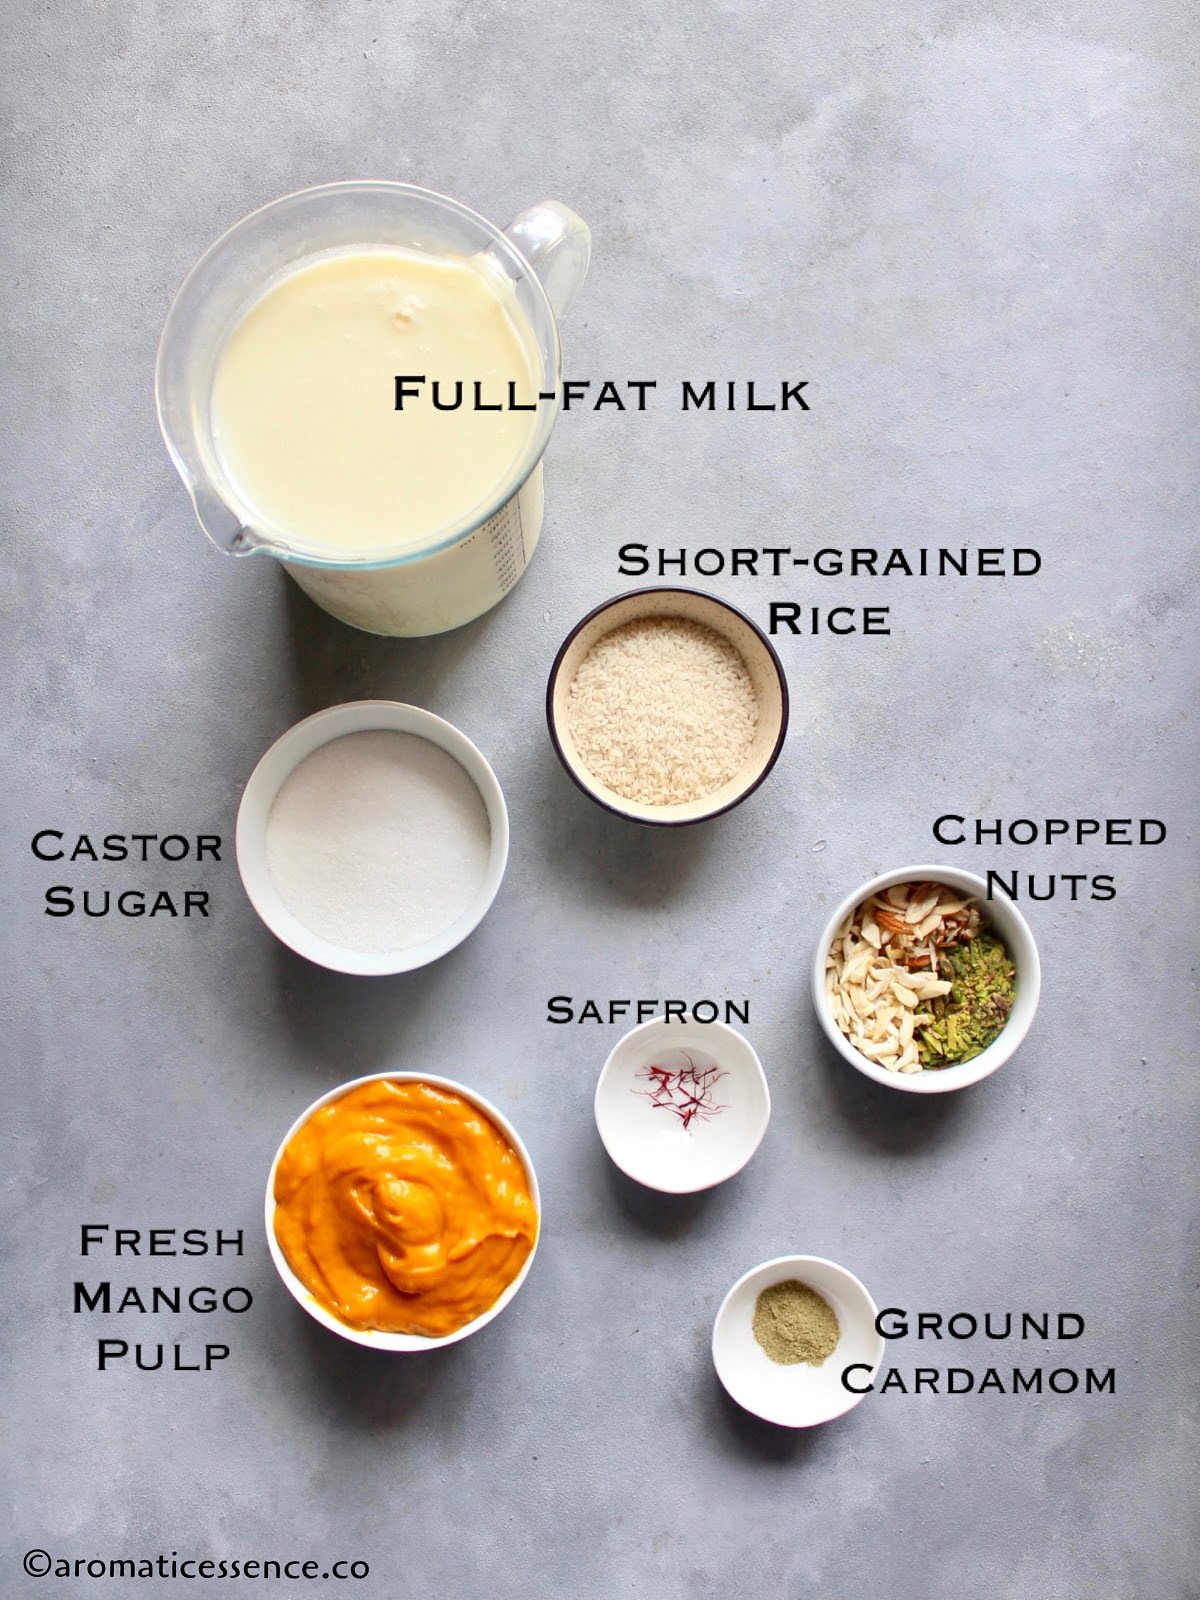
Ingredients needed for mango rice pudding
Milk: Use full-fat/whole milk always when it comes to preparing kheer!
Rice: I’ve used gobindobhog rice, which is a fragrant, short-grained variety of rice.
Sugar: I’ve used castor sugar, I prefer using it for my dessert recipes. You can use regular sugar as well. Honey, agave nectar, maple syrup are some other alternatives to sweeten the kheer.
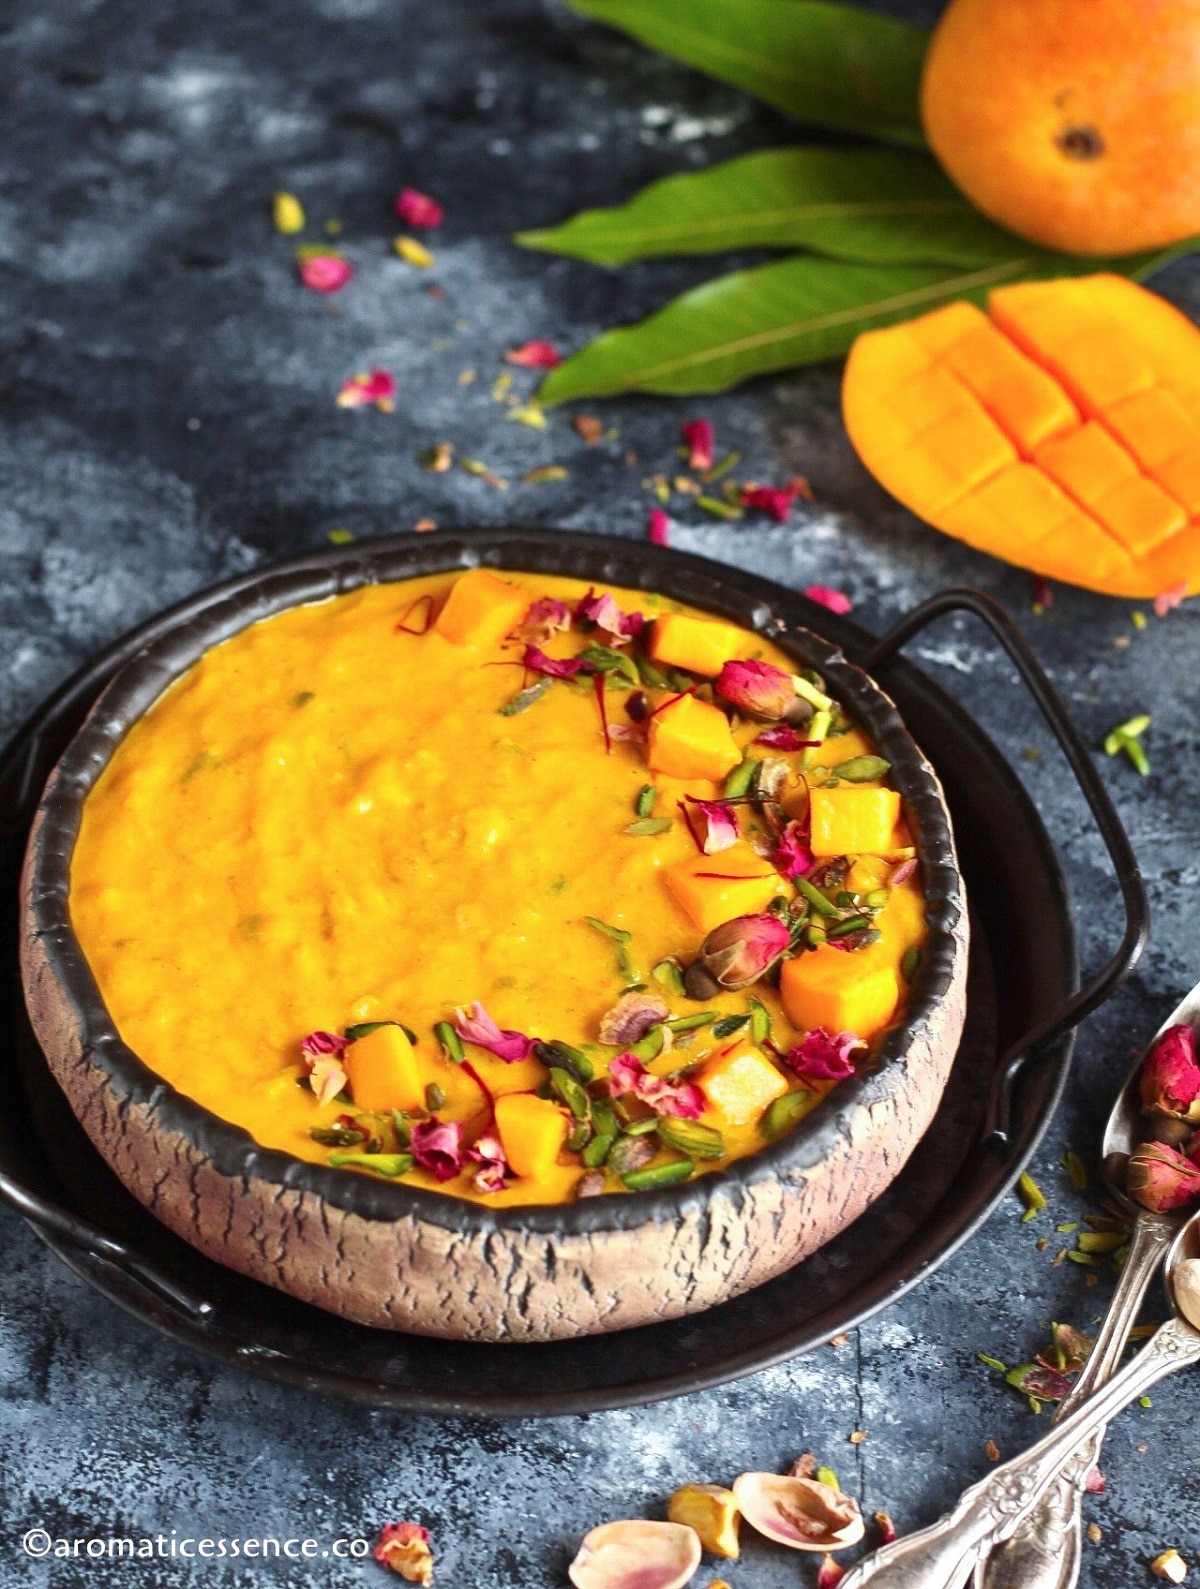
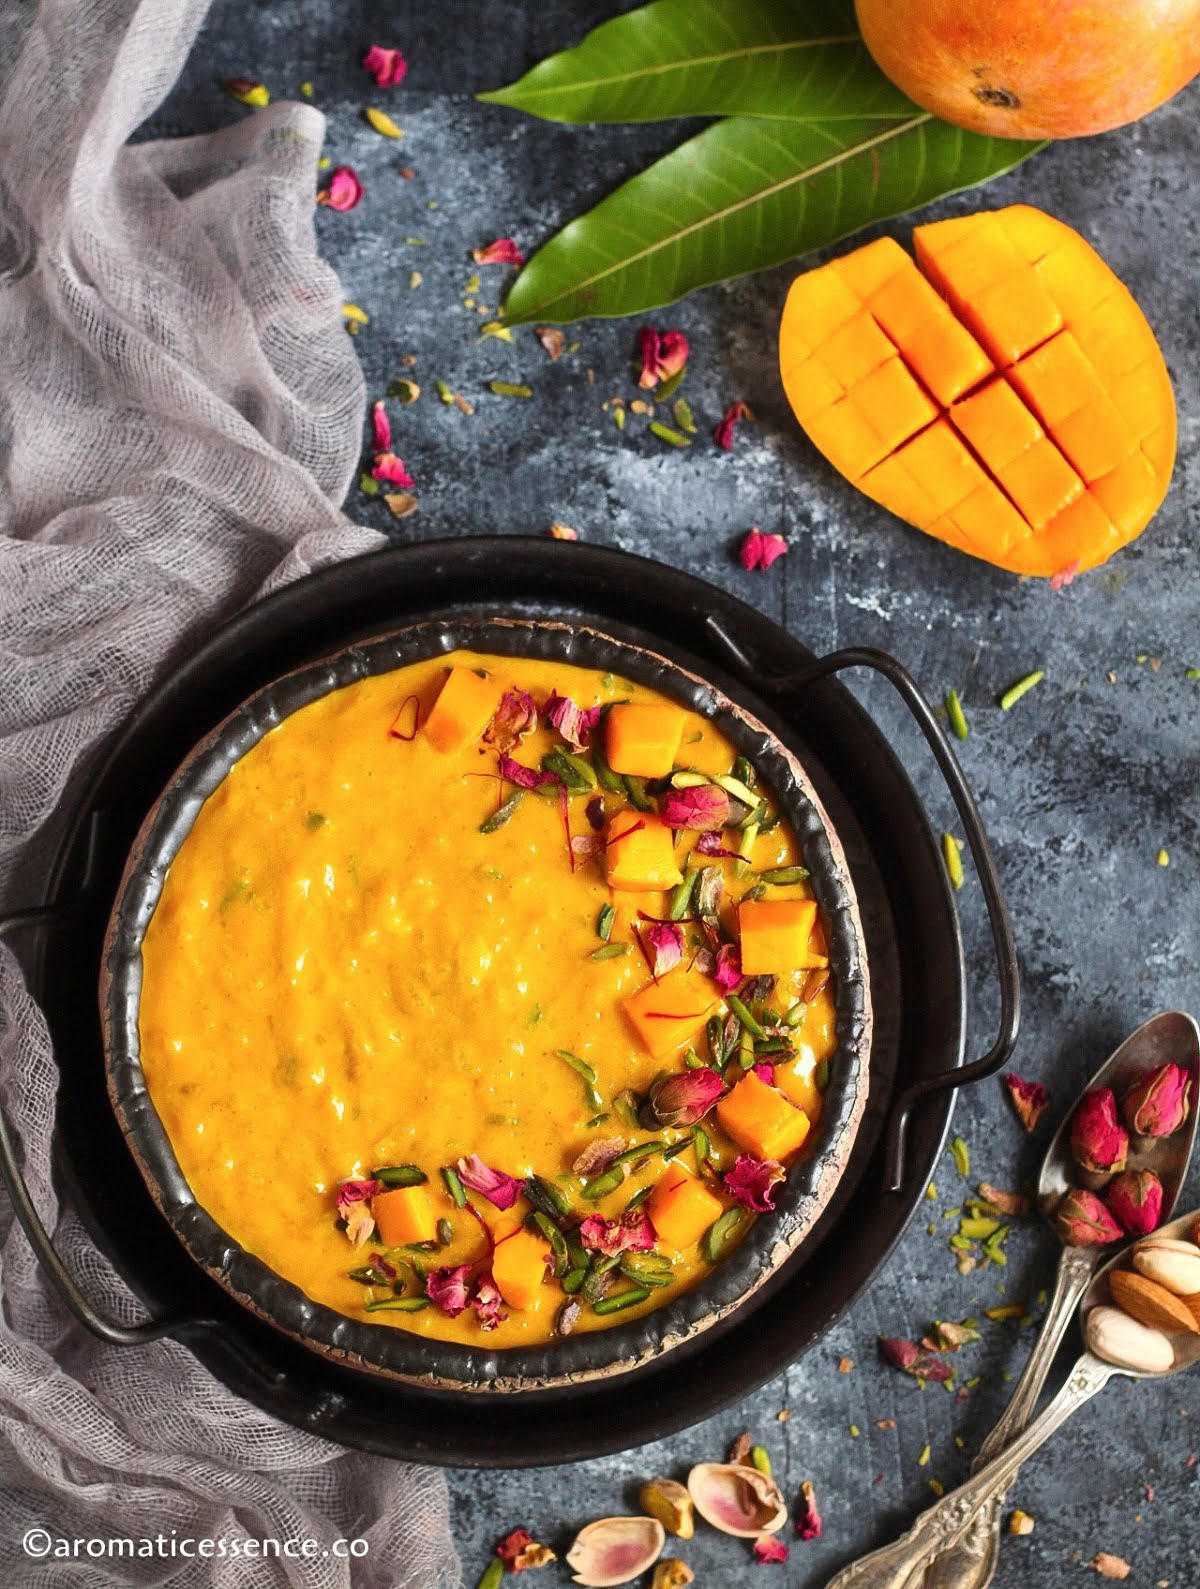
Mangoes: Fresh alphonso mango pulp!
Nuts: A mix of almond, cashew nuts, and pistachios. They add a nice texture contrast to the creamy and rich kheer.
Saffron and cardamom: The classic spices to flavor Indian desserts. It just makes sense to include them here as well. They add a touch of exotic flavors that pair well with mangoes!
How to make mango kheer – Step by step process
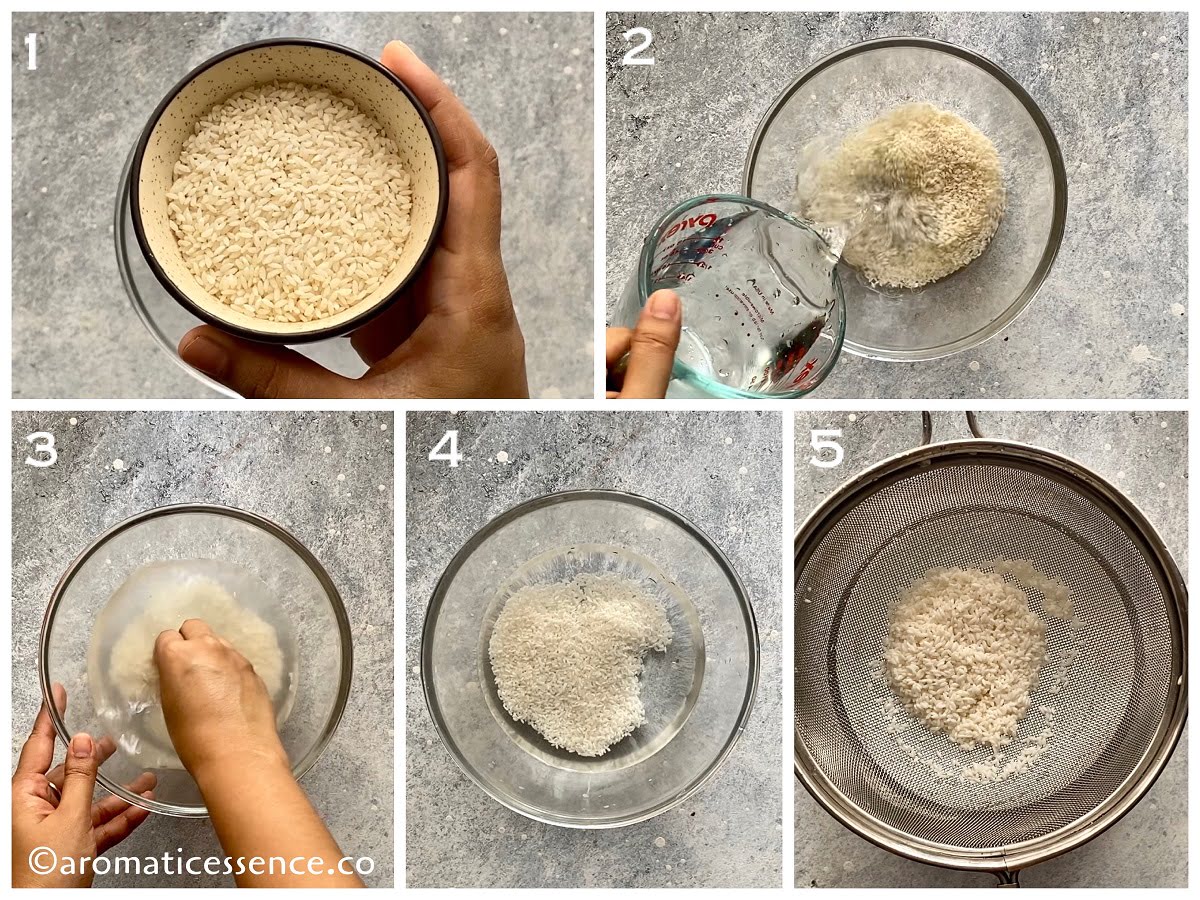
Step 1: Soak the rice
Rinse 50 grams of short-grained rice until the water runs clear. Soak the rice for 30 minutes and set it aside. ( Photos 1 to 5 )
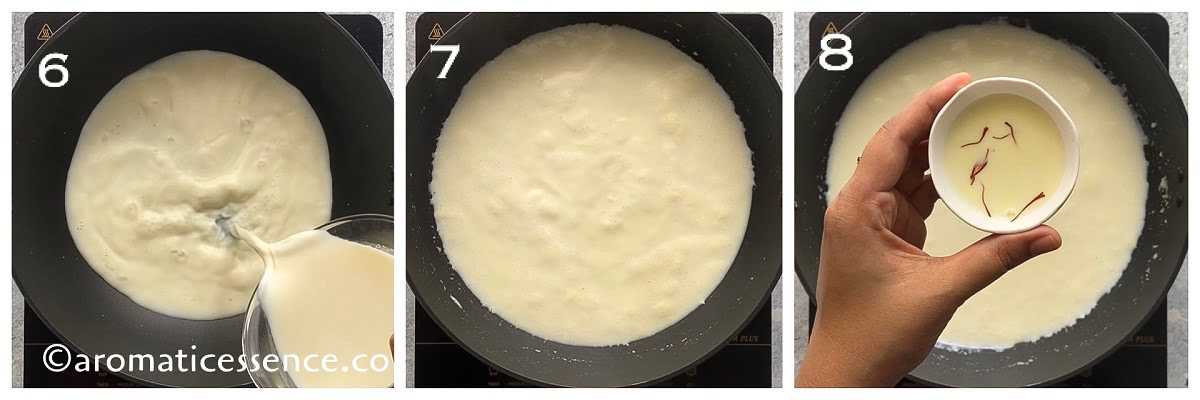
Step 2: Bring milk to a boil
Add 1-liter milk in a heavy-bottomed pot, bring to boil over medium heat. Add 2 tablespoons of hot milk to saffron in a small bowl and set it aside. ( Photos 6 to 8 )
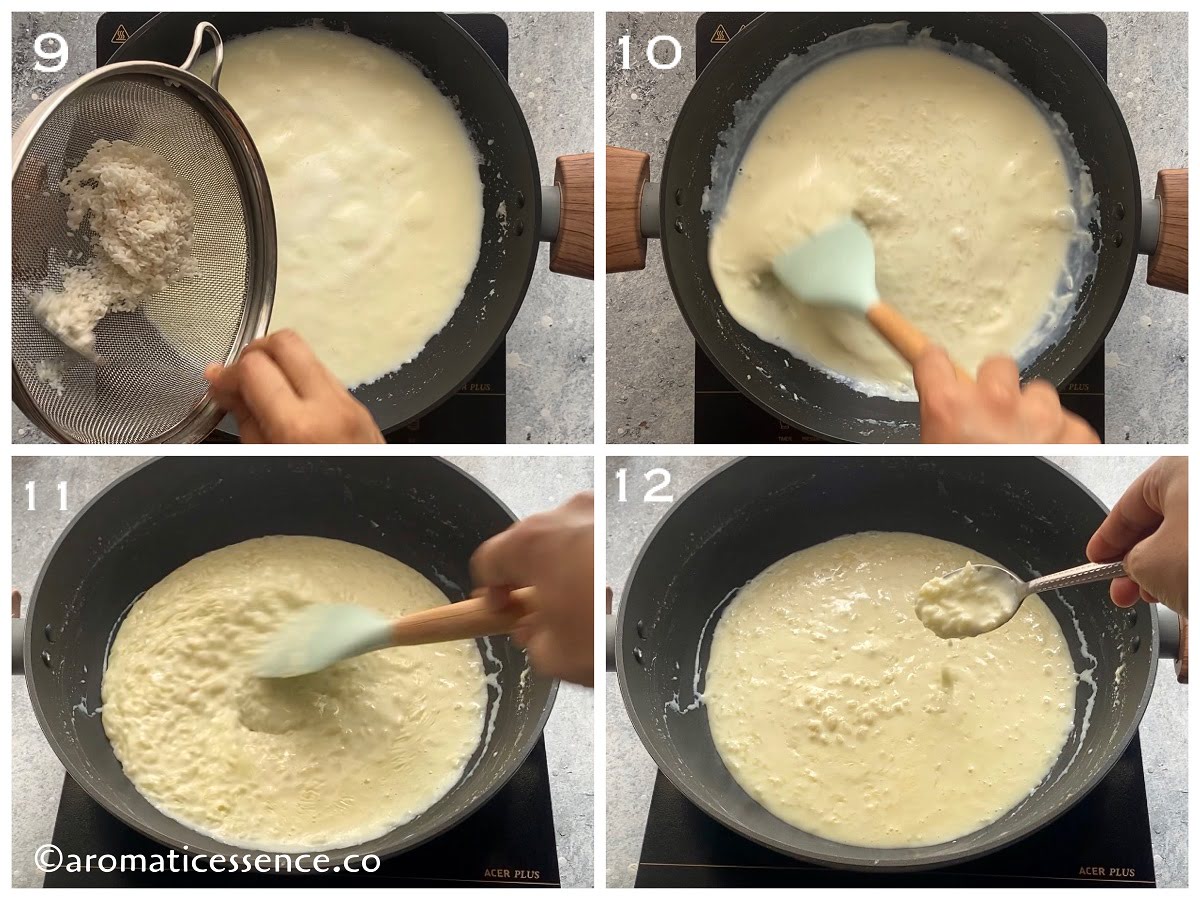
Step 3: Add drained rice and cook until thickened
After it comes to a boil, add the drained rice, mix well. ( Photos 9 and 10 )
Cook over medium-low heat until the rice cooks completely and the milk thickens about 25 to 30 minutes. ( Photos 11 and 12 )
Stir occasionally every 2-3 minutes to prevent the milk from sticking and burning at the bottom of the pan.
To check for the correct consistency: If you drop some mixture from a spoon, the rice and milk should fall in one stream and not separately.
Step 4: Add sugar and remaining ingredients
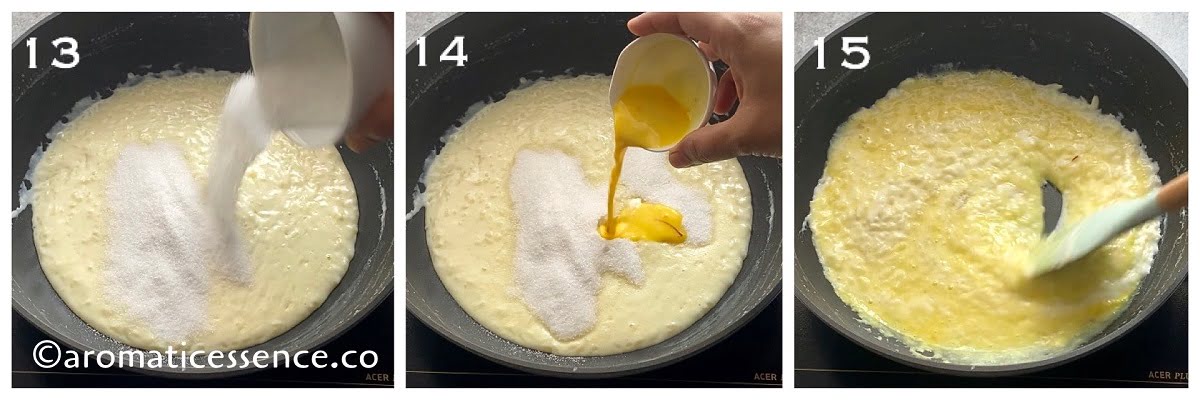
Add 100 grams sugar and saffron-infused milk, continue cooking for another 5 minutes over medium-low heat. ( Photos 13 to 15 )
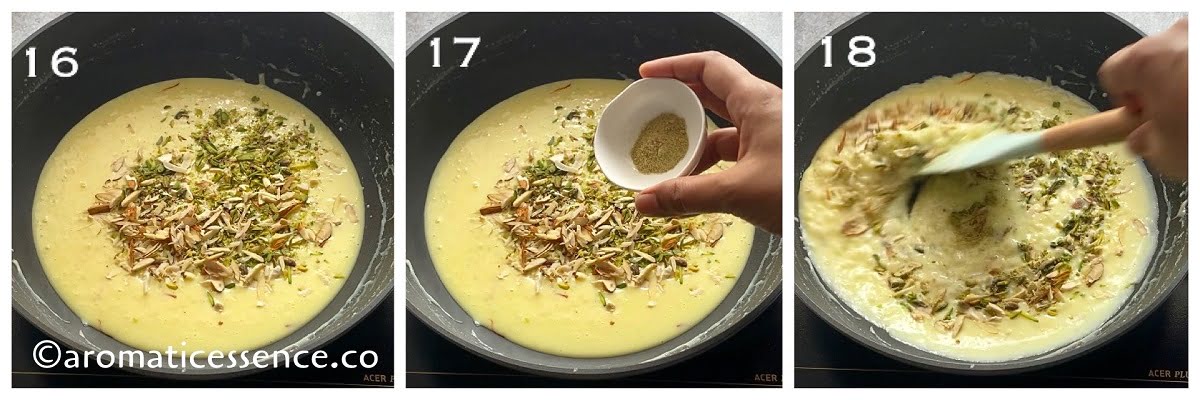
Add 1/4 to 1/2 teaspoon of cardamom powder and 1 tablespoon each of chopped cashew nuts, almonds, and pistachios. Cook for another minute. ( Photos 16 to 18 )
Switch off the heat and let the mixture cool down completely.
Add 1 cup of fresh mango pulp, mix well. ( Photos 19 and 20 )

Transfer to an airtight bowl, cover, and refrigerate until ready to serve.
Serving suggestions
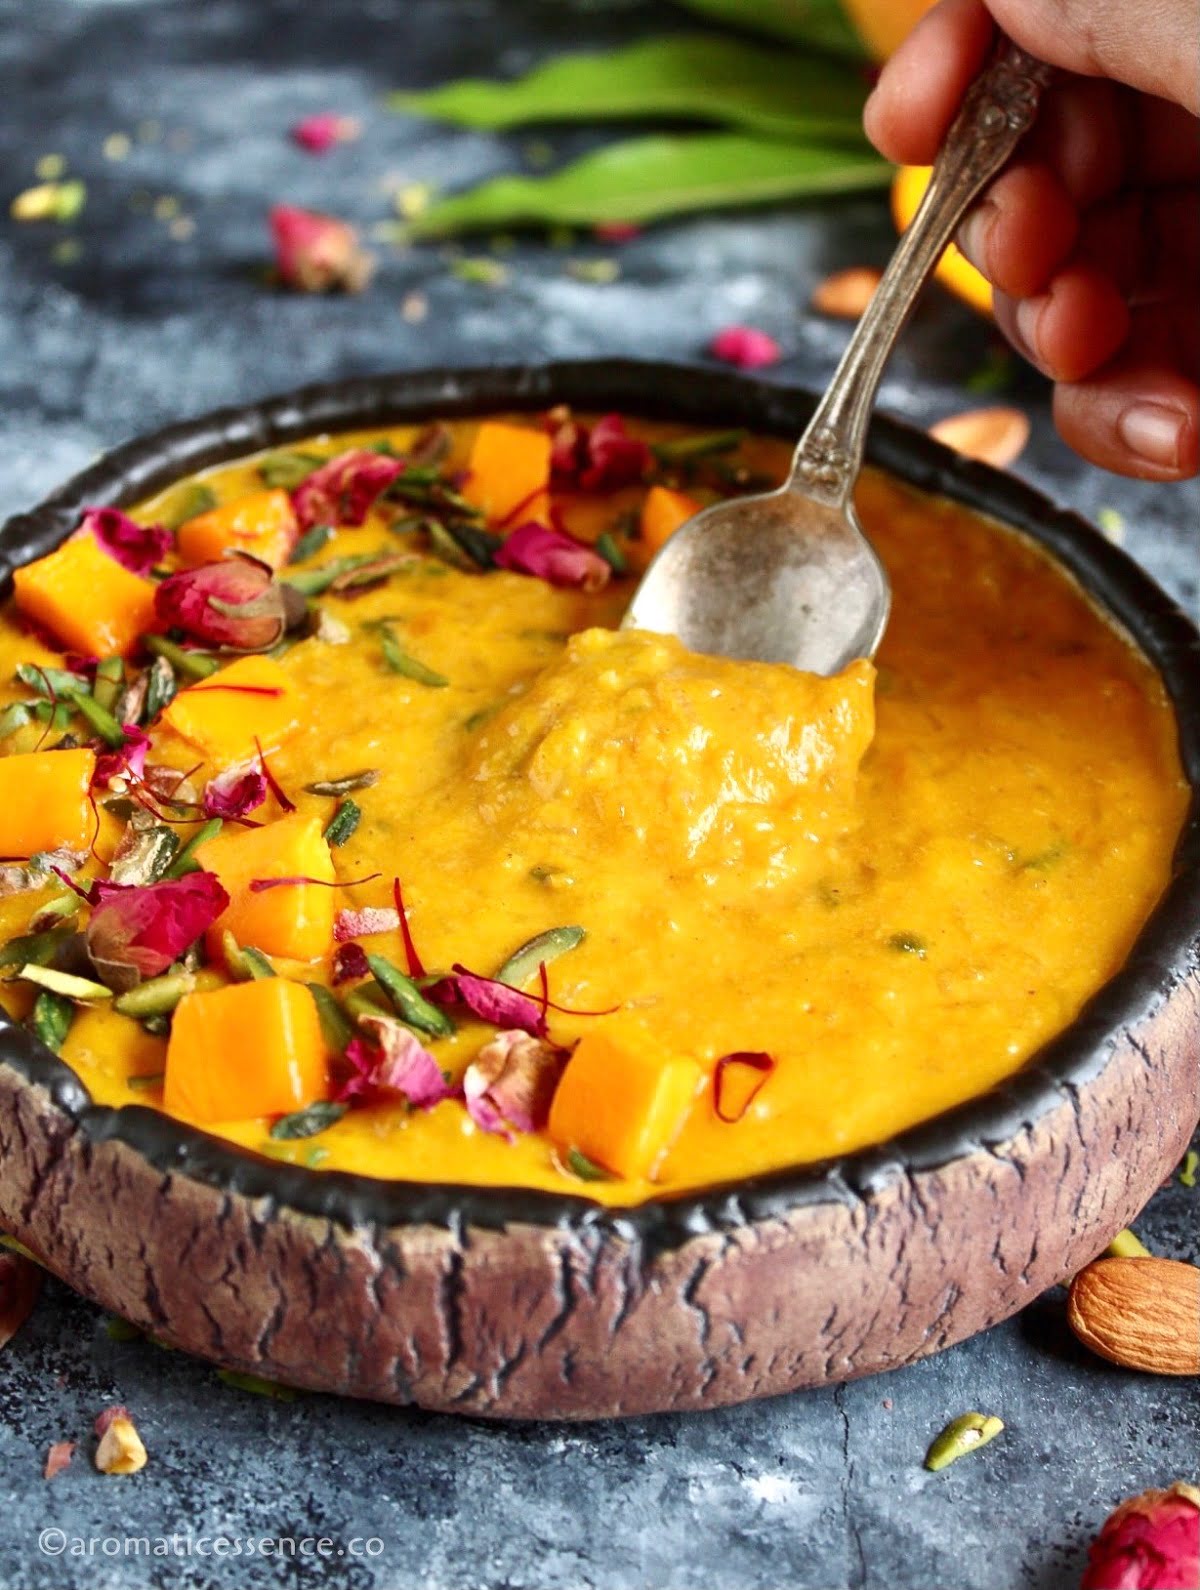
Mango kheer is a delicious dessert that can be served warm or cold. We love chilled kheer during the summers and warm kheer during the winters.
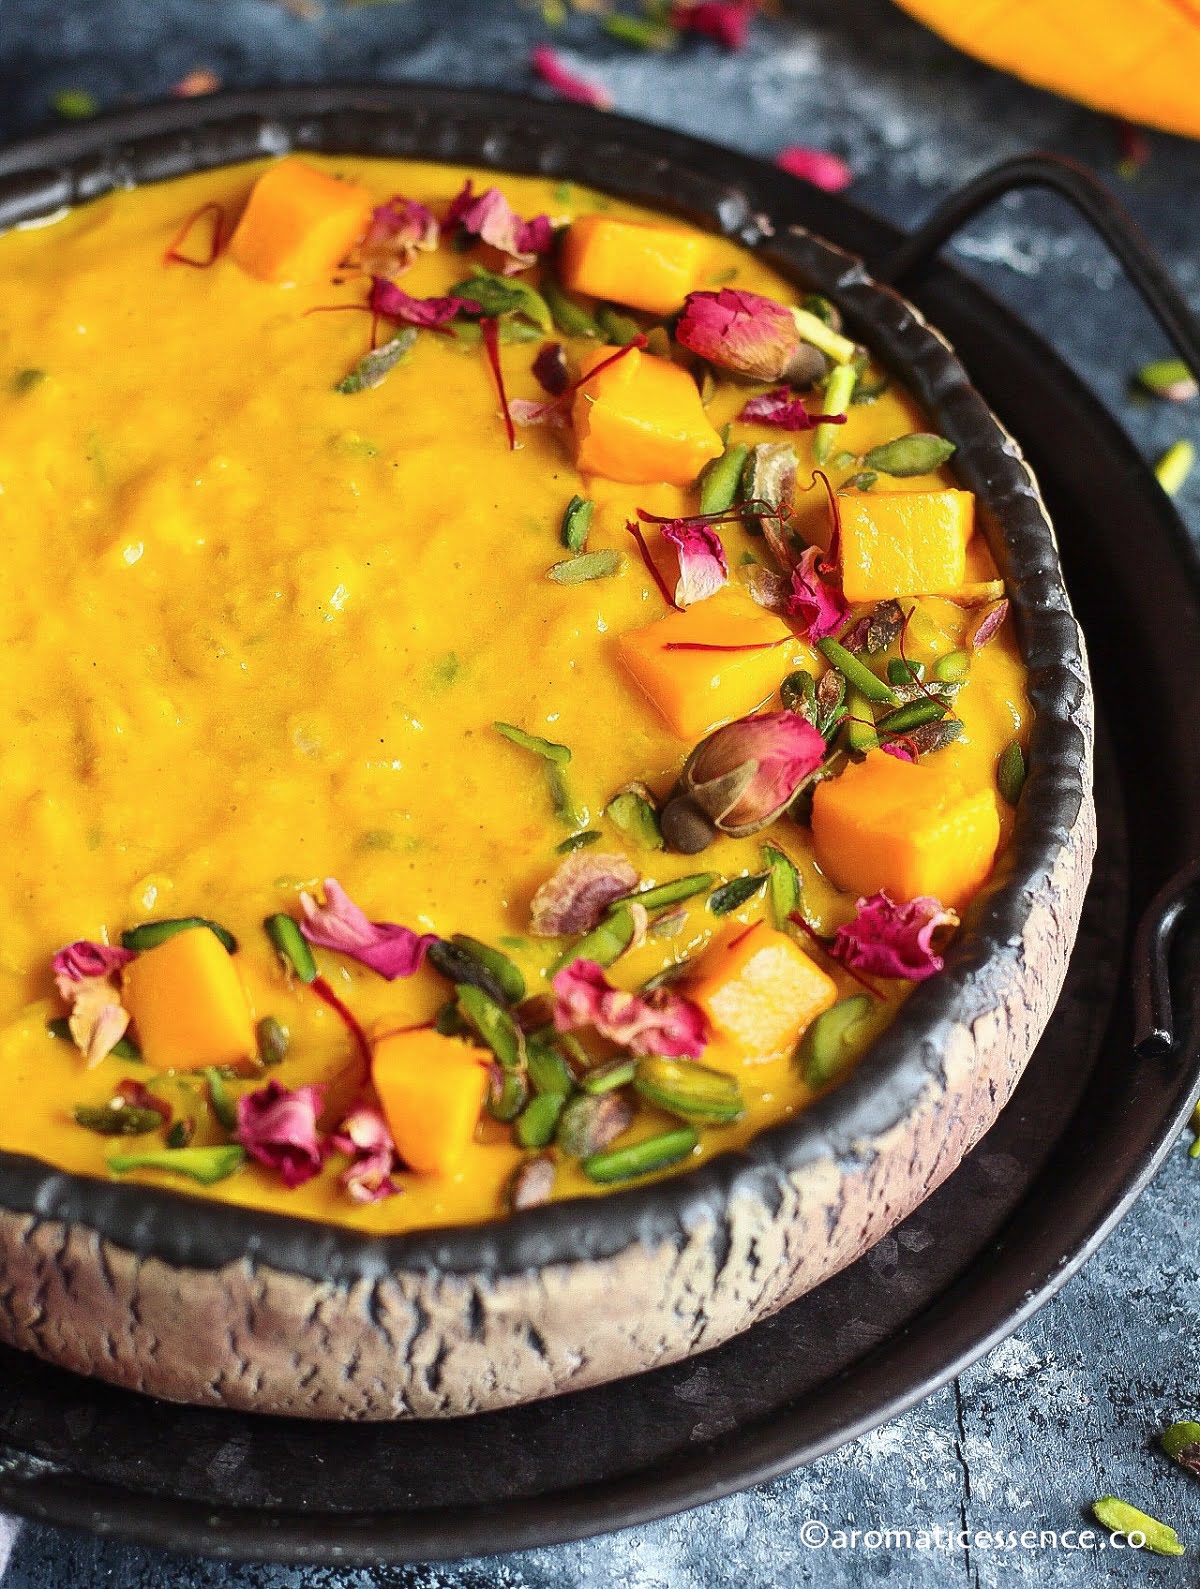
Top it with some diced mangoes, nuts, edible flowers for visual appeal. You can roast the nuts and raisins in ghee and use that to garnish this mango kheer as well.
Although the gorgeous golden hue is already visually appealing, a few garnishing touches make this aam ki kheer even more special.
My top tips for this recipe
Stick to the ratios: 50 grams of rice is perfect for 1 liter of milk. It looks too little a quantity for so much milk, but trust me, it is enough!
Use short-grained rice: This is the most important tip when it comes to making kheer. While basmati rice is fragrant, it is not the rice to be used in this recipe. It does not gelatinize during cooking, due to which the rice grains remain distinct and fluffy after cooking. Hence, it is not the preferred rice to be used for kheer. If you do use, then use broken basmati rice. For best results, stick to any short-grained variety of rice.
It is pretty basic science. The starch from the rice is released into the milk as it cooks, thickening the milk.
I always used basmati rice until I learned this easy tip from my friend, Prachi, while I was in the US. Now, I either use kalijeera or Gobindobhog rice, because it seriously makes the best rice kheer ever! Try it and see the difference.
Use full-fat milk: Using full-fat milk will make the kheer rich and creamy. Skimmed milk, 1% milk, or low-fat milk will not give you similar results. However, feel free to use it if you prefer a lighter kheer.
Remember to stir occasionally: Do not walk away from the stovetop. If the milk scorches and burns at the bottom of the pan, there is no way you can salvage that pot of kheer. You will have to trash it, so please remember to stir every 2-3 minutes. Also, make sure you set the heat to medium-low to minimize the chances of the milk burning.
The right time to add sugar: Always add sugar after the rice has cooked completely, or else it will take a long time to cook the rice. This is not applicable to the Instant Pot, but must be taken into account if making kheer on the stovetop.
Consistency of mango kheer: Avoid overcooking kheer too much because it thickens as it sits in the refrigerator. You can always thin it out by adding a few tablespoons of boiled and cooled milk at a time till you reach your desired consistency.
If for some reason, the kheer doesn’t thicken while cooking, you can add some cornstarch slurry. To do that, mix 1 tablespoon of cornstarch with 1-2 tablespoons of cold milk, mix well, add the slurry in the last step just before adding the nuts and cardamom powder. Stir continuously until it thickens. You should not encounter this problem if you use the right type of rice. But, you can troubleshoot this problem with this easy solution.
Type of mangoes: Use ripe, sweet, and non-fibrous mangoes for this recipe. Alphonso, kesari, banganapalli are some of my go-to mangoes for most mango desserts. If you do use a fibrous mango, just make sure you strain the pulp before using it in any mango-based dessert.
Add mango pulp when kheer cools down: Never add mangoes to hot dairy, or else it can split and curdle the milk.
What is the shelf life of kheer?
This mango kheer will keep well in an airtight container for 2 to 3 days in the fridge. You may also freeze freshly prepared kheer once it cools down. Freeze it for up to 1 month. Thaw overnight in the fridge.
For a fun twist, freeze leftovers in kulfi or popsicle molds!
Can I sweeten this mango kheer with condensed milk instead of sugar?
Yes, you can! Use about 3/4th or the entire 14 oz can of sweetened condensed milk. Adjust as per desired sweetness.
To be very honest, I have never found the need to add condensed milk in rice kheer. Just using the right type of rice and full-fat milk is enough to give you the creamiest kheer. You don’t need extra ingredients.
Can I use canned mango pulp in this recipe?
Yes, you can use it! You may need to reduce the sugar, as canned mango pulp is usually sweetened.
Canned mango pulp is also not as thick as fresh mango pulp, so the texture of the kheer may vary slightly. If you like thick kheer, then cook the mango pulp until it thickens to your liking. Cool and add it to the rice kheer.
Can I make this vegan?
I’ve not tried a vegan version of kheer yet. But I see no reason why it won’t work. Almond milk and oat milk would be great to make a vegan version.
I would not recommend soy milk as it might alter the flavor of the kheer. If you love the flavor of coconut, you can use coconut milk.
What is the difference between kheer and phirni?
The ratios are the same, though the only difference is in the way the rice is treated for both recipes. For phirni, the rice is soaked, drained, dried, and powdered. For kheer, you do not need to powder the rice grains.
Can I make this recipe in the Instant Pot?
Yes, you can use your handy Instant Pot for this kheer recipe. It is pretty much a dump-and-go recipe.
Follow these steps;
- Simply add all the ingredients except the nuts, cardamom powder, and mango pulp in the steel insert.
- Set the valve to the ‘SEALING’ position.
- Pressure cook on ‘HIGH’ for 20 minutes followed by natural pressure release (NPR) for 10 minutes. Then do a quick release as per the manufacturer’s instructions.
- Once the silver pin drops, open the lid.
- Turn on ‘SAUTE’ mode, set to ‘NORMAL’, and cook, stirring occasionally for another 10 to 12 minutes or until your reach your desired consistency of kheer.
- Add the nuts and cardamom powder, and mix well.
- Switch off the IP, and let the kheer cool down. Once cool, add the mango pulp and mix well.
You may also enjoy these mango recipes
Mango shake
Mango semolina cupcakes
Eggless mango loaf cake
Mango kulfi
You can also follow me on Facebook , Pinterest, Instagram & Twitter

Mango Kheer | Indian Mango Rice Pudding
Ingredients1x2x3x
- 50 grams short-grained rice (I’ve used Gobindobhog rice), about 1/4 cup
- 1 liter full-fat milk
- Pinch of saffron
- 100 grams castor sugar, little less than 1/2 cup, adjust as per desired sweetness
- 1 tablespoon cashew nuts
- 1 tablespoon sliced almonds
- 1 tablespoon slivered pistachios, plus more for garnishing (as required)
- 1/2 teaspoon cardamom powder
- 225 grams fresh mango pulp, about 1 cup
- Dried rose petals, for garnishing, optional
Instructions
- Rinse rice until the water runs clear. Soak the rice for 30 minutes and set it aside. Drain after 30 minutes and set aside.
- In the meanwhile, add milk in a heavy-bottomed pot, bring to boil over medium heat. Add 2 tablespoons of hot milk to saffron in a small bowl and set it aside.
- After it comes to a boil, add the drained rice, mix well, and cook over medium-low heat until the rice cooks completely and the milk thickens about 20-25 minutes, stirring occasionally every 2-3 minutes to prevent the milk from sticking and burning at the bottom of the pan.
- To check for the correct consistency: If you drop some mixture from a spoon, the rice and milk should fall in one stream and not separately.
- Add sugar and saffron-infused milk, continue cooking for another 5 minutes over medium-low heat.
- Add cardamom powder and nuts, and cook for another minute. Switch off the heat and let the mixture cool down completely.
- Add fresh mango pulp, mix well.
- Transfer to an airtight bowl, cover, and refrigerate until ready to serve.
