These eggs chops, Goan style make for an impressive hors-d’oeuvre or a great snack that can be enjoyed along with your cuppa. In these egg chops, half an egg is topped with a spicy green chutney and encompassed in a smooth mashed potato shell which is then coated with breadcrumbs and pan-fried.

Okay folks, would you believe if I told you these pics have been sitting in my laptop for over a year now! My Mum in law prepared these Goan egg chops during her stay with us. I don’t know how, but I completely forgot to share it here and it got lost in the barrage of folders of millions of food pics.
Okay, I’m exaggerating, but you get the point of the pics 😀 We click hundreds only to select 3-4 perhaps! The life of a food blogger!

- HOW TO MAKE EGG CHOPS?
- SOME MORE SIMILAR GOAN SNACKS YOU MAY ALSO ENJOY
- STEP BY STEP INSTRUCTIONS TO MAKE POTATO EGG CHOPS, GOAN STYLE
- HOW TO MAKE POTATO EGG CHOPS, GOAN STYLE?
- Egg Chops (Egg snacks) – Goan style | Goan Egg Chops
HOW TO MAKE EGG CHOPS?
To make these Goan egg chops, you will need 3 elements,
- Egg, but of course, right!
- Mashed potatoes
- Spicy, green chutney made with cilantro (coriander leaves), green chillies, ginger, and garlic.
If you are making it for kids, omit the green chillies. You can in-fact top it with your go-to green chutney.
That reminds me I have to also share my Mom’s green chutney with you guys! It is the best I’ve ever had, and no I’m not being boastful! I will definitely share that in my coming posts, so stay tuned.
These egg chops make for a delicious evening snack or an after-school snack. My son loves eggs in all form, so he happily enjoys these 🙂 And I’m sure you guys will enjoy these simple yet delicious egg chops as much!

I’ve used whole wheat panko breadcrumbs for coating the chops, I love how crispy the end product turns out. However, you may use semolina too if you can’t find panko breadcrumbs. Shallow frying makes this a rather healthy egg snack, you may choose to deep fry if you wish to.
So I’ll wind up this post with the recipe below, which frankly isn’t really much. Hope you give it a try!
p.s. if you dislike cilantro, substitute with parsley or any condiment you’d fancy! Or skip this chutney all together and use your favorite chutney or relish and enjoy it further by dipping it in your favorite sauce or the trusty ‘ol ketchup 😀
SOME MORE SIMILAR GOAN SNACKS YOU MAY ALSO ENJOY
Prawn potato chops
Mackerel croquettes
STEP BY STEP INSTRUCTIONS TO MAKE POTATO EGG CHOPS, GOAN STYLE
1.Add cilantro, ginger, garlic, green chillies & sugar to a blender, add about a tablespoon of water, make a smooth and thick paste. Transfer to a bowl, add salt to taste, mix well.

2.Make a smooth dough of the mashed/shredded boiled potatoes, divide it into 8 equal portions.

3.Take a potato ball, make a cavity, place one-half egg in the cavity. Top it with some green chutney.

4.Seal the edges of the potato dough to enclose the egg well. Roll it in semolina/breadcrumbs. Prepare all the chops in the same way. Refrigerate for 30 minutes, so that they firm a bit, which makes for easier frying without breaking apart.

5.Heat oil in a skillet, shallow fry on medium heat until the chops are golden brown from all sides. Serve hot with cilantro chutney or ketchup.


HOW TO MAKE POTATO EGG CHOPS, GOAN STYLE?

Egg Chops (Egg snacks) - Goan style | Goan Egg Chops
Ingredients1x2x3x
Measuring cup used, 1 Cup = 250 ml, 1 tsp = 5 ml
- 1 lb potatoes, boiled, cooled, peeled, and shredded/mashed
- 4 large eggs, boiled and skinned, cut into halves
- Breadcrumbs/Semolina, as required
- Oil, as required
For the green chutney
- 1 cup loosely packed cilantro leaves
- 2 green chillies
- 2 garlic cloves
- 1/4 inch ginger
- Pinch of sugar
- Salt, to taste
Instructions
- Add cilantro, ginger, garlic, green chillies & sugar to a blender, add about a tablespoon of water, make a smooth and thick paste. Transfer to a bowl, add salt to taste, mix well.
- Make a smooth dough of the mashed/shredded boiled potatoes, divide it into 8 equal portions.
- Take a potato ball, make a cavity, place one-half egg in the cavity. Top it with some green chutney.
- Seal the edges of the potato dough to enclose the egg well. Roll it in semolina/breadcrumbs. Prepare all the chops in the same way. Refrigerate for 30 minutes, so that they firm a bit, which makes for easier frying without breaking apart.
- Heat oil in a skillet, shallow fry on medium heat until the chops are golden brown from all sides. Serve hot with cilantro chutney or ketchup.

I would love to hear from you! Please feel free to share your feedback with photos and suggestions to me at aromaticessence77@gmail.com
You can also follow me on :
Facebook @ Aromaticessence
Pinterest @ Aromatic Essence
Instagram @ aromatic_essence77
Twitter @ freda_dias
Regards,
Freda

Egg Chops (Egg snacks) - Goan style | Goan Egg Chops
Ingredients
Measuring cup used, 1 Cup = 250 ml, 1 tsp = 5 ml
- 1 lb potatoes, boiled, cooled, peeled, and shredded/mashed
- 4 large eggs, boiled and skinned, cut into halves
- Breadcrumbs/Semolina, as required
- Oil, as required
For the green chutney
- 1 cup loosely packed cilantro leaves
- 2 green chillies
- 2 garlic cloves
- 1/4 inch ginger
- Pinch of sugar
- Salt, to taste
Instructions
- Add cilantro, ginger, garlic, green chillies & sugar to a blender, add about a tablespoon of water, make a smooth and thick paste. Transfer to a bowl, add salt to taste, mix well.
- Make a smooth dough of the mashed/shredded boiled potatoes, divide it into 8 equal portions.
- Take a potato ball, make a cavity, place one-half egg in the cavity. Top it with some green chutney.
- Seal the edges of the potato dough to enclose the egg well. Roll it in semolina/breadcrumbs. Prepare all the chops in the same way. Refrigerate for 30 minutes, so that they firm a bit, which makes for easier frying without breaking apart.
- Heat oil in a skillet, shallow fry on medium heat until the chops are golden brown from all sides. Serve hot with cilantro chutney or ketchup.
This festive rasmalai cake is a delicious fusion cake combining the best of both worlds making it an ultimate dessert to treat your sweet tooth! And it is completely egg-free!

So this rasmalai cake was trending last year and I’ve been putting it off to even try it since then. Decking up a cake aka frosting is something that still intimidates me. And it is pretty evident in my amateurish finish! And I only make a frosted cake for an occasion, which brings us to today’s post.

As lame as it may sound, I baked this cake for my very own birthday which was last weekend. Of course, I didn’t have to. But the blogger in me saw a perfect opportunity to make a cake and blog about it 😀

If you aren’t aware of rasmalai, let me first familiarize you with this decadent Indian dessert. Rasmalai is Indian dessert consisting of flattened, spongy cottage cheese cakes dunked in thickened, sweetened milk flavored with saffron and cardamom. Like most Indian milk-based desserts, this one is super addictive.
- SO WHAT THEN IS THIS RASMALAI CAKE?
- STEP BY STEP INSTRUCTIONS TO MAKE RASMALAI CAKE (EGGLESS)
- HOW TO MAKE RASMALAI CAKE?
- Rasmalai cake | Eggless Rasmalai Cake
SO WHAT THEN IS THIS RASMALAI CAKE?
It is a cardamom flavored cake, the layers of which are soaked with the ‘ras’ (thickened, sweetened milk infused with cardamom and saffron) from the rasmalai, and frosted with ‘ras’ infused whipped cream, dressed up with nuts, dried rose petals, some ‘malai’ which refers to the creamy, spongy cottage cheese cakes.
This rasmalai cake is absolutely worthy of an ambrosial treat, and almost reminded me of yet another classic favorite – ‘ Mexican Tres leches cake ‘

I’ve used my basic vanilla cake recipe but swapped the eggs with yogurt to make this an eggless rasmalai cake. The cake is flavored with cardamom and almond extract instead. This plain cake itself smelled divine as it was baking, the kitchen was brimming with exotic flavors! Baking with cardamom is one that you should venture into if you love it’s complex, citrusy, floral characteristics. It is the most common spice used to flavor Indian desserts.
This mawa cake is flavored with cardamom, and so are these Karachi biscuits. You should definitely try them if you haven’t already! They are soooo good!

I made this eggless rasmalai cake with my very own homemade rasmalai. I shall be doing a post on that next, so stay tuned! {Update- You can find the recipe for rasmalai here }
In India, generally, a non-dairy cream is used to frost a cake that calls for whipping cream. That has a much smoother finish and looks much glossier as compared to dairy whipped cream. So if you have access to non -dairy cream use that for a good finish.
I got a little ambitious and divided the cake into 3 layers when I think 2 would have been much better. I ended up using a lot of cream, which can get a little overwhelming. So I’d suggest going in for just 2 layers for a cake of this size.
I had fun making this rasmalai cake, and I hope you will try it soon too 🙂

STEP BY STEP INSTRUCTIONS TO MAKE RASMALAI CAKE (EGGLESS)
For the cake base
1.Preheat the oven to 350 degrees F/ 180 degrees C. Position a rack in the middle of the oven. Grease a 7-inch cake tin with little butter and dust with flour to coat the pan, or you may use parchment paper.

2.In a medium mixing bowl, sieve flour, baking powder, baking soda, and cardamom powder. Add salt, whisk the dry ingredients until well combined. Set aside.

3.In the bowl of your stand mixer fitted with the paddle attachment, beat the butter and sugar on medium-high speed until light and creamy, scraping down in between, should take about 2-3 minutes. Or you can use an electric hand mixer/beater.

4.Add in the yogurt next, continue beating on medium-high speed.

5.In goes the almond extract next. Beat on medium speed for another 30 seconds.

6.Now reduce to the lowest possible speed, alternately add the dry ingredients and milk, starting with flour and ending with flour. ( DO NOT OVER MIX ).

7.Transfer the batter to the prepared cake tin. Give the tin a gentle tap, bake on the middle rack for 50-55 min or until the toothpick inserted in the center of the cake comes out clean.

8.Cool the cake on a rack in the tin for 10 minutes, then remove from the tin and cool on the rack completely. Slice the cake only once it has cooled down completely.

For the whipped cream frosting
1.In the bowl of your stand mixer fitted with the whisk attachment, add the heavy cream, icing sugar, almond extract, ‘ras’ from the rasmalai milk and 5-6 drops of yellow food color.

2.Whip the cream on low speed to incorporate the sugar, then increase the speed to medium-high and beat until it forms stiff peaks. Do not overbeat or else it will turn into butter. Another method to check if your cream is ready is by inverting bowl if the cream stays intact without showing signs of slipping from the bowl, it’s done. Refrigerate the cream in the meanwhile until you are ready to frost the cake.

Assembling the cake
1.Once the cake has completely cooled down, divide it into 3 layers or (2 layers if you desire) with the help of a long serrated knife. Also, transfer some cream to a piping bag fitted with a Wilton 1A round tip (or you can simply snip off the edge of the piping bag before you begin piping), to pipe out the layers in between. I do this so that the cream layer looks even all over. You may simply transfer the cream with the help of a spatula if that is convenient for you.


2.Put a tbsp of whipped cream on the turntable. Transfer the first layer to the turntable. Brush it with ‘ras’ (thickened sweetened milk). Squeeze out the ‘ras’ from the rasmalai and crumble it int pieces directly over the layer brushed with the ‘ras’.Pipe out the whipped cream in circular motions starting from outer circumference towards the center. Flatten and smooth the cream with an offset spatula.

3.Repeat the same with the second layer.

4.Finally, place the last cake layer, and coat the cake with a rough crumb coating. Refrigerate it for 30 minutes.
5.Apply more whipped cream all over the cake and smooth out the edges.
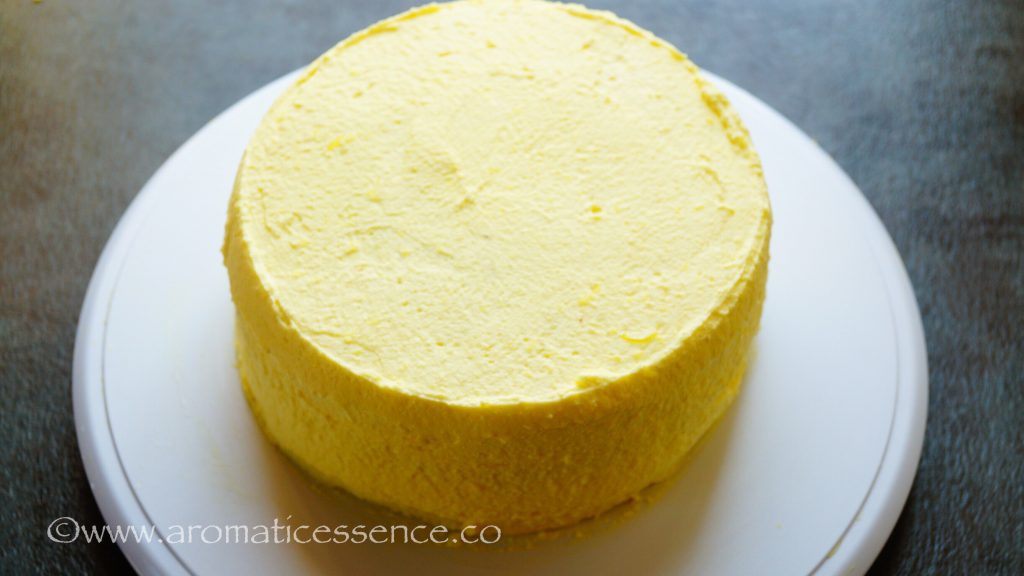
6.Transfer the remaining cream into a piping bag fitted with Wilton 1M nozzle or any other nozzle as per your design. Pipe out the cream to form rosettes or any other design.


7.Place some slivered pistachios, almond slices and dried rose petals all over the sides.

8.Cut 6 small circular disc from about 2 rasmalai’s, after squeezing out all the ‘ras’. Place it the center to resemble a flower. You can get creative and make any design you wish, or simply place rasgullas all over the cake, if you wish. Sprinkle some saffron strands, and dried rose petals on the top. Refrigerate the cake for 2-3 hours before serving. Enjoy yummy rasmalai cake 🙂
NOTE
1.You may reduce the heavy cream to 2.5 cups if you are dividing the cake into 2 layers.

HOW TO MAKE RASMALAI CAKE?

Rasmalai cake | Eggless Rasmalai Cake
Ingredients1x2x3x
Measuring cup used, 1 Cup = 250 ml, 1 tsp = 5 ml
For the cake base
- 1 & 1/2 cups / 7.5 oz / 214 grams unbleached all purpose flour (maida), spooned and leveled
- 1 cup / 7.4 oz / 210 grams sugar
- 1/2 cup / 4 oz / 113 grams unsalted butter
- 1/2 cup / 4 oz / 115 grams yogurt/dahi non sour
- 1 & 1/2 tsp baking powder
- 1/4 tsp baking soda
- 1/4 tsp salt, skip if using salted butter
- 1/4 tsp cardamom powder
- 1/4 tsp almond extract
- 1/2 cup milk
For the whipped cream frosting
- 3 cups of heavy whipping cream, 35 %
- 6 tbsp confectioner’s / icing sugar, sifted, (add more if you want it sweeter)
- 2 tbsp ‘ras’-sweetened thickened milk from the rasmalai
- 1/4 tsp almond extract
- yellow food color, as required (optional)
Other ingredients
- Approx 1/3 cup ‘ras’-sweetened thickened milk from the rasmalai to brush the cake layers
- 4 rasmalai’s
- Sliced pistachios as required
- Sliced almonds as required
- dried rose petals as required
Instructions
For the cake base
- Preheat the oven to 350 degrees F/ 180 degrees C. Position a rack in the middle of the oven. Grease a 7-inch cake tin with little butter and dust with flour to coat the pan, or you may use parchment paper.
- In a medium mixing bowl, sieve flour, baking powder, baking soda and cardamom powder. Add salt, whisk the dry ingredients until well combined. Set aside.
- In the bowl of your stand mixer fitted with the paddle attachment, beat the butter and sugar on medium-high speed until light and creamy, scraping down in between, should take about 2-3 minutes. Or you can use an electric hand mixer/beater.
- Add in the yogurt next, continue beating on medium-high speed.
- In goes the almond extract next. Beat on medium speed for another 30 seconds.
- Now reduce to the lowest possible speed, alternately add the dry ingredients and milk, starting with flour and ending with flour. ( DO NOT OVER MIX ).
- Transfer the batter to the prepared cake tin. Give the tin a gentle tap, bake on the middle rack for 50-55 min or until the toothpick inserted in the center of the cake comes out clean.
- Cool the cake on a rack in the tin for 10 minutes, then remove from the tin and cool on the rack completely. Slice the cake only once it has cooled down completely.
For the whipped cream frosting
- In the bowl of your stand mixer fitted with the whisk attachment, add the heavy cream, icing sugar, almond extract, ‘ras’ from the rasmalai milk and 5-6 drops of yellow food color.
- Whip the cream on low speed to incorporate the sugar, then increase the speed to medium-high and beat until it forms stiff peaks. Do not overbeat or else it will turn into butter. Another method to check if your cream is ready is by inverting bowl if the cream stays intact without showing signs of slipping from the bowl, it’s done. Refrigerate the cream in the meanwhile until you are ready to frost the cake.
Assembling the cake
- Once the cake has completely cooled down, divide it into 3 layers or (2 layers if you desire) with the help of a long serrated knife. Also, transfer some cream to a piping bag fitted with a Wilton 1A round tip (or you can simply snip off the edge of the piping bag before you begin piping), to pipe out the layers in between. I do this so that the cream layer looks even all over. You may simply transfer the cream with the help of a spatula if that is convenient for you.
- Put a tbsp of whipped cream on the turntable. Transfer the first layer to the turntable. Brush it with ‘ras’ (thickened sweetened milk). Squeeze out the ‘ras’ from the rasmalai and crumble it int pieces directly over the layer brushed with the ‘ras’.Pipe out the whipped cream in circular motions starting from outer circumference towards the center. Flatten and smooth the cream with an offset spatula.
- Repeat the same with the second layer.
- Finally, place the last cake layer, and coat the cake with a rough crumb coating. Refrigerate it for 30 minutes.
- Apply more whipped cream all over the cake and smooth out the edges.
- Transfer the remaining cream into a piping bag fitted with Wilton 1M nozzle or any other nozzle as per your design. Pipe out the cream to form rosettes or any other design.
- Place some slivered pistachios, almond slices and dried rose petals all over the sides.
- Cut 6 small circular disc from about 2 rasmalai’s, after squeezing out all the ‘ras’. Place it the center to resemble a flower. You can get creative and make any design you wish, or simply place rasgullas all over the cake, if you wish. Sprinkle some saffron strands, and dried rose petals on the top. Refrigerate the cake for 2-3 hours before serving. Enjoy yummy rasmalai cake.
Notes

I would love to hear from you! Please feel free to share your feedback with photos and suggestions to me at aromaticessence77@gmail.com
You can also follow me on :
Facebook @ Aromaticessence
Pinterest @ Aromatic Essence
Instagram @ aromatic_essence77
Twitter @ freda_dias
Regards,
Freda
