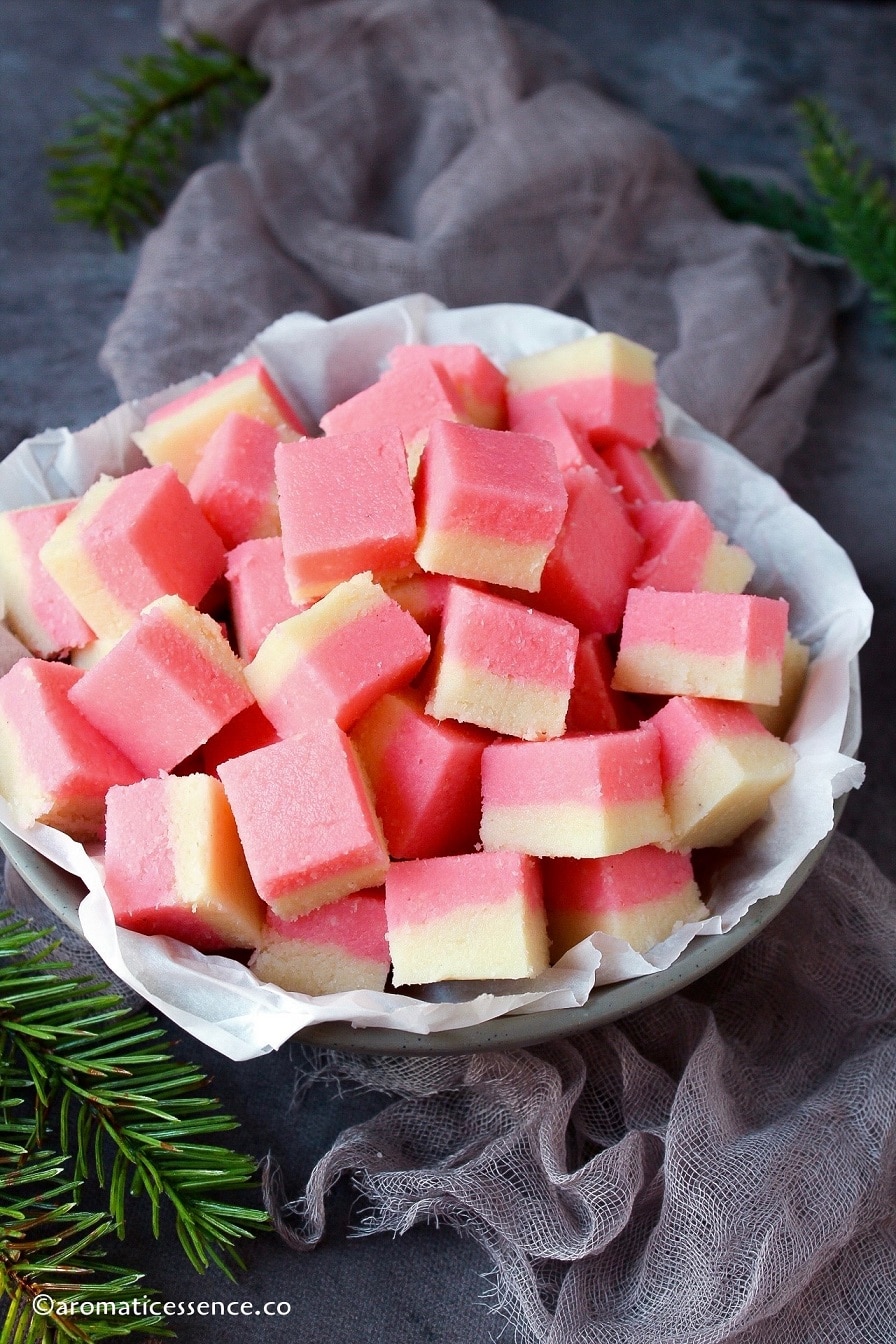
These coconut ice squares are soft and chewy, they look adorable and make a great addition to your festive Christmas dessert platter! You need just 3 ingredients to whip up these no-cook, delicious coconut treats.
Hi folks! I truly hope that everyone is doing well during these tough and challenging times. Apologies for being MIA, this was my longest break ever. I had a lot goin on, so blogging took a backseat.
I’ve missed sharing so much in the past 5 months and more so during this festive season, but I couldn’t let the holidays pass by without sharing some of my favorite recipes with you guys 🙂
I’ve already shared quite a lot of traditional Christmas sweets on the blog here like neureos , kormolas, guava cheese (Perad), milk cream, marzipan , etc to name a few.
I do intend to share more Christmas treats in the coming days. On that note, let me start off with this ridiculously easy recipe, that needs no cooking! After all, who doesn’t love a good no-cook or no-bake recipe, right? I’m always up for one, especially during the holidays when things can get hectic.
I know everyone is busy during Christmas, and trust me, a lot of our traditional Goan sweets are time consuming and laborious. I’m sure many of you will be pre-ordering the sweets and there’s absolutely no harm in it, as not everyone has the time or energy.
But if you are up to preparing something this season, that’s really as easy as 1-2-3, this is the recipe for you! Mix, layer, set, and cut into squares, bars, or any desired shapes using fancy cookie cutters. It is a fun activity to get the kids involved and spend some quality time with your family 🙂

- What is coconut ice?
- Why you will love this recipe
- Ingredients required
- How to make coconut ice squares – Step by step
- FAQs
- Variations
- Coconut Ice {Easy, No-Cook Recipe}
What is coconut ice?
Coconut ice is a British confectionery prepared using grated desiccated coconut or just grated coconut, condensed milk, and sugar, which is formed to create a solid, soft candy. It typically has a chewy, soft, and mildly grainy texture; some versions are semi-hard. It is also available in South Africa, some areas of Australia, and New Zealand.
The origin of the use of the word “ice” in the confectionery’s name is not known, but it may have derived from its general appearance and coloration. ( Wiki)

Honestly, I didn’t know one of my favorite Christmas sweets also happens to be popular in Britain. I always thought of it as a traditional Goan Christmas sweet.
Why you will love this recipe
I’m sure you will love this recipe as ;
- It tastes so good, it is highly addictive
- Requires a few ingredients
- It does not involve any cooking
- Looks attractive
- Perfect for gifting, wrap them in cellophane and tie them with ribbons for a gourmet touch
The hardest part of this recipe is just waiting for it to set!
Ingredients required
The traditional method to make this dessert involves cooking grated coconut along with milk and sugar, somewhat similar to this coconut toffee recipe that I’ve shared earlier. That is more of a firm and chewy candy, that has a bite to it.
Today, I’m sharing the no-cook method which calls for 3 ingredients;
- Unsweetened desiccated coconut, easily found in the baking aisle
- Sweetened condensed milk
- And icing sugar or confectioner’s sugar
I’ve flavored it with vanilla and rose essence. These ingredients are completely optional. You can use whatever you have at hand. Check out the variations listed further below at the bottom of the post.

How to make coconut ice squares – Step by step
Step 1: Prepare the pan
Grease a 7 or 8-inch square pan with oil or non-stick spray. Line the pan with parchment paper and set aside. (image 1)

Step 2: Prepare the white mixture
In a large bowl, add 200 grams condensed milk, 100 grams icing sugar, and 1/2 teaspoon vanilla extract. Stir well until combined. (image 2 and 3)
Next, add 175 grams of desiccated coconut, mix well until combined. You may use your hands the mix thoroughly if it gets difficult to mix. (image 4 and 5)

Press the white mixture firmly over the base of the pan, smooth out the surface with an offset spatula or your hands. Set aside. (image 6 and 7)

Step 3: Prepare the pink mixture
Wipe out the bowl, and add the remaining 200 grams condensed milk, 100 grams icing sugar, 1/4 teaspoon pink food color, and 1/4 teaspoon rose essence, stir well until combined. (image 8 and 9)
Next, add the remaining 175 grams of desiccated coconut, mix well until combined. (image 10 and 11)
You can also use 2 bowls, and prepare the separate layers simultaneously, whatever is convenient for you.

Step 4: Layer and set
Press the pink mixture over the white layer, smooth out the surface with an offset spatula, back of measuring cup, or your hands. (image 12)

Cover the pan with a cling film or aluminum foil. Refrigerate overnight. It usually sets in 2-3 hours, but for best results refrigerate it overnight. You may also let it air-dry, uncovered, at room temperature. I prefer setting it in the refrigerator as it is is a quicker alternative.
Step 5: Cut and serve
Lift the parchment paper out of the pan. Let the coconut ice stand at room temperature for 5-10 minutes. I trimmed off the edges to have clean ends, but that is completely optional. Cut into desired sized pieces. (image 13 and 14)

You may also cut them into bars but I find that it is too much of a serving portion.
How long does coconut ice last?
Once the coconut ice squares have dried out completely, store them in an airtight container in a cool, dry place for up to 2 weeks, though I highly doubt it will last that long 😀
For longer shelf life, refrigerate them in an airtight container for up to 1 month. Remove the required number of squares you intend to serve, let it sit at room temperature for about 10-15 minutes before serving.
Coconut ice not setting
That problem could arise with the traditional cooking method, which calls for milk, sugar, and coconut. In this no-cook recipe, the icing sugar helps it to set. Ideally, you should not have this problem here.
If at all you do face this problem, the simplest way to troubleshoot is by making laddoos or balls out of it and rolling it in more desiccated coconut. Place it on a parchment-lined plate or tray and leave it to dry for a few hours.
Next time, try increasing the desiccated coconut to 350 or 400 grams for it to set.
Can I skip the icing sugar?
I do not suggest skipping the icing sugar as it helps in setting the coconut ice.
I’ve tested this recipe with 3 ratios of icing sugar,
- 100 grams: More coconut flavor and very subtle in terms of sweetness, perfect if you prefer less-sweet desserts.
- 200 grams: What I’ve used in this recipe and it was just the right amount of sweetness for us.
- 350 grams: The entire dessert was way too sweet, and had less coconut flavor.
The dessert set well with all these proportions, so feel free to increase/decrease the icing sugar depending on how sweet you like it.
Can I use fresh shredded coconut in this recipe?
You cannot use it as a direct substitute in this recipe. However, you can make your own homemade desiccated coconut by dry roasting the freshly shredded coconut in a skillet over medium-low heat, to remove all the moisture. Keep stirring continuously to prevent the coconut from burning and changing color.
Then transfer onto a plate and set aside to cool down. If the shreds are big, pulse in the blender to break it down to a finer consistency. Then you can use it in the recipe.

Variations
You can get creative with the flavors and colors and make your own unique flavored coconut ice. These are some of the variations that I think you may enjoy, feel free to experiment.
- Holiday-themed: Add a few drops of peppermint extract. You can make 2 layers of red and green.
- Pistachio flavored: Add about 1/4 teaspoon of pistachio extract and green food color to one half of the mixture. Layer over the white mixture.
- Cardamom flavored: Add 1/4 teaspoon of cardamom essence or 1/2 teaspoon of powdered cardamom along with green food color to one half of the mixture. Layer over the white mixture.
- Pink coconut ice: Add about 1/2 teaspoon of strawberry/raspberry extract and pink food color.
- For the white layer , you can also use almond extract.
- Caramel flavored: Use the same amount of dulce de leche instead of the condensed milk.
- Coconut snowballs: Once you prepare the mixture, take a portion of the mixture and form balls. Coat it with more desiccated coconut.
- Chocolate coated: Melt some bittersweet or dark chocolate, dip the squares completely in the chocolate, then transfer to a wire rack or parchment-lined tray to dry completely. Avoid using milk chocolate or white chocolate as it will make the entire thing too sweet.
Avoid going overboard with the extracts, as some of them are quite strong and little goes a long way.

p.s: I hope you have already soaked the dried fruits to make the rich, boozy, Christmas fruit cake . If you haven’t, it is still not too late, here’s all that you need to know to soak the dried fruits.
You can also follow me on Facebook , Pinterest, Instagram & Twitter

Coconut Ice {Easy, No-Cook Recipe}
Ingredients1x2x3x
- 400 grams sweetened condensed milk
- 200 grams icing sugar, sifted, little less than 2 cups (Refer notes)
- 350 grams of desiccated coconut about 4 cups, tightly packed
- 1/2 teaspoon vanilla extract
- 1/4 to 1/2 teaspoon rose essence
- 1/4 teaspoon rose pink food color
Instructions
- Grease a 7 or 8-inch square pan with oil or non-stick spray. Line the pan with parchment paper and set aside.
- In a large bowl, add half of the condensed milk, half of the icing sugar, and vanilla extract, stir well until combined.
- Next, add half of the desiccated coconut, mix well until combined. You may use your hands the mix thoroughly if it gets difficult to mix.
- Press the white mixture over the base of the pan, smooth out the surface with an offset spatula or your hands. Set aside.
- Wipe out the bowl, and add the remaining condensed milk, icing sugar, along with the pink food color, and rose essence, stir well until combined.
- Next, add the rest of the desiccated coconut, mix well until combined.
- Press the pink mixture over the white layer, smooth out the surface with an offset spatula or your hands.
- Cover the pan with a cling film or aluminum foil. Refrigerate overnight. It usually sets in 2-3 hours, but for best results refrigerate it overnight. You may also let it air-dry, uncovered, at room temperature.
- Lift the parchment paper out of the pan. Let the coconut ice stand at room temperature for 5-10 minutes. Cut into desired sized pieces.
Video
Notes
Nutrition

Coconut Ice {Easy, No-Cook Recipe}
Ingredients
- 400 grams sweetened condensed milk
- 200 grams icing sugar, sifted, little less than 2 cups (Refer notes)
- 350 grams of desiccated coconut about 4 cups, tightly packed
- 1/2 teaspoon vanilla extract
- 1/4 to 1/2 teaspoon rose essence
- 1/4 teaspoon rose pink food color
Instructions
- Grease a 7 or 8-inch square pan with oil or non-stick spray. Line the pan with parchment paper and set aside.
- In a large bowl, add half of the condensed milk, half of the icing sugar, and vanilla extract, stir well until combined.
- Next, add half of the desiccated coconut, mix well until combined. You may use your hands the mix thoroughly if it gets difficult to mix.
- Press the white mixture over the base of the pan, smooth out the surface with an offset spatula or your hands. Set aside.
- Wipe out the bowl, and add the remaining condensed milk, icing sugar, along with the pink food color, and rose essence, stir well until combined.
- Next, add the rest of the desiccated coconut, mix well until combined.
- Press the pink mixture over the white layer, smooth out the surface with an offset spatula or your hands.
- Cover the pan with a cling film or aluminum foil. Refrigerate overnight. It usually sets in 2-3 hours, but for best results refrigerate it overnight. You may also let it air-dry, uncovered, at room temperature.
- Lift the parchment paper out of the pan. Let the coconut ice stand at room temperature for 5-10 minutes. Cut into desired sized pieces.
Video
Notes
Nutrition
This walnut fudge (walnut toffee) is creamy, rich, and decadent packed with crunchy walnuts in every bite! Homemade walnut fudge makes for a delicious edible gift this Holiday season, or any other season really!

Walnut fudge or walnut toffee as it is known by some folks is a popular confection prepared during Christmas by the Goan and East Indian community in India.
Although fudge is not a traditional Indian Christmas sweet per se, people do love to include it in their ‘ kuswar ‘ (Goan Christmas sweet platter) along with the other popular traditional sweets like neureos, fruit cake, marzipan, milk toffee, kulkuls, kormolas, etc
I’ve yet to meet someone who doesn’t like fudge! What’s not to love about fudge after all, right?
There are different varieties of fudge and a number of ways to make them, either using the old-fashioned method with sugar, milk, and butter, or using marshmallows/marshmallow cream, or the quicker no-cook version of using condensed milk and melted chocolate, which is quite popular today.

- About this walnut fudge
- Ingredients needed
- How to make walnut fudge/walnut toffee – Step by step process
- Storage and shelf life
- A few tips to keep in mind
- Variations
- You may also enjoy these traditional Goan Christmas sweets
- Walnut Fudge | Walnut Toffee (Indian Christmas Sweet)
About this walnut fudge
The walnut fudge or walnut toffee recipe I’m sharing today is what I’ve learned from my aunt Carol. It uses condensed milk as the base and a bit of cocoa for a hint of chocolate flavor.
The recipe is quite similar to the milk cream I’ve shared earlier, except that milk cream uses a few cashew nuts. But since this fudge is all about the walnuts, that’s what we are going to use today.
These walnut fudge bites are truly irresistible and perfect for gifting your loved ones. These also make for a wonderful addition to your Christmas dessert or cookie platter! And it doesn’t need much elbow grease, I promise!
So, let’s see how to make this walnut fudge or walnut toffee, whatever you like to call it. It is delicious nonetheless 😀

Ingredients needed
To prepare this decadent walnut toffee at home, you will need the following ingredients;
- Sweetened condensed milk: This is the base of the fudge. The traditional method calls for reducing the milk with sugar which is essentially condensed milk. This is where we save time!
- Castor sugar: You may also use powdered sugar.
- Unsweetened cocoa powder: I’ve used Hershey’s cocoa powder. This is optional, you may skip it if you want to, but I do recommend including it in the recipe.
- Butter : I’ve used salted butter. If using unsalted butter, add about 1/8 teaspoon table salt, when adding the butter. The salt enhances and balances the overall flavor of the fudge.
- Coarsely chopped walnuts
- Vanilla extract: Optional, but a little doesn’t hurt!

How to make walnut fudge/walnut toffee – Step by step process
Step 1: Cook condensed milk, sugar, and cocoa powder
Grease a 7 or 8-inch square pan with oil/butter or non-stick oil spray. You can also use any other pan, thali, or a buttered board. Line the pan with parchment paper overhang for easy removal of the fudge. Grease the parchment paper and set the prepared pan aside. (photo 1)

Add 400 grams of sweetened condensed milk, 50 grams sugar, and 15 grams cocoa powder in a heavy-bottomed, non-stick pan. Switch on the heat to medium-low, stir continuously with a silicon or wooden spatula for about 10 minutes. (photos 2 to 5)

Step 2: Add the remaining ingredients and continue cooking
Once it begins to thicken, reduce the heat to low, add 28 grams salted butter and 1/2 teaspoon vanilla extract, cook, until it starts leaving the sides of the pan. (photos 6 and 7)

Add 100 grams of coarsely chopped walnuts. Mix well, and cook for few more minutes until the entire mixture comes together and leaves the sides of the pan. Switch off the heat. (photos 8 and 9)

Step 3: Transfer to a greased pan
Transfer the fudge mixture to a greased tray or a buttered board, spread it evenly with an offset spatula or regular spatula. Sprinkle some chopped walnuts, press it down gently with the spatula. Air-dry, uncovered, for a few hours/overnight or until it sets. (photos 10 and 11)

Step 4: Cut and serve
Once it has set, it will appear firm. Lift the fudge out of the pan. Cut into squares or diamonds. Enjoy! (photo 12)

Storage and shelf life
Store the walnut fudge in a cool, dry place for up to 1 week in an airtight container.
It does not need to be refrigerated. Even if you do refrigerate it, let it sit out till it reaches room temperature before serving.
A few tips to keep in mind
Good quality non-stick pan: To make this recipe as hassle-free as possible, use a good quality non-stick pan or wok as the fudge mixture won’t stick much, and it also leaves the sides of the pan nicely, indicating that it is done. If you don’t have one or avoid using a non-stick pan, use a good, heavy-bottomed pan.
Pay attention to the heat: Use low to medium-low heat while cooking the mixture, or it may burn at the bottom.
Grease the spatula with oil or butter while spreading the mixture in the tray: Doing so, will prevent the fudge from sticking to the spatula, and you can spread it evenly.
Alternatively, you can also grease one side of the parchment paper with some butter, place the greased side on the surface of the fudge, and press it down to flatten it nicely. Check out the pics below for reference.

Or spread the fudge mixture on a buttered board, place a parchment paper over the surface and roll it out to the desired thickness.
If the fudge has not set after a day: This happens when you have removed the fudge earlier off the heat. Usually, in Indian homes, no one really uses a candy thermometer to check it has reached the right consistency. People often use their judgment, which almost never fails.
If you are a beginner, you may not be able to judge and that is okay. Either way, the fudge is still edible, even if it doesn’t set. It will be like the soft, and chewy, Lonavala type of walnut fudge that can be eaten with a spoon. Delicious!
If it is too sticky, transfer it back to the pan, cook it on low heat for a couple of minutes. Then transfer it to the prepared greased pan, spread it out, and leave it to air-dry.
It takes practice, believe me, I’ve been there, done that! But you will get it right!

Variations
- Other nuts: You can add other coarsely chopped nuts like cashew nuts, pecans, almonds, pistachios, etc.
- More chocolate: if you prefer a more chocolatey flavor, you can add 1/4 cup of cocoa powder. You can increase the sugar by a few more tablespoons to compensate for the added cocoa powder or skip adding more sugar if you don’t want it sweeter.
- Shape the fudge in moulds: If you’d like to shape in moulds like milk toffee, make a fine powder of the walnuts. You will also need to check if the consistency of the fudge mixture is right in order to be able to shape then. When the mixture leaves the sides of the pan, test it by dropping a small amount of mixture in a bowl of water, try to form a ball. If you can form a ball, it is done. If it disintegrates, it needs to cook more. Have a look at my milk toffee post for pictorial reference.
You may also enjoy these traditional Goan Christmas sweets
- Marzipan (no-cook/egg-free)
- Bebinca
- Guava cheese
- Milk Cream
- Coconut Toffee
- Baath cake
- Doce de grao (chana dal fudge)
- Karanji/Neureos
- Kormolas
- Shankapali
- No-cook coconut ice
- Rich fruit cake
You can also follow me on Facebook , Pinterest, Instagram & Twitter

Walnut Fudge | Walnut Toffee (Indian Christmas Sweet)
Ingredients1x2x3x
- 400 grams sweetened condensed milk
- 50 grams castor sugar or powdered sugar, approx 1/4 cup
- 15 grams unsweetened cocoa powder, 2 tablespoons
- 28 grams salted butter, 2 tablespoons
- 1/2 teaspoon vanilla extract
- 100 grams coarsely chopped walnut, about 1 cup
Instructions
- Grease a 7 or 8-inch square pan with oil/butter or non-stick oil spray. You can also use any other pan, thali, or a buttered board. Line the pan with parchment paper overhang for easy removal of the fudge. Grease the parchment paper and set the prepared pan aside.
- Add condensed milk, sugar, and cocoa powder in a heavy-bottomed, non-stick pan. Switch on the heat to medium-low, stir continuously with a silicon or wooden spatula for about 10 minutes.
- Once it begins to thicken, reduce the heat to low, add butter and vanilla extract, cook until it starts leaving the sides of the pan.
- Add the coarsely chopped walnuts. Mix well, and cook for few more minutes until the entire mixture comes together and leaves the sides of the pan. Switch off the heat.
- Transfer the fudge mixture to a greased tray or a buttered board, spread it evenly with an offset spatula or regular spatula. Sprinkle some chopped walnuts, press it down gently with the spatula. Air-dry, uncovered, for a few hours/overnight or until it sets.
- Once it has set, it will appear firm. Lift the fudge out of the pan. Cut into squares or diamonds. Enjoy!
