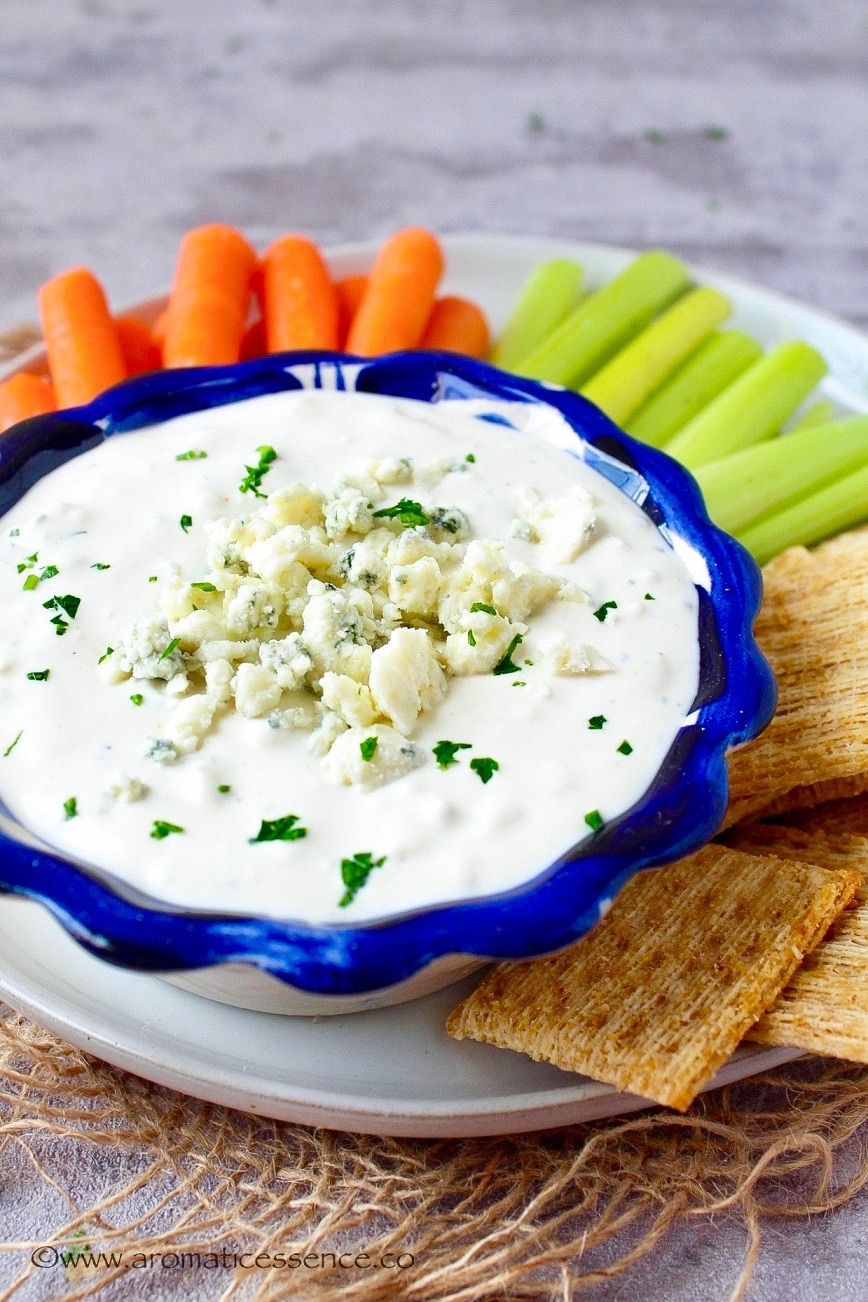
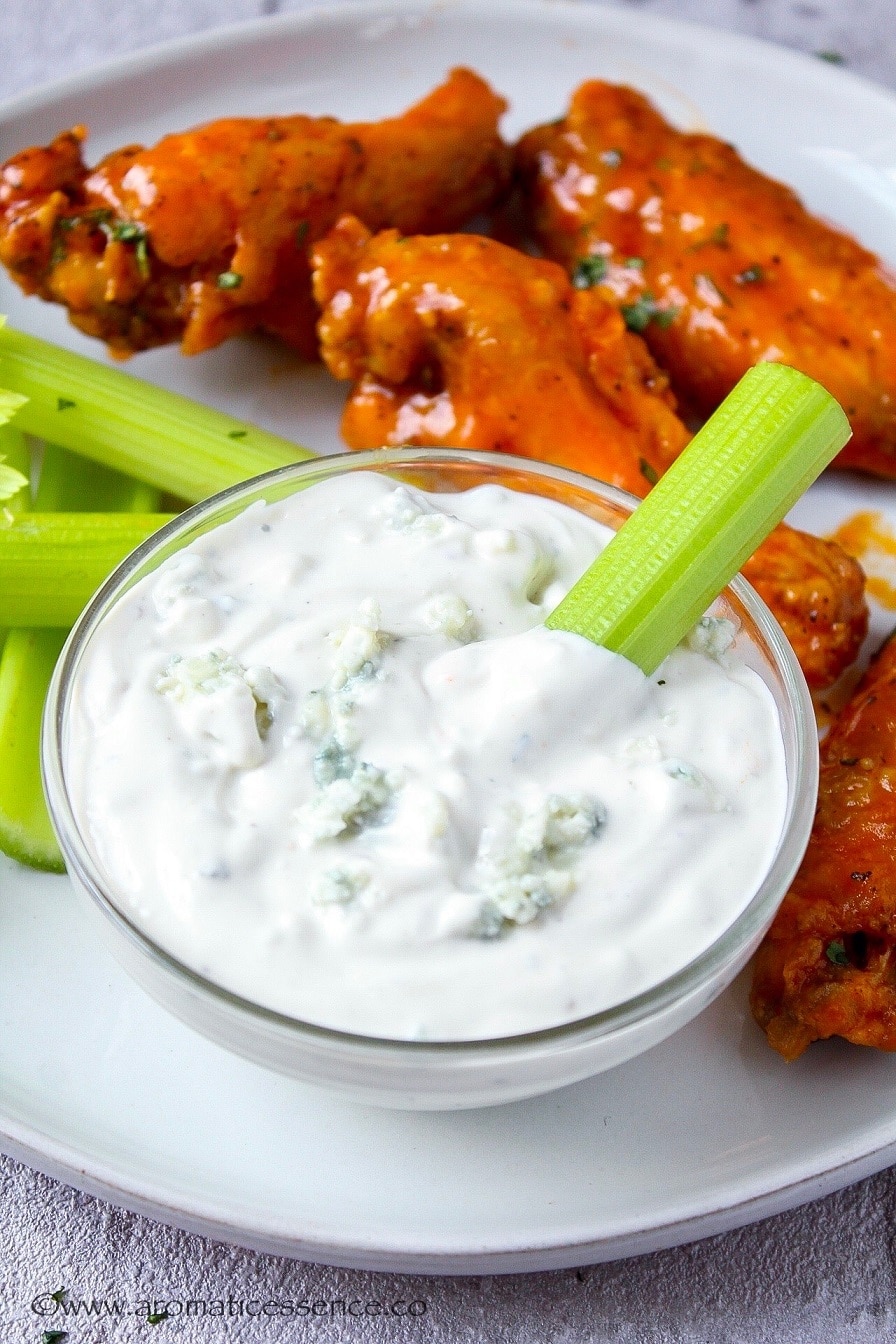
This blue cheese dip is so indulgent and delicious, a million times better than the store-bought ones. You need just a few ingredients to make this cool, tangy, and creamy blue cheese dipping sauce from scratch! Not only is it great alongside some buffalo chicken wings, but it pairs well with anything and everything, you name it!
I prefer making my own dips and salad dressings because it is actually so easy to make one at home. How difficult can mixing ingredients in a bowl or a Mason jar really be, right?
I know, I hear ya! The store-bought stuff is super convenient, just open a jar or pop open a bottle, so why really bother to make it at home. A walk down the salad dressing aisle and one is really spoilt for choices with a number of brands.
For me, they just taste blah, and even worse, it is loaded with preservatives, additives, and unwanted fillers. Hence, I prefer making my own dips or salad dressings from scratch, which also gives me plenty of room to customize and play around. Honestly, that’s my favorite part 😀
I was quite hesitant to try bleu cheese for the longest time. That typical smell really put me off. But it’s something I’ve come to appreciate over the years. On the contrary my hubby really really loves it.
The first time I ever sampled blue cheese was in the form of this dip at a local restaurant and I think that was a good start, I was pleasantly surprised that I actually loved it.
Since I enjoyed the dip so much, I thought it was about time to explore more of the blue cheese territory…..haha 😀 Blue cheese dip has been a favorite since then and a must-make at home, especially if buffalo wings are on the menu!

- Ingredients needed for this simple dip
- Substitutions
- Variations
- Tips to make the best blue cheese dip
- Servings suggestions
- You may also enjoy these delicious dips
- How to make blue cheese dip recipe – Step by step instructions
- Quick FAQs
- Blue Cheese Dip
Ingredients needed for this simple dip
To make this quick and easy blue cheese dip, you will need;
Bleu cheese- the star of this dip: There are so many kinds of blue cheeses, depending on the region it is made. It is ‘bleu’ in French and Roquefort which is a French cheese is one of the best known blue cheeses. There are other types of blue cheese like gorgonzola from Italy, Stilton from England, Cabrales from Spain, and Maytag blue from the US to name a few.
Be sure to use a good quality, soft, blue cheese that crumbles well. Confused about what type of blue cheese to use for this dip? If you have never tried blue cheese before, I suggest starting off with a mild one like gorgonzola dolce, Amish, or Danish blue cheese.
For a stronger flavor, you could use gorgonzola piccante, Stilton, or Roquefort.
For something in between that’s not too mild nor too strong, use Maytag blue.
Ultimately, use the kind of blue cheese that you love as it will dictate the taste of this dip to an extent.
Mayonnaise and sour cream: This forms the creamy and tangy base of the dip.
Lemon juice: To slight acidity really brightens up this dip.
Worcestershire sauce: For that hint of savoriness
Seasonings like salt, pepper, and garlic powder.
That is all that I’ve used in my homemade blue cheese dip! You really don’t even need a packaged dip mix, seriously ditch it!
Substitutions
This recipe is truly adaptable to whatever ingredients you have at hand. You really don’t need to stick to this recipe, though I suggest you try it the way it is, and then make alterations to suit your preferences.
Mayonnaise: Can be substituted with the same amount of full-fat Greek yogurt. You can also use 4 oz, which is about 1/2 cup of cream cheese in lieu of mayonnaise. Using cream cheese will also add more thickness to this dip, so you may need a splash of milk to thin it down.
Sour cream: You can also make this blue cheese dip without sour cream. Substitute it with Greek yogurt or creme fraiche. For a healthier version of blue cheese dip, skip the mayo and sour cream, and simply use all Greek yogurt.
Fresh garlic: I’ve used garlic powder, but you can also use a clove or two of garlic, finely minced. You can also use onion powder, a pinch of paprika if you like.
Lemon juice: You can swap the lemon juice with lime juice, apple cider vinegar, white wine vinegar, balsamic, or red wine vinegar.

Variations
I love to keep this recipe simple, but you can consider incorporating some of these ingredients for a different variation.
Herbs: You can add a couple of tablespoons of fresh herbs likes parsley, dill, chives, etc for a pop of color. You can also use a teaspoon or two of dried herbs.
Bacon: Use about 1/3 – 1/2 cup crumbled cooked bacon, reserving about 2 tablespoons for garnishing. Mix it with the rest of the ingredients, garnish with the reserved bacon before serving. Skip the salt, taste just before serving and add if needed.
Caramelized onion: If you are feeling fancy, take this dip a notch up by adding caramelized onions, a cross between an onion and blue cheese dip.
Julienne 1 sweet or Vidalia onion, sauté with 1-2 tablespoons of olive oil or butter, and a pinch of salt. Cook on medium-low heat, stirring occasionally until the onions caramelize and turn a deep golden brown. You can add a splash of water to scrape up all that yummy browned bits stuck at the bottom of the pan. Once the onions have caramelized, transfer to a bowl and let it cool. You can chop it up to make it less stringy. Add it along with the other ingredients and enjoy this fancy version of blue cheese dip with caramelized onions.
Nuts: Garnish the dip with some chopped nuts like pecans or walnuts to add some more texture to this dip
Heat: Add 1/4 to 1/2 teaspoon of cayenne pepper or jalapeño, diced into small pieces, also add some of the seeds for that kick.

Tips to make the best blue cheese dip
Best quality ingredients: Use quality ingredients while making this dip. You must use good mayo (if it’s homemade, even better!), and good quality blue cheese.
I suggest buying a wedge of blue cheese instead of the crumbles sold in containers. But i f you are not in the mood to splurge on fancy blue cheese, the crumbled stuff in the container will work fine. It just won’t taste the best but will work in a pinch.
Avoid reduced-fat or fat-free mayonnaise/salad dressing: Use full-fat mayo for that creamy texture. Be sure to use real mayonnaise and not salad dressing. You can still get away with reduced-fat or light mayo in this recipe, but using salad dressing would make the dip watery.
Also, keep in mind if you choose to use a blender or food processor to mix the ingredients, avoid using low-fat mayo and sour cream as it can make the dip watery. Simply mix everything in a bowl.
Adjust the quantity of blue cheese: These quantities of blue cheese work well for us in this recipe. You can use more or less blue cheese, depending on your preference.
Chunky v/s smooth dip: This dip is fairly chunky and that’s how we like it. If you prefer a really smooth dip, blend all the ingredients in a food processor or a blender.
You can also mash the cheese in a bowl with the back of a fork, add the other ingredients, and mash everything together until it reaches your desired consistency.
Servings suggestions
This tangy, cooling blue cheese dipping sauce is the perfect accompaniment for spicy buffalo wings. But besides that, there are so many ways of using this delicious dip. I like to serve it with;
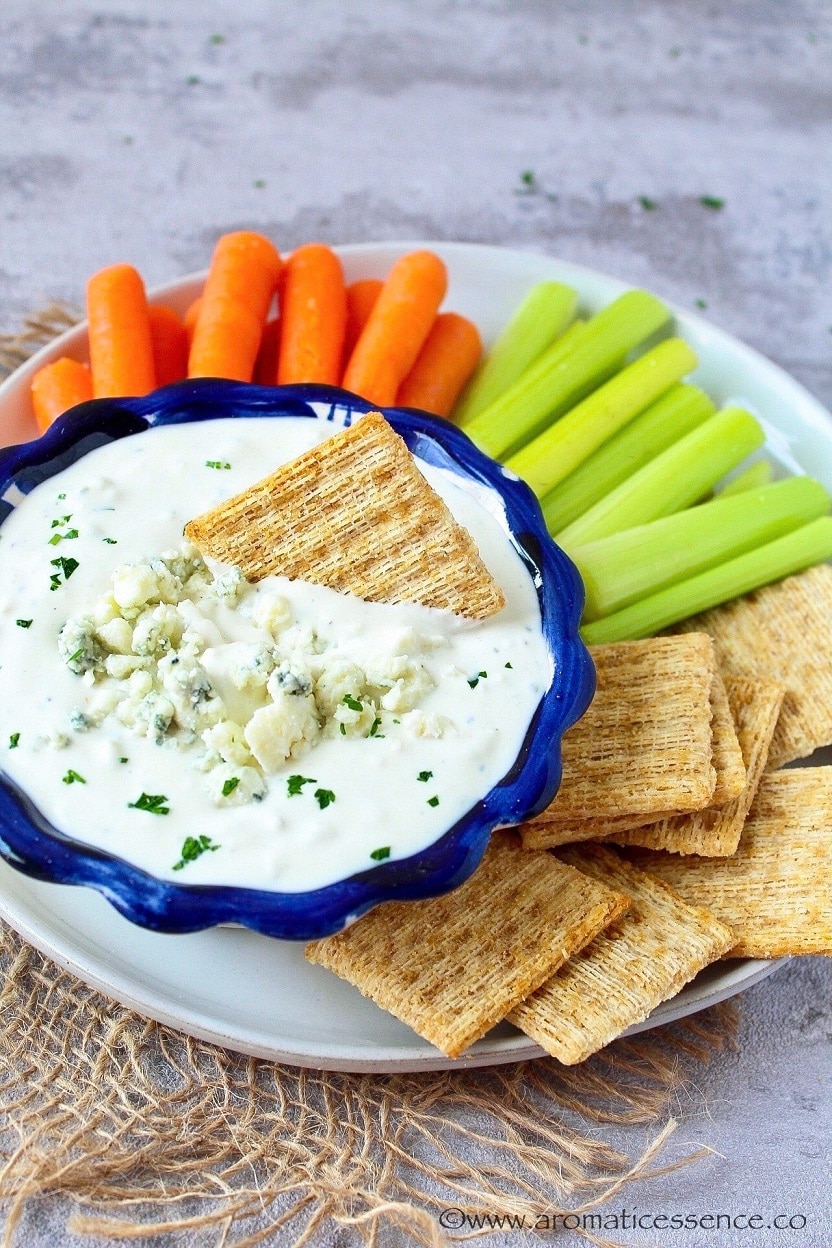
- Veggies like celery sticks, baby carrots, thinly sliced radish, red peppers, broccoli
- Roasted vegetables
- Thin it down and use it for drizzling on a classic wedge salad
- All sorts of chips like potato chips, Kettle chips, nacho chips, blue corn chips, pita chips or veggie chips
- Crackers
- Soft pretzels
- As a topping for baked potatoes
- On burgers
- Chicken strips or popcorn chicken
- Along with steak bites
Whether you are hosting a party, or simply want a quick dipping sauce for chips or hot wings, give this easy recipe a go! I bet you will never go back to the store-bought stuff!
You may also enjoy these delicious dips
- Greek tzatziki
- Restaurant-style salsa
- Baba ganoush
- Roasted tomatillo salsa verde
How to make blue cheese dip recipe – Step by step instructions
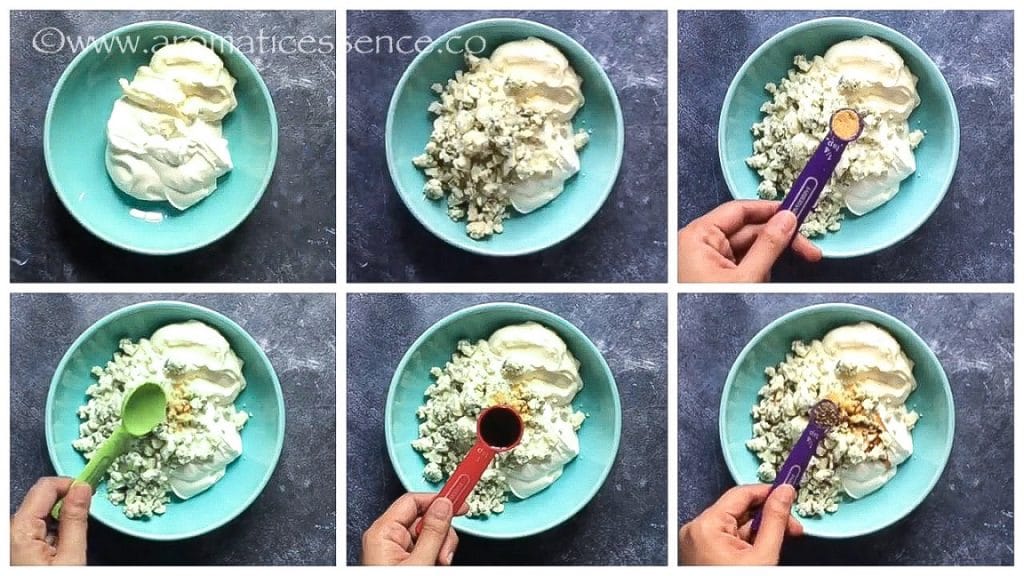
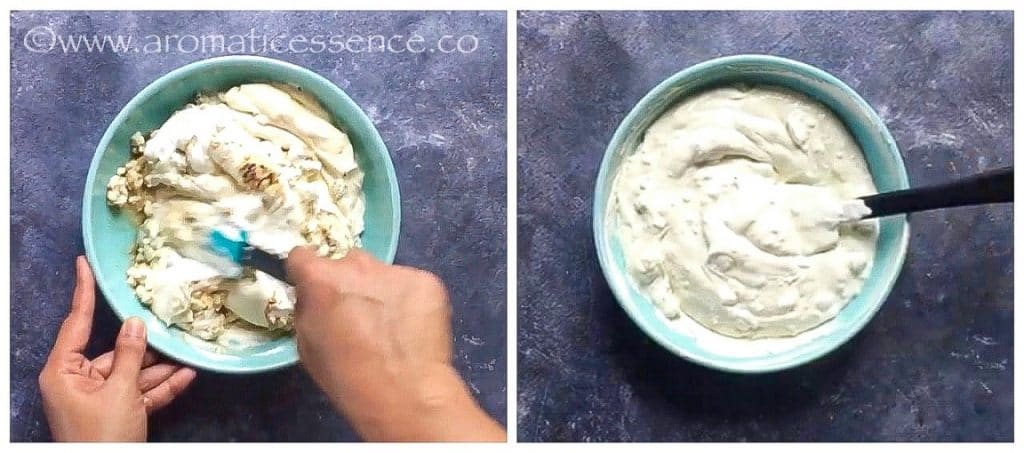
Step 1: Combine ingredients and mix well
For a chunky consistency: In a medium-sized bowl, add 1 cup sour cream, 1/2 cup full-fat mayonnaise, 5 oz crumbled bleu cheese (reserve a tablespoon for the topping), 1 tablespoon lemon juice, 1 teaspoon Worcestershire sauce, 1/4 teaspoon garlic powder, 1/4 teaspoon kosher salt, 1/4 teaspoon freshly cracked pepper. Mix until well combined.
For a smooth consistency: Add all the ingredients in a food processor or blender and blend until well combined. You may reserve half of the cheese to mix in later, for a smooth and chunky consistency.
Step 2: Refrigerate for at least 2 hours
Cover the bowl with a cling wrap or transfer to a Mason jar and refrigerate for a minimum of 2 hours to 2 days.
Taste-test before serving and adjust seasonings if required. Top with the reserved cheese crumbles. I sprinkled freshly chopped parsley some color. Serve chilled or at room temperature.

Note
- If the dip is too thick for you, add a few tablespoons of milk/buttermilk to thin it down to your desired consistency.
What does this dip taste like?
This delicious dip is packed with robust bleu cheese crumbles. The spicy, salty, piquant flavor of the bleu cheese compliments the creamy mayo and sour cream.
This dip is savory and indulgent with a thick, creamy, and chunky consistency. The lemon juice adds a pop of brightness.
A dash of salt brings out the flavor, freshly cracked pepper adds a little kick and the garlic powder gives this dip a mild garlic flavor. This homemade version tastes fresh and is nothing like the bland store-bought ones.
Does this dip go bad?
USDA does not recommend storing foodstuff for more than 2 hours at room temperature or more than 1 hour if the temperature is above 90° F. Cover the bowl with plastic wrap or transfer the dip to a Mason jar and refrigerate it as soon as it’s prepared.
This makes a pretty big batch and will last for about 5 days in the refrigerator. You can scale down this recipe to make a small batch.
Blue cheese dip v/s dressing
The only difference between the two is the consistency. For the dressing, you will need the same base as the dip, and thin it down by adding a few tablespoons of milk or buttermilk until you reach your desired consistency.
Can I make this dip without blue cheese?
If you can’t get past the typical flavor of bleu cheese, try swapping it with crumbled feta or goat cheese. It won’t taste quite the same but will work in a pinch.
Interested in knowing more about blue cheese?
Check out this article from Delishably that throws more insight into the different types of blue cheese.
You can also follow me on Facebook , Pinterest, Instagram & Twitter

Blue Cheese Dip
Ingredients1x2x3x
- 1 cup sour cream
- 1/2 cup full-fat mayonnaise
- 5 oz crumbled blue cheese, more or less to taste
- 1 tablespoon lemon juice, or to taste
- 1 teaspoon Worcestershire sauce
- 1/4 teaspoon garlic powder
- 1/4 teaspoon black pepper
- Salt, to taste
Instructions
- For a chunky consistency: In a medium-sized bowl, add all the ingredients, reserve a tablespoon of cheese for the topping. Mix until well combined.
- For a smooth consistency: Add all the ingredients in a food processor or blender and blend until well combined. You may reserve half of the cheese to mix in later, for a smooth and chunky consistency.
- Cover the bowl with a cling wrap or transfer to a Mason jar and refrigerate for a minimum of 2 hours to 2 days.
- Taste-test before serving and adjust seasonings if required. Top with the reserved crumbled blue cheese Serve chilled or at room temperature.
Notes
- If the dip is too thick for you, add a few tablespoons of milk/buttermilk to thin it down to your desired consistency.
- Nutrition Disclaimer: Nutrition info listed are approximate values that are calculated using an online nutrition calculator and will differ depending on the products used. If you rely on them for your diet, please use your preferred nutrition calculator.
- Measuring cup used, 1 cup = 250 ml, 1 teaspoon = 5 ml
Nutrition


Blue Cheese Dip
Ingredients
- 1 cup sour cream
- 1/2 cup full-fat mayonnaise
- 5 oz crumbled blue cheese, more or less to taste
- 1 tablespoon lemon juice, or to taste
- 1 teaspoon Worcestershire sauce
- 1/4 teaspoon garlic powder
- 1/4 teaspoon black pepper
- Salt, to taste
Instructions
- For a chunky consistency: In a medium-sized bowl, add all the ingredients, reserve a tablespoon of cheese for the topping. Mix until well combined.
- For a smooth consistency: Add all the ingredients in a food processor or blender and blend until well combined. You may reserve half of the cheese to mix in later, for a smooth and chunky consistency.
- Cover the bowl with a cling wrap or transfer to a Mason jar and refrigerate for a minimum of 2 hours to 2 days.
- Taste-test before serving and adjust seasonings if required. Top with the reserved crumbled blue cheese Serve chilled or at room temperature.
Notes
- If the dip is too thick for you, add a few tablespoons of milk/buttermilk to thin it down to your desired consistency.
- Nutrition Disclaimer: Nutrition info listed are approximate values that are calculated using an online nutrition calculator and will differ depending on the products used. If you rely on them for your diet, please use your preferred nutrition calculator.
- Measuring cup used, 1 cup = 250 ml, 1 teaspoon = 5 ml
Nutrition
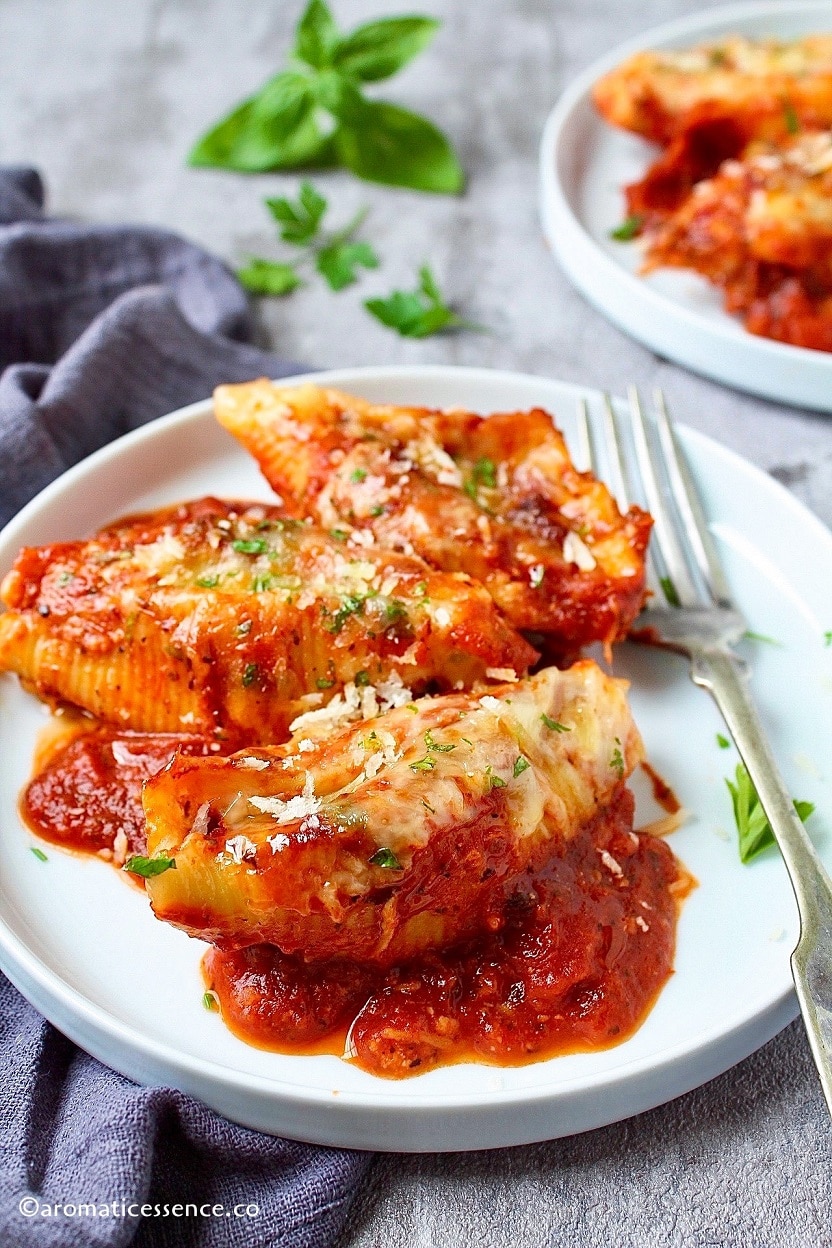
These stuffed shells are filled with a creamy and savory mixture made with three different types of cheese. They are smothered with marinara sauce, topped with more cheese, and baked until the cheese is ooey gooey and bubbly. An easy, delicious, and comforting pasta dish for busy weeknights!

I fell in love with these stuffed shells the first time we ordered them at Olive Garden. Well what’s not to love about pasta filled with cheese, doused in a blanket of more deliciousness, right? So, I had to try recreating it at home. As fancy as these cheesy stuffed shells are, they couldn’t be easier to prepare. Seriously! You just need to do the following:
- Cook the pasta
- Make the cheese filling
- Stuff the shells
- Bake
This stuffed jumbo shells recipe comes together fairly quickly. I adapted the recipe that’s printed on the back of Barilla jumbo shells pasta box and changed up the cheese filling to include some seasonings and fresh herbs. The only time-consuming part is stuffing the shells which isn’t really laborious, per se.
But the good news is that these can be prepared ahead of time. Having some frozen stuffed shells in the freezer makes it super handy for a busy weeknight dinner or to satiate those sudden cozy and cheesy comfort food cravings.
My kids often request this dish, and hence, I always have some stuffed shells in the freezer. The entire thing comes together in a snap. Make a fresh salad while the pasta bakes and you have this wholesome, delicious, and complete meal on the table under an hour. This is a gorgeous meal, perfect for date nights :p
These meatless stuffed shells are a big hit among meat-eaters too. Given a choice, my husband would opt for meals with meat, but he absolutely loves devouring these which makes it a win-win for me 😀

- Ingredients needed for stuffed jumbo shells
- Add-ins for the cheese filling
- Substitutions
- Handy tips for making stuffed shells
- You should try this recipe because it is
- How to make stuffed shells with marinara sauce – Step by step instructions
- Side dishes
- Make-ahead
- Storage
- Reheating stuffed pasta shells
- Stuffed Shells Recipe | How To Make Stuffed Shells
Ingredients needed for stuffed jumbo shells
There are three components that go into the making of these simple and classic Italian-American stuffed shells;
- Conchiglioni pasta also known as jumbo pasta shells in the US: I’ve used Barilla jumbo shells
- The creamy and cheesy, three-cheese filling: The stuffing is a mix of ricotta cheese, mozzarella, and freshly grated parmesan cheese.
- Sauce for stuffed shells: I’ve used jarred marina, but homemade would be even more awesome! Check out more options for the sauce in the substitution section below.

Add-ins for the cheese filling
This is a really simple and basic stuffed shell recipe. I’m listing a few of my favorite add-ins. I normally add one or a combination of either of these ingredients for a different version sometimes. You can’t go wrong with any of them.
Spinach: Add 5-6 oz of frozen spinach, thawed, drained, and squeezed dry of excess moisture, to the ricotta mixture. You can also use half a pound of fresh spinach, saute it in a skillet until it wilts, let it cool, squeeze out excess moisture, chop and add it to the cheese filling. You can also add a 10 oz can of artichokes, drained and diced into small pieces, along with the spinach. Spinach and artichoke is a classic pairing that goes well in this cheese filling.
Broccoli: Add 10 oz of frozen broccoli, thawed, drained, and chopped into small pieces in the cheese mixture.
Pesto: Add about 1/3 cup of basil pesto to the cheese filling.
Mushrooms: Clean and chop 1 pound of baby bella mushrooms, saute the chopped mushrooms in butter or olive oil with a pinch of salt, pepper, and a clove of minced garlic until the mushrooms are well-browned, and the moisture has evaporated. Let it cool, then add along with the rest of the ingredients for the cheese filling. You can add more garlic cloves while sauteing and skip the raw garlic in the cheese filling if you prefer.
Ground Meat: You can incorporate meat in this dish in either of these ways.
- The simplest one: Use jarred or homemade meat sauce instead of marinara.
- Or make a quick one by sauteing 1/2 lb or (more if you like) of lean ground beef, turkey, or Italian sausage, add the marinara sauce, and simmer for 10 minutes.
- Or incorporate the sauteed meat into the cheese filling after it cools down. Drain off any drippings.
Chicken: Add about 3/4 cup of shredded rotisserie chicken to the cheese filling.

Substitutions
Ricotta cheese: If you are not a fan of ricotta, substitute it with cottage cheese, or use half of both. If using cottage cheese, I suggest mixing the three kinds of cheese in a food processor, so that the cottage cheese is well blended and you have a creamy filling.
Other cheeses: Feel free to experiment with other types of cheese such as goat cheese, pecorino romano, fontina, asiago, mascarpone, cream cheese, etc
Shells: You can use the same filling to stuff manicotti pasta, or even make lasagna roll ups.
Sauce: You can use your favorite pasta sauce instead of marinara. If you like it spicy, use Arrabbiatta sauce or consider using meat sauce if you don’t like meatless meals. You can also use Alfredo sauce, along with marinara to make a copycat version of Olive Garden’s giant stuffed shells. If you do that, definitely add some breadcrumbs on top too and bake. Using only alfredo would make this a pretty one-dimensional dish with creamy and cheesy notes.
Eggless: You can skip the eggs here. The eggs are used as a binder which helps the cheese filling set. You could substitute it with 2 tablespoons of cornstarch, potato starch, potato flakes, or ground oats.
Handy tips for making stuffed shells
- Cook the pasta 2 to 3 minutes less than directed on the packet. That’s because they will finish cooking in the oven. Rinse with cold water to prevent further cooking and drain well.
- Cook a few extra pasta shells as a back-up, just in case a few break apart while stuffing. I learned that the first time I tried my hands at making this. Wasted time cooking more shells.
- If using fresh ricotta , drain it or else it will make the filling runny.
- Chill the cheese mixture in the fridge for an hour or so, if you find it to be too runny.
- Do not add a lot of salt in the cheese filling as the cheese already has salt, the marinara has salt and the pasta is cooked in boiling salted water. An excess amount of salt will render the entire dish inedible.
- Cover the baking pan with aluminum foil for the first 30 minutes, so that the sauce does not dry out. Uncover and bake for another 5-10 minutes until the cheese is bubbly.
- I’ve used a spoon to stuff the shells, but you could use a pastry bag or a zip lock bag t o pipe the filling for convenience .
You should try this recipe because it is
- Not only beautiful but also easy and delicious
- Versatile, adaptable, and customizable {check ideas for add-ins and substitutions above}
- Perfect to feed a crowd
- Good for meal prep
- Freezer-friendly
How to make stuffed shells with marinara sauce – Step by step instructions
Step 1: Cook the shells
Cook shells as per the package instructions, three minutes less than that directed on the packet. Drain, rinse with cold water, drizzle about 1 teaspoon of olive oil, and toss to coat the shells. You could also lay them in a single layer on a plate or tray to prevent them from sticking to each other.
Preheat the oven to 350° F.

Step 2: Prepare the stuffing
In a medium bowl, combine 15 oz whole-milk ricotta, 1 cup shredded mozzarella cheese, 1/2 cup grated Parmesan cheese, 1 large egg, 1 teaspoon minced garlic, 1-2 tablespoons fresh parsley, 1-2 tablespoons fresh basil, 1/4 teaspoon dried oregano, 1/4 teaspoon red pepper flakes (optional), 1/8 teaspoon ground nutmeg, 1/4 teaspoon salt, 1/4 teaspoon freshly cracked black pepper. Mix until well incorporated.

Step 3: Stuff the shells
Spread 1 cup of marinara sauce in the bottom of the baking dish.
Stuff the shells with a spoon, about 2 tablespoons per shell. Or transfer the filling to a pastry bag or zip-lock bag, seal the top, snip off one of the bottom corners of the zip-lock bag and squeeze in the filling into the shell.
Place the stuffed shell, seam side up, on top of the sauce. Repeat with the rest of the shells.

Step 4: Top the shells with more marinara, cheese, and bake
Top the shells with the rest of the marinara sauce, sprinkle the remaining 1 tablespoons of chopped basil, remaining 1 cup of shredded mozzarella cheese, and1/4 cup of grated parmesan cheese.
Cover the baking dish with aluminum foil, and bake at 350° F for 30 to 35 minutes. Uncover and bake for another 5-10 minutes, until the sauce begins to bubble and the cheese has melted.

Step 5: Serve
Let the baked shells rest for 5-10 minutes, sprinkle some chopped parsley, and serve. Enjoy!

Note
- You can substitute ricotta cheese with cottage cheese. Refer to the ‘substitution’ section of the post for alternatives.
- This dish tastes best with whole-milk ricotta cheese. To cut back on calories, you can use part-skim ricotta cheese or low-fat cottage cheese.
- We love this dish to be saucy and cheesy, but you can customize this recipe to suit your taste buds.
- Don’t like it as saucy? Use about 1.5 cups of marinara, spread the sauce at the bottom of the baking dish. You can serve extra sauce on the side while serving.
- Don’t like as much cheese? Reduce the mozzarella cheese to 1 & 1/2 cups, 1 cup for the cheese filling, and 1/4 to 1/2 cup for topping the shells. You can also reduce the parmesan to 2 tablespoons for the topping.
Side dishes
Serve these baked jumbo shells with;
- Chopped Italian salad or green salad along with some
- Garlic knots or garlic bread
- or Homemade dinner rolls
- or crusty artisan bread , or a loaf of Italian bread or French baguette
Make-ahead
You can either make the cheese filling in advance or stuff the shells and keep them in an airtight container, and refrigerate for up to 1-2 days. When you are ready to bake, spread the sauce at the bottom of the baking dish, follow step 4.
Storage
Refrigerate leftovers
Store any leftovers in an airtight container in the fridge for up to 3-5 days.
Freeze
This recipe does not make a lot, it is enough for 4 to 6 servings. I like to serve about 3 shells per serving with some salad and crusty bread to mop up the sauce. You can double or even triple the batch, bake some right away and freeze the rest in either of the following ways;
Freeze the assembled dish:
- Follow steps 1-4, cover the baking dish with cling wrap, followed by aluminum foil. Freeze for up to 3 months.
- Thaw it in the fridge overnight. When you ready to bake, remove the cling wrap, cover with the foil, bake as instructed above.
- Or bake from frozen at 350° F for about 50 to 60 minutes covered, and 10 minutes uncovered or until the shells are heated through and the sauce begins to bubble.
Freeze only the filled shells:
- Place the stuffed shells on a baking tray, cover with cling wrap and freeze for 1-2 hours until completely frozen and then transfer them to a labeled freezer-safe bag.
- When you are ready to bake, remove as many shells as you’d like to eat. Spread the sauce at the bottom of the baking dish, place the frozen shells, pour the rest of the sauce and cheese and bake at 350° F for 50 to 60 minutes, covered, and 10 minutes uncovered, or until heated through.
- You can also thaw the shells overnight in the fridge, and bake as directed in the instructions.
I prefer freezing the filled shells, as it optimizes the freezer space, and you can cook only as many shells as you need.
Reheating stuffed pasta shells
To reheat leftovers, place the required number of shells on a microwave-safe plate, sprinkle some water or sauce, cover, and microwave for a minute on high.
Or place the shells in a shallow oven-safe dish, spoon some of the sauce on top of the shells, cover with an aluminum foil and reheat at 350° F for 15-20 minutes, or until heated through. You can sprinkle additional cheese, and bake uncovered for few more minutes.

You can also follow me on Facebook , Pinterest, Instagram & Twitter

Stuffed Shells Recipe | How To Make Stuffed Shells
Ingredients1x2x3x
- 18 jumbo pasta shells uncooked, about 6 oz
- 1 teaspoon olive oil
- 24 oz marinara sauce
Cheese filling for stuffed shells
- 15 oz whole-milk ricotta cheese
- 1.5 to 2 cups shredded mozzarella cheese, divided
- 3/4 cup grated parmesan cheese, divided
- 1 large egg
- 1 teaspoon minced garlic
- 1 to 2 tablespoons fresh parsley, plus more for garnishing
- 3 tablespoons fresh basil divided,
- 1/4 teaspoon dried oregano
- 1/4 teaspoon red pepper flakes optional
- 1/8 teaspoon ground nutmeg
- 1/4 teaspoon salt
- 1/4 teaspoon freshly cracked black pepper
Instructions
- Cook shells as per the package instructions, three minutes less than that directed on the packet. Drain, rinse with cold water, drizzle olive oil, and toss to coat the shells. Preheat the oven to 350° F.
- In a medium bowl, combine ricotta cheese, 1 cup shredded mozzarella cheese, 1/2 cup grated Parmesan cheese, egg, minced garlic, fresh parsley, 2 tablespoons fresh basil, dried oregano, red pepper flakes (optional), ground nutmeg, salt, freshly cracked black pepper. Mix until well incorporated.
- Spread 1 cup of marinara sauce in the bottom of the baking dish. Stuff the shells with a spoon or a pastry bag, about 2 tablespoons per shell. Place the stuffed shell, seam side up, on top of the sauce. Repeat with the rest of the shells.
- Top the shells with the rest of the marinara sauce, sprinkle the remaining 1 tablespoons of chopped basil, remaining 1 cup of shredded mozzarella cheese, and1/4 cup of grated parmesan cheese.
- Cover the baking dish with aluminum foil, and bake at 350° F for 30-35 minutes. Uncover and bake for another 5-10 minutes, until the sauce begins to bubble and the cheese has melted.
- Let the baked shells rest for 5-10 minutes, sprinkle some chopped parsley, and serve. Enjoy!
Video
Notes
- You can substitute ricotta cheese with cottage cheese. Refer to the ‘substitution’ section of the post for alternatives.
- This dish tastes best with whole-milk ricotta cheese. To cut back on calories, you can use part-skim ricotta cheese or low-fat cottage cheese.
- We love this dish to be saucy and cheesy, but you can customize this recipe to suit your taste buds.
- Don’t like it as saucy? Use about 1.5 cups of marinara, spread the sauce at the bottom of the baking dish. You can serve extra sauce on the side while serving.
- Don’t like as much cheese? Reduce the mozzarella cheese to 1 & 1/2 cups, 1 cup for the cheese filling, and 1/4 to 1/2 cup for topping the shells. You can also reduce the parmesan to 2 tablespoons for the topping.
- This recipe yields about 6 servings, if you consider 3 shells as a serving along with sides. You can get 4 servings out of this recipe if you serve it without any sides.
- Nutrition Disclaimer: Nutrition values listed are estimates calculated using an online nutrition calculator. If you rely on them for your diet, please use your preferred nutrition calculator.
- Measuring cup used, 1 cup = 250 ml, 1 teaspoon = 5 ml
Nutrition

