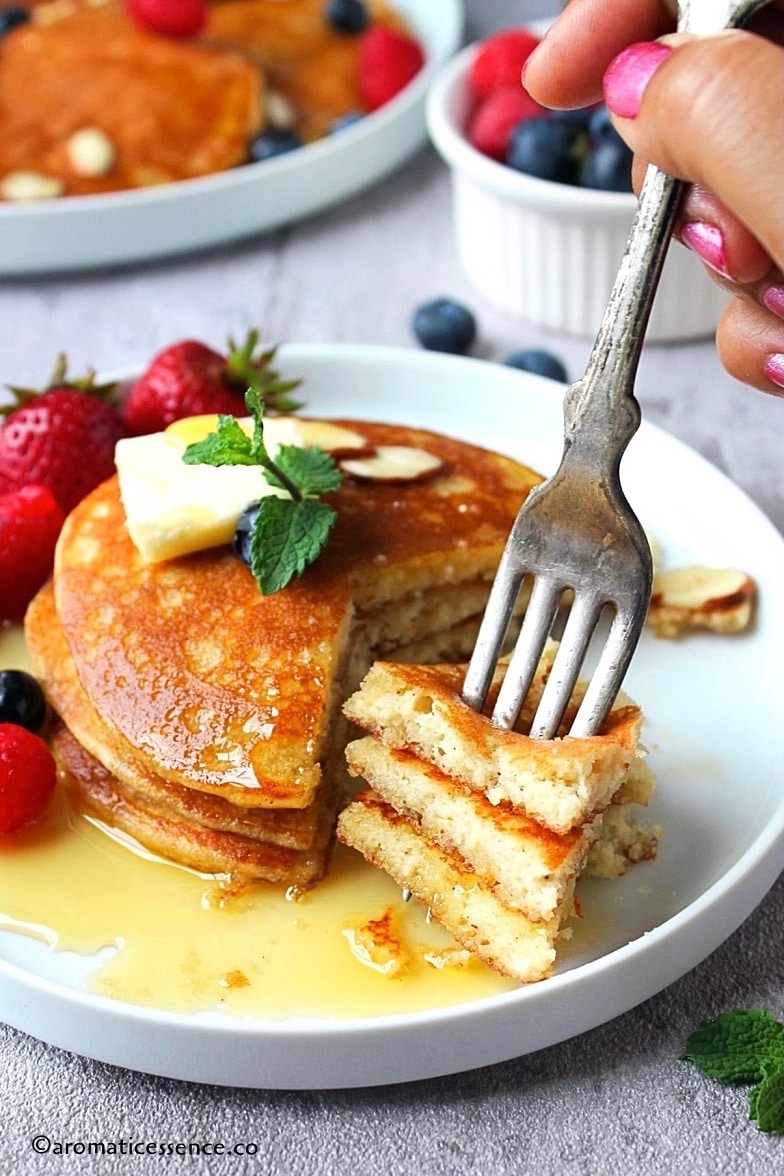
These almond flour pancakes are fluffy, nutty, and delicious made with simple pantry ingredients. Enjoy these low-carb pancakes topped with some butter, syrup, and fresh fruits for a protein-packed breakfast that’s indulgent yet healthy and yummy!

Wishing everyone a very happy, healthy, and prosperous New Year 2021! I hope you guys had a fabulous time with your friends and family 🙂
I, for one, had a great time with my family during this holiday season. We indulged in a lot of sweet treats and decadent meals. So now it’s time to get back on track towards a healthier lifestyle in the month of January.
As I’ve mentioned before, we don’t follow any sort of diet and eat everything in moderation. But this year, my husband and I aim to reduce carbs and sugar even though we are not following a keto diet. If I make something we enjoy in that category, it will definitely be up on this blog 🙂

These healthy homemade almond flour pancakes are a favorite in my house, even my kids enjoy these. Quite a win-win situation in my book! So, I definitely had to share them with y’all as well.
If you are looking for a low-carb, gluten-free pancake recipe, you have got to try these pancakes made with almond flour. I’m sure you will enjoy this guilt-free and satisfying pancake recipe.
They are really easy to prepare and are an awesome alternative to traditional pancakes. Since these pancakes are gluten-free, they aren’t are light as the traditional pancakes but trust me, they are really delicious in their own way.
These are a little tricky to work with as it is a nut flour after all. But don’t worry, I’ve included tips and a short video that shows you how to make these low carb almond pancakes effortlessly.

- Ingredients and substitutions
- How to make almond flour pancakes? – Step by step process
- Serving suggestions
- Storage, freezing, and re-heating these low carb pancakes
- Top tips to make the best almond flour pancakes
- Why you will love these pancakes?
- Variations
- You may also enjoy these healthy breakfast recipes
- Almond Flour Pancakes Recipe
Ingredients and substitutions
- Blanched almond flour: I’ve used Bob’s Red Mill almond flour. I’ve also tried these with Costco’s brand and it worked great. Any brand of fine almond flour will work here. If your’s is a little coarse, simply pulse it in the blender to a finer consistency. Do not blend too much, or else you will end up with almond butter.
- Eggs: The eggs lend moisture and act as a binder in this recipe. Along with that, they also help make the pancakes fluffy. Unfortunately, I’ve not tested an eggless version of this recipe at this point, so I’m not sure what would work here. If you have successfully made an eggless version, please do share in the comments below so that others can benefit as well.
- Coconut oil: You can swap this with any other cooking oil like sunflower, avocado, grapeseed oil, or melted unsalted butter.
- Sweetener: I prefer not to add a lot of sweetener in the batter, as I top the pancakes with syrup or honey. I’ve used maple syrup as the sweetener in this recipe. For a keto-friendly version use sugar-free maple syrup, monk fruit syrup, erythritol, or stevia.
- Liquid: The recipe needs some liquid for the pancake batter. The batter should be thick and pourable. I’ve used whole cow’s milk. You can use water or plant-based milk like unsweetened almond milk, oat milk, cashew milk, or coconut milk, etc.
- Baking powder: To make the pancakes fluffy!
- Salt: To round up all the flavors!
- Flavoring: I’ve used vanilla extract, ground cinnamon, a pinch of allspice to boost the flavor profile of these pancakes. The pancakes don’t taste as eggy with the addition of some vanilla and warm spices. Be sure to use a good quality vanilla extract as it makes a lot of difference in the final flavor of these pancakes!

How to make almond flour pancakes? – Step by step process
Step 1: Mix wet ingredients
In a medium mixing bowl, whisk together 2 large eggs, add 1/4 to 1/3 cup milk, 1 tablespoon coconut oil, 1/2 tablespoon maple syrup, and1 teaspoon vanilla extract. Whisk well. (Photos 1 to 6).
Note: Start with 1/4 cup milk, adjust the consistency with more milk if needed later.

Step 2: Add the dry ingredients and mix
Add 1 cup of fine blanched almond flour, 1 teaspoon baking powder, 1/2 teaspoon ground cinnamon, 1/4 teaspoon of allspice, and 1/8 teaspoon of fine sea salt. Mix until the batter is smooth. (Photos 7 to 12)

Step 3: Cook the pancakes
Heat a nonstick skillet over medium-low heat. Grease the skillet with any neutral-flavored oil or melted unsalted butter. Turn down the heat to low and pour a little less than 1/4 cup of the batter. Spread it with the back of the measuring cup to make a round shape (about 3.5 inches in diameter).
Cook until bubbles begin to form on top and the bottom looks set (about 2 minutes). Flip the pancakes using a spatula, cook the other side for another 1-2 minutes, or until golden brown on the other side. Transfer to a serving plate.
Repeat the same process with the rest of the batter to make more pancakes. If you have a large griddle, you can cook 3-4 pancakes at a time. (Photos 13 to 18)

Serving suggestions
These fluffy little almond flour pancakes are great topped with a combination of either of these;
- Maple syrup/sugar-free maple syrup or honey. My kids prefer honey, so that’s what I’ve used to top the pancakes.
- Butter
- Fresh berries
- Banana slices
- Homemade berry compote
- Spread a thin layer of cream cheese/almond butter or peanut butter
- Breakfast sausage links

Storage, freezing, and re-heating these low carb pancakes
Store : This recipe does not make a lot of pancakes, so ideally you shouldn’t have any leftovers. If you do or if you make a double batch for meal prep, you can refrigerate the pancakes in an air-tight container for up to 3 days.
Freeze: Once the pancakes have cooled down completely, place them on a baking sheet lined with parchment paper in a single layer into the freezer, until frozen solid. Stack the frozen pancakes between parchment or waxed paper in an airtight container or freezer-safe bag removing out as much air as possible. Freeze up to 2-3 months. It is best to freeze into required portion sizes as you can just grab a bag and thaw what you need.
Reheat: Thaw pancakes overnight in the refrigerator. Reheat the pancakes in the microwave for about 20-30 seconds or in a skillet on low heat, flipping sides until heated through. For a big batch, reheat in a 350°F oven for 8 to10 minutes or until warm.
Top tips to make the best almond flour pancakes
- Use fine almond flour: Almond flour is made by grinding blanched whole almonds. Whereas almond meal is made by grinding whole almonds with the skin. Almond meal has a coarse texture, so using that in this recipe will result in a coarse, mealy, and much denser pancake. Try to use blanched almond flour for best results.
- Fluff the flour before measuring: This will help break up the clumps in the almond flour. Spoon and measure the flour into your measuring cup instead of scooping it, as the latter method packs up the cup with more flour which in turn will result in dense pancakes. You may need a splash of milk to thin out the batter. If the flour still looks a lot clumpy, you can sift the flour and use it in the recipe.
- Quantity of the liquid: You may need to adjust the quantity of liquid depending on the size of the eggs used. If you use small eggs, you may need more than 1/3 cup of liquid. Add a tablespoon at a time, if it turns too runny, you can always compensate by adding more almond flour. You are aiming for a thick, yet pourable batter consistency.
- A good nonstick pan or well-seasoned cast-iron skillet: These pancakes are super delicate, and need a really good quality nonstick pan so that the batter does not stick to the pan, and can be flipped easily.
- Make small pancakes: Pancakes made with almond flour are much more delicate than regular pancakes that are made with refined flour. I find it’s best to use a 1/4 cup measuring cup to pour the batter onto the skillet. It is the perfect size for these pancakes. They cook evenly on low heat without browning too much and can be flipped with ease.
- Cook the pancakes on low heat: These pancakes take longer to cook as compared to the traditional pancakes. Cooking it on high heat will cause the exterior to brown fast and will stay raw in the center. Hence, cook on the lowest heat, especially if using a gas stove.
Why you will love these pancakes?
- One-bowl recipe! You can even dump all the ingredients in a blender to make the batter.
- They are delicious, tender, flavorful, hearty, and filling. Will keep you full until lunch!
- Gluten-free, grain-free, and can easily be adapted to make it keto-friendly.
- These pancakes are packed with protein and fiber, making them much healthier than the traditional pancakes made with refined flour.
- At 83 calories and a net carb of 3 grams per pancake, I’m sure you don’t need reasons to make and enjoy these healthy pancakes for breakfast or brunch :D.
Variations
Add-ins: You can throw in some blueberries, chocolate chips, chopped nuts, etc while cooking the pancakes.
Oats: You can swap some of the almond flour with oat flour in this recipe to make almond oat pancakes.
Buttermilk: Swap the milk with buttermilk to make these extra light and fluffy. Use 1/2 teaspoon each of baking powder and baking soda, rest everything stays the same.
Switch up the flavor: You can use different ingredients to flavor up these pancakes like pumpkin pie spice mix, nutmeg, cardamom, almond extract, etc

You may also enjoy these healthy breakfast recipes
Vegan maple coconut granola
Yogurt granola parfait with homemade berry compote
Mixed berry chia smoothie
Chia seed pudding
Instant Pot steel cut oatmeal
You can also follow me on Facebook , Pinterest, Instagram & Twitter

Almond Flour Pancakes Recipe
Ingredients1x2x3x
- 2 large eggs about 57 grams each with shell
- 1/4 to 1/3 cup whole milk Refer notes
- 1 tablespoon coconut oil
- 1/2 tablespoon maple syrup
- 1 teaspoon pure vanilla extract
- 1 cup blanched almond flour, 110 grams
- 1 teaspoon baking powder
- 1/2 teaspoon cinnamon
- 1/4 teaspoon ground allspice
- 1/8 teaspoon fine sea salt
- Unsalted butter/coconut oil or any other cooking oil, to cook the pancakes, as required
Instructions
- In a medium mixing bowl, whisk together 2 large eggs, add milk, coconut oil, maple syrup, and vanilla extract.
- Add blanched almond flour, baking powder, ground cinnamon, ground allspice, and fine sea salt. Mix until the batter is smooth.
- Heat a nonstick skillet over medium-low heat. Grease the skillet with any neutral-flavored oil or melted unsalted butter. Turn down the heat to low and pour a little less than 1/4 cup of the batter. Spread it with the back of the measuring cup to make a round shape (about 3.5 inches in diameter).
- Cook until bubbles begin to form on top and the bottom looks set (about 2 minutes). Flip the pancakes using a spatula, cook the other side for another 1-2 minutes, or until golden brown on the other side. Transfer to a serving plate.
- Repeat the same process with the rest of the batter to make more pancakes. If you have a large griddle, you can cook 3-4 pancakes at a time.
Video
Notes
Nutrition

Almond Flour Pancakes Recipe
Ingredients
- 2 large eggs about 57 grams each with shell
- 1/4 to 1/3 cup whole milk Refer notes
- 1 tablespoon coconut oil
- 1/2 tablespoon maple syrup
- 1 teaspoon pure vanilla extract
- 1 cup blanched almond flour, 110 grams
- 1 teaspoon baking powder
- 1/2 teaspoon cinnamon
- 1/4 teaspoon ground allspice
- 1/8 teaspoon fine sea salt
- Unsalted butter/coconut oil or any other cooking oil, to cook the pancakes, as required
Instructions
- In a medium mixing bowl, whisk together 2 large eggs, add milk, coconut oil, maple syrup, and vanilla extract.
- Add blanched almond flour, baking powder, ground cinnamon, ground allspice, and fine sea salt. Mix until the batter is smooth.
- Heat a nonstick skillet over medium-low heat. Grease the skillet with any neutral-flavored oil or melted unsalted butter. Turn down the heat to low and pour a little less than 1/4 cup of the batter. Spread it with the back of the measuring cup to make a round shape (about 3.5 inches in diameter).
- Cook until bubbles begin to form on top and the bottom looks set (about 2 minutes). Flip the pancakes using a spatula, cook the other side for another 1-2 minutes, or until golden brown on the other side. Transfer to a serving plate.
- Repeat the same process with the rest of the batter to make more pancakes. If you have a large griddle, you can cook 3-4 pancakes at a time.
Video
Notes
Nutrition
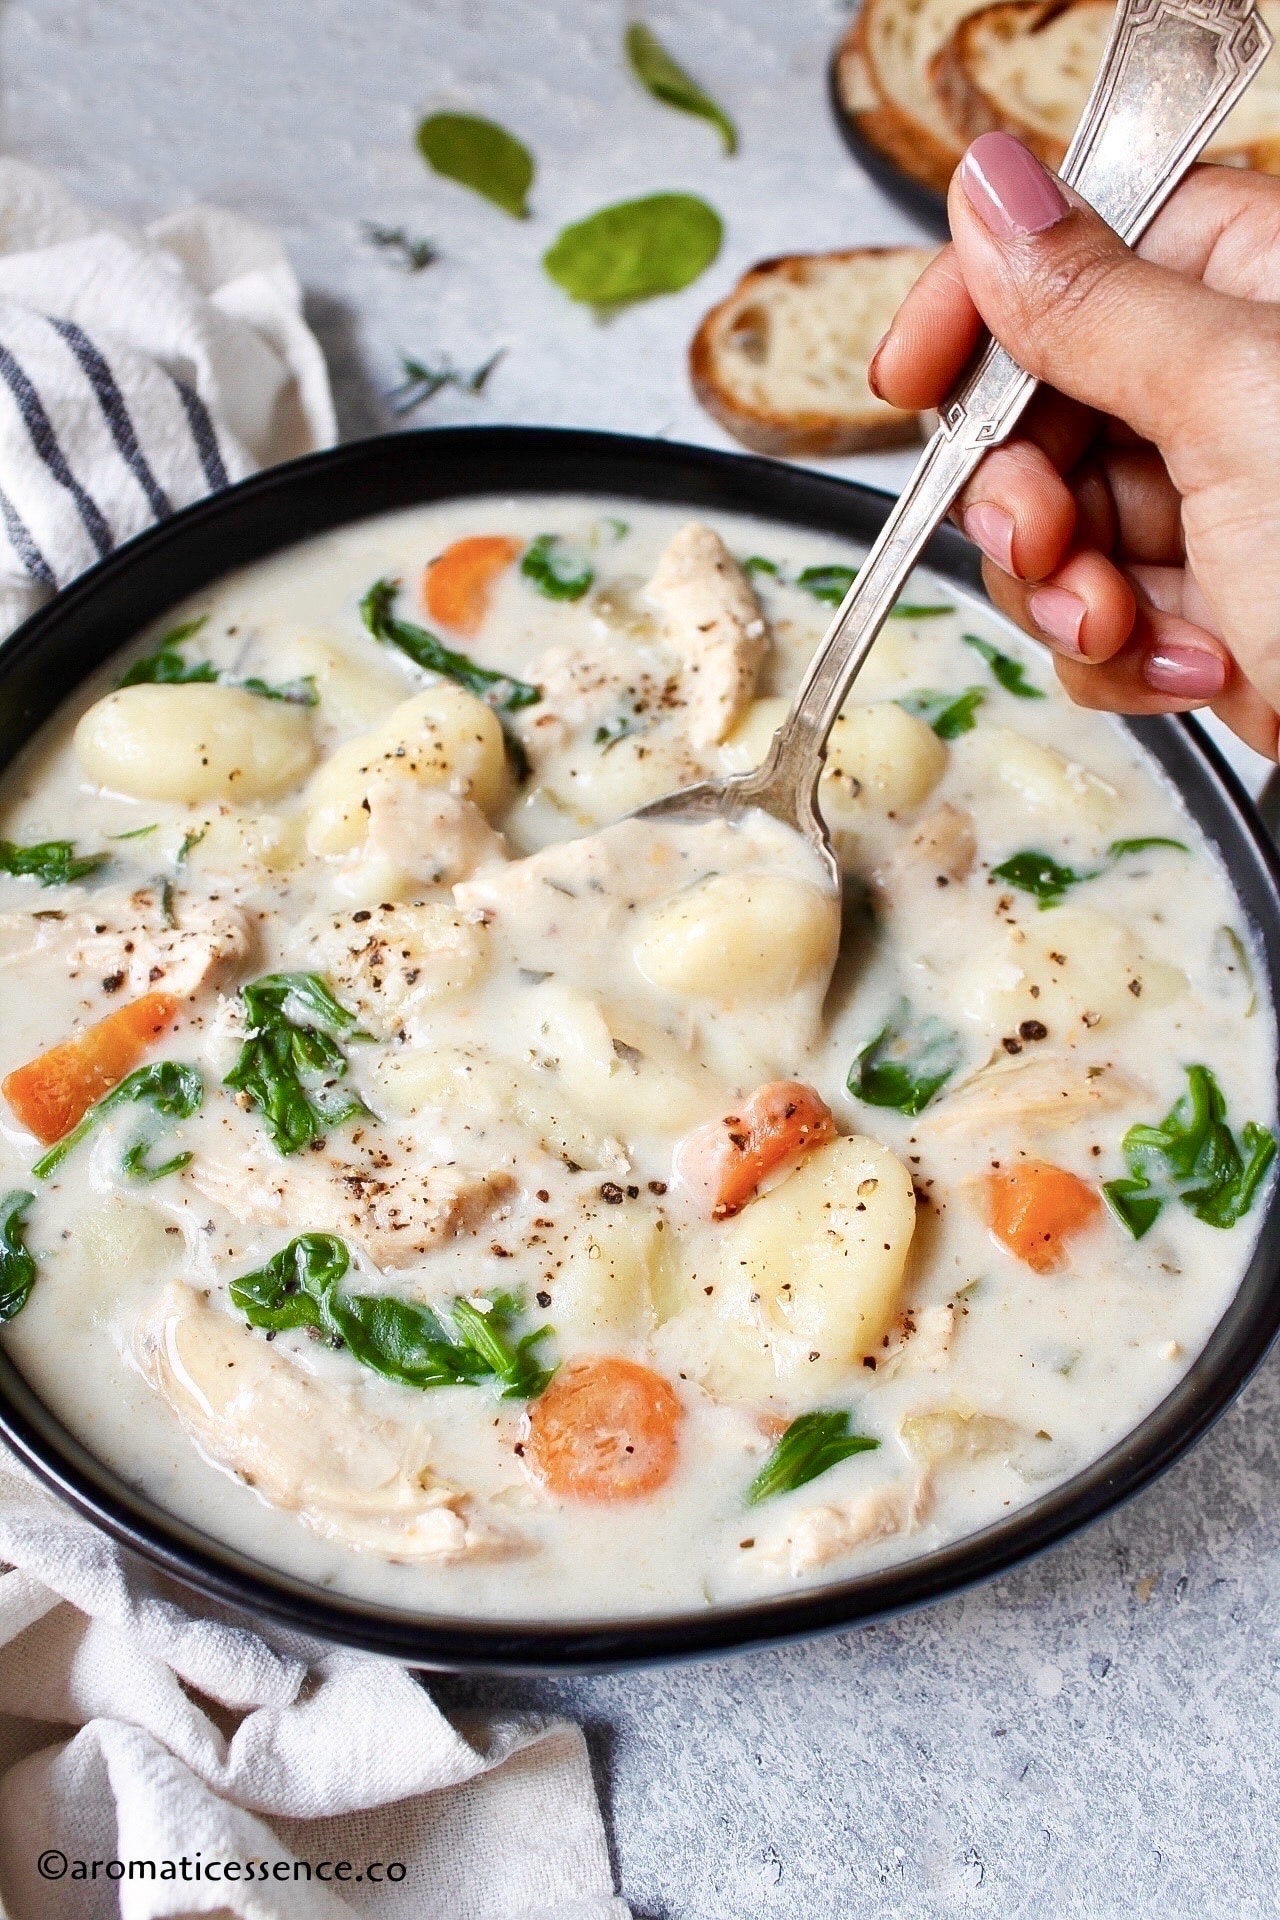
This Instant Pot chicken gnocchi soup is packed with juicy, flavorful shredded chicken, pillowy soft Italian potato dumplings aka gnocchi, and veggies in a thick, savory, and creamy broth. Inspired by Olive Garden, this pressure cooker version is so easy to make at home and is just as great!

Who doesn’t love Olive Garden Chicken Gnocchi soup? I bet we all do! Minestrone soup, Pasta e Fagioli, Zuppa Toscana, lasagna fritta, and chicken marsala are some of my Olive Garden favorites.
Since I’ve moved out of the US, obviously going to Olive Garden is not an option. But thankfully, I can make one of our favorite restaurant dishes at home and enjoy a comforting bowl of this yummy soup whenever we desire!
This pressure cooker creamy chicken gnocchi soup is an indulgent and decadent version of my Instant Pot chicken noodle soup . I’ve swapped the noodles with gnocchi and use heavy cream to add a creaminess and richness to the soup. Along with that, I’ve also used cornstarch to thicken and add body to the soup.
We love creamy soups like this Instant Pot corn chowder , broccoli cheese soup , wild rice chicken mushroom soup, and tortellini sausage soup . This is yet another of our favorites!
Would you believe me if I said I’ve already made this soup three times last month? My family thinks this is literally the best chicken gnocchi soup they’ve ever had 😀

- Why must you make this soup?
- Ingredients needed
- How to make Instant Pot Chicken Gnocchi Soup – Step by step process
- Serving suggestions
- Storage and reheating
- A few tips and variations…
- Frequently asked questions
- More Instant Pot Soup recipes
- Instant Pot Chicken Gnocchi Soup
Why must you make this soup?
- Flavorful, hearty, and comforting
- One-pot meal
- If you are bored with the classic chicken noodle soup and are looking to switch things up.
- If this is one of your favorite restaurant foods, you just have to try it! It is much more economical, makes a large pot, and leftovers are tasty too.
- If you are just a soup person like me, then make it and enjoy it frequently all year round!
- It is a simple recipe that comes together in a few steps once you have all your ingredients prepped up.
- This soup is a crowd-pleaser! It is ideal for potlucks and get-togethers.

Ingredients needed
To make this easy and delicious Instant Pot chicken gnocchi soup you will need,
- Chicken: I’ve used boneless, skinless chicken breasts. You can also use chicken thighs or a mix of both. You can also use bone-in chicken. It definitely adds more flavor to the soup. For rotisserie chicken, please refer FAQs below.
- Gnocchi: Gnocchi is a variety of pasta made of mashed potatoes, flour, and eggs. I’ve used the premade, shelf-stable potato gnocchi (gnocchi di patate) easily found in the pasta aisle in most grocery stores. You can also use frozen ones (more on that in FAQs). Have time to spare? Then make your own gnocchi, nothing beats fresh pasta after all! You can also use sweet potato, cauliflower gnocchi for a change.
- Olive oil + unsalted butter: Adding a little bit of oil prevents the butter from burning.
- Mirepoix: Diced onion, carrots, and celery. I’ve used a white onion, but you can also use yellow onion. You can also use shredded or julienned carrots instead of dicing them. I prefer to keep them thick since the soup is pressure cooked for 10 minutes, and we don’t like mushy carrots.
- Garlic: Use freshly minced preferably!
- Chicken stock: I’ve used better than bouillon chicken stock base. Use low-sodium broth or stock preferably.
- Seasoning mix: I’ve used a mix of dried herbs like thyme, rosemary, parsley, basil, Italian seasoning, kosher salt, and freshly cracked pepper. I have also used nutmeg to add some finishing touches to the soup. Nutmeg enhances the creamy flavors. You can also add a pinch of red pepper flakes for some kick. You can add whatever seasoning you prefer!
- Parmesan: Freshly grated always! The other stuff might not melt well due to all the additives, and that can make the soup gloppy.
- Cornstarch: To thicken the soup!
- Baby spinach: You may also add baby kale or skip the greens altogether.
- Heavy cream: I love the richness that heavy cream adds to the soup. You can substitute it with half-and-half or evaporated milk for a lighter version. I don’t suggest using milk as it will lack that creaminess and the soup won’t be as thick either.

How to make Instant Pot Chicken Gnocchi Soup – Step by step process
Step 1: Saute the aromatics and herbs
Press the ‘SAUTE’ button, and set it to ‘NORMAL’. Once it displays ‘HOT’, add 1 tablespoon of olive oil and 2 tablespoons of unsalted butter, let the butter melt. ( Photo 1 )
Add 1 cup each of diced onions, carrot, and celery along with 1 tablespoon of minced garlic. ( Photo 2 )
Saute until the onions turn translucent. Make sure you scrape off all the browned bits stuck at the bottom of the pot, to avoid getting a ‘BURN’ error. ( Photo 3 )

Add the seasoning mix (1/2 teaspoon dried thyme, 1/2 teaspoon dried rosemary, 1 teaspoon each of dried parsley, dried basil, and Italian seasoning, 1/2 teaspoon each of kosher salt and freshly cracked pepper), mix well, and saute for another 30 seconds or until the herbs are fragrant. ( Photos 4 and 5 )

Step 2: Add stock, bay leaves, and chicken
Pour in 5 cups of low-sodium stock, give everything a good mix. Throw in 2 bay leaves. ( Photos 6 and 7 )
Place 1.5 pounds of boneless, skineless chicken in the broth. ( Photo 8 )

Step 3: Pressure cook
Press cancel, close the lid of the Instant Pot with the valve on sealing position. Press the manual or pressure cook button and pressure cook on high for 10 minutes, about 15 minutes for thicker pieces. It will take some time for the pressure to build up (about 15 minutes), after which the timer will start. ( Photos 9 and 10 )

Step 4: Natural pressure release (NPR) for 10 minutes
Once the cooking cycle is complete, let it depressurize for at least 10 minutes, then do a quick release of leftover pressure following the manufacturer’s instructions. Once the float valve (silver pin) drops, open the lid. ( Photo 11 )

Step 5: Shred the chicken
Discard the bay leaves ( Photo 12 )
Remove the chicken using tongs, shred using two forks or cut into small cubes. ( Photos 13 to 15 )

Step 6: Add the remaining ingredients
Press the ‘SAUTE’ button and bring the soup to a boil. Add 1 pound of gnocchi, cover the Instant Pot with a lid, cook until the gnocchi floats to the top, about 2-3 minutes. ( Photos 16 to 19 )

In the meanwhile, whisk 2 tablespoons each of cornstarch and water in a small bowl. Once the gnocchi is cooked through, pour in the cornstarch slurry, stir continuously until it thickens. ( Photos 20 and 21 )

Add 1 cup of warmed cream or half and half, mix well and simmer for a minute. Press ‘CANCEL’ to turn off the Instant Pot. ( Photos 22 and 23 )
Add 1/4 cup freshly grated parmesan cheese, stir continuously until it has melted, and blended well into the soup. ( Photos 24 and 25 )
Add3 cups of roughly chopped baby spinach, mix well, until the spinach wilts. ( Photos 26 and 27 )

Return the shredded chicken back to the Instant Pot. Add about 1/8 teaspoon of ground nutmeg, mix well ( Photos 28 to 32 )

Check for seasonings, and adjust with more salt and pepper as needed. Cover and let it sit for 10 minutes before serving. Dish out, sprinkle some freshly grated parmesan cheese if desired.
Serving suggestions
Since this Instant Pot chicken gnocchi soup is so rich and filling, it is substantial enough to be served on its own. You can enjoy it as such or pair it with;
- Crusty artisan bread or garlic bread.
- Breadsticks, crackers, French baguette
- And/or a fresh chopped salad.
Storage and reheating
To store: Refrigerate leftovers in an airtight container for up to 3 days.
To reheat: The soup will thicken because of the starch released from the gnocchi. The gnocchi also absorbs some of the liquid. Transfer the soup to a heavy-bottomed pot, add a splash of stock to thin it out. Heat on low until warmed through.
A few tips and variations…
Dairy: Always add the heavy cream after the pressure cooking process. Also, warm it to prevent it from curdling and splitting. Or else temper the cream by adding about 1/2 cup of the hot broth gradually to the cold cream, stirring continuously. Then add the cream mixture to the soup.
Parmesan rinds : If you have parmesan rinds, I suggest throwing in a rind just before pressure cooking. It will infuse a richer flavor to the soup.
Salt: Be mindful of the salt you use in this recipe, as there’s sodium in the stock, gnocchi, and parmesan cheese. If you are unsure, hold off the salt and add it in the end when you check for seasoning.
Seasoning: Adjust the seasoning as per desired taste.
Use a good-quality broth or stock: The stock adds a great deal of flavor to this soup, so make sure you use a good one. I use better than bouillon stock base, and I think it is fantastic.
Adjust the consistency: This soup is thick and gets thicker as it sits. If you prefer a thinner soup consistency, simply add another cup of stock, and heat it through.
Gluten-free: Make this recipe gluten-free by using gluten-free gnocchi and gluten-free cornstarch.
More veggies: You can add more veggies like zucchini, peas, bell peppers, etc along with the gnocchi. They will be tender-crisp and have the perfect texture when added after pressure cooking.
More gnocchi: If you prefer to add more gnocchi, feel free to double it. You may need to add extra broth or stock to account for the added gnocchi.
Italian sausage: You can brown a pound of sweet or hot Italian sausage, followed by mirepoix, garlic, and seasoning mix. The sausage adds another layer of deliciousness that’s quite similar to the sausage tortellini soup sans the tomatoes.

How to make a vegetarian version of this recipe?
Skip the chicken. Dump in the rest of the ingredients including the gnocchi, and pressure cook on ‘HIGH’ for 1 minute followed by a quick release. Thicken with cornstarch, then add cream, vegan parmesan cheese, and chopped spinach.
Honestly, without the chicken, this soup would be much quicker to prepare on the stovetop. But if you are traveling somewhere or have no access to a stovetop, you can most certainly make this soup as stated above.
You can also substitute the chicken with some cubed tofu.
Can I use rotisserie or canned chicken?
Yes, you can! Simply follow the same steps mentioned above for the vegetarian version, and add the cubed or shredded rotisserie chicken in the end after the spinach has wilted, Cover the pot with a lid and let it sit for 10 minutes so that the chicken is heated through.
Can I skip the dairy?
You can skip the cream and swap it with coconut cream if you are okay with that flavor. Cashewnut cream is another great alternative. Also, use vegan parmesan cheese and use more olive oil or vegan butter.
Does this soup freeze well?
I don’t suggest freezing this soup as cooked gnocchi doesn’t hold up well in the freezer. The texture of the gnocchi will change after thawing, it will turn mushy. Additionally, there is dairy in this recipe, which will separate on thawing and reheating.
Can I use frozen gnocchi?
Yes, you can. Use them in the recipe without thawing and cook until they float to the top. Thawing frozen gnocchi will make them soggy.
More Instant Pot Soup recipes
- Carrot ginger soup
- Beef and barley soup
- Minestrone soup
You can also follow me on Facebook , Pinterest, Instagram & Twitter

Instant Pot Chicken Gnocchi Soup
Ingredients1x2x3x
- 1 tablespoon olive oil
- 2 tablespoons unsalted butter
- 1 cup diced white onion
- 1 cup diced celery
- 1 cup diced carrots
- 1 tablespoon minced garlic
- 5 cups low sodium chicken stock or broth
- 1.5 pound of boneless skinless chicken breasts
- 2 bay leaves
- 1 lb potato gnocchi regular or mini size
- 2 tablespoons cornstarch, mixed with 2 tablespoons of water
- 1 cup heavy cream or half and half, warmed
- 1/4 cup freshly grated parmesan cheese
- 3 cups roughly chopped baby spinach, about 3.5 oz
- 1/8 teaspoon grated nutmeg
Seasoning mix
- ½ teaspoon dried thyme
- 1/2 teaspoon dried rosemary
- 1 teaspoon dried parsley
- 1 teaspoon dried basil
- 1 teaspoon Italian seasoning
- 1/2 teaspoon kosher salt, or to taste
- ½ teaspoon freshly cracked pepper, or to taste
Instructions
- Press ‘SAUTE’ button, and set it to ‘NORMAL’. Once it displays ‘HOT’, add olive oil and unsalted butter, let the butter melt.)
- Add diced onions, carrot, and celery along with minced garlic.
- Saute until the onions turn translucent. Make sure you scrape off all the browned bits stuck at the bottom of the pot, to avoid getting a ‘BURN’ error.
- Add the seasoning mix, mix well, and saute for another 30 seconds or until the herbs are fragrant.
- Add stock and give everything a good mix. Add the bay leaves and chicken.
- Press cancel, close the lid of the Instant Pot with the valve on sealing position. Press the manual or pressure cook button and pressure cook on high for 10 minutes, about 15 minutes for thicker pieces. It will take some time for the pressure to build up, after which the timer will start.
- Once the cooking cycle is complete, let it depressurize for at least 10 minutes, then do a quick release of leftover pressure following the manufacturer’s instructions. Once the float valve (silver pin) drops, open the lid.
- Discard the bay leaves.
- Remove the chicken using tongs, shred using two forks or cut into small cubes.
- Press the ‘SAUTE’ button and bring the soup to a boil. Add gnocchi, cover the Instant Pot with a lid, cook until the gnocchi floats to the top, about 2-3 minutes.
- In the meanwhile, whisk cornstarch and water in a small bowl. Once the gnocchi is cooked through, pour in the cornstarch slurry, stir continuously until it thickens.
- Add the warmed cream or half and half, mix well and simmer for a minute. Press ‘CANCEL’ to turn off the Instant Pot.
- Add grated parmesan cheese, stir continuously until it has melted, and blended well into the soup.
- Add the spinach, mix well, until the spinach wilts.
- Return the shredded chicken back to the Instant pot and mix well.
- Add nutmeg, mix well.
- Check for seasonings, and adjust with more salt and pepper as needed. Cover and let it sit for 10 minutes before serving.
- Dish out, sprinkle some fresh grated parmesan cheese if desired.
